
7 Visual Art
Section outline
-

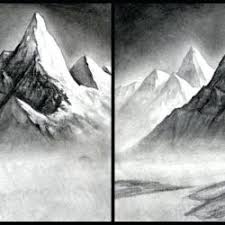
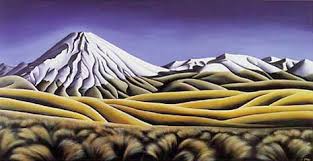
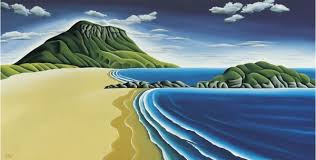
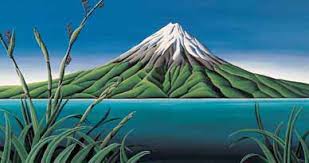
These paintings are created by Dianna Adams. We'll have a practise using acrylic paint to see how we can show form through tonal change.
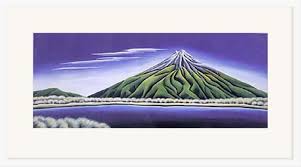
Next I would like to use another artist model Shane Cotton. His use of landscape in these examples is included in a different example of an idea where the mountains are part of a collection of symbols, text and landscape. The idea of this style is that it helps to convey extra messages. During our Global Studies course we are looking at the context of 'What it means to be a good Whanau member and friend'. So his art links in nicely to how we can create an artwork and include mountains, text and symbols to represent who we are and our context of learning.


Achievement Objectives
Learning Intentions
Success Criteria
Maori Art and Design.
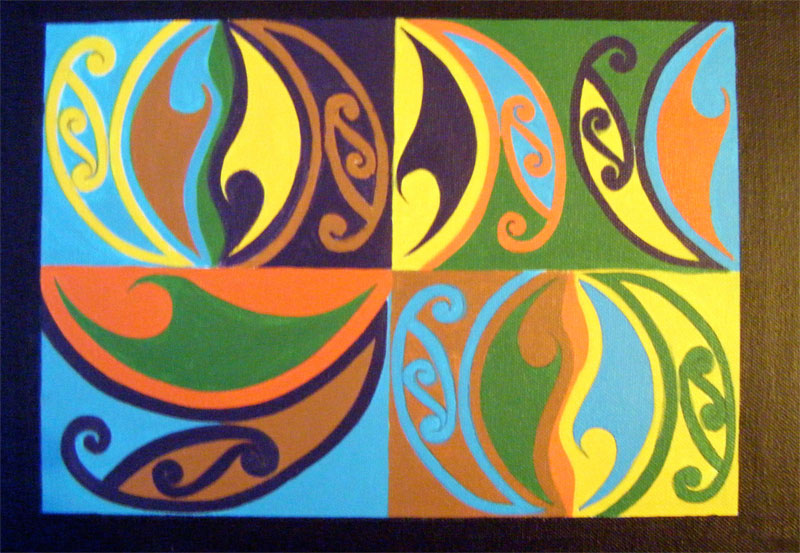
For 7M1 this term we will be looking at the form of the koru then the creation of the Kowhaiwhai Design, this is to give understanding of what kowhaiwhai represent in the art world and Te Ao Māori.
Learning Intentions: Apply Maori art conventions (Kowhaiwhai) designs, processes and practices in the creation of a personal design.
Success Criteria: I have applied knowledge of Maori art conventions, designs, processes and practices and designing a personal piece which will be apart of a class combined project.
WALT(We are learning to: Understand the form of drawing a koru then planning a personal kowhaiwhai design for the combined classroom project.
Activities:

These are forms of kowhaiwhai use in the marae.
Jarene Carroll these are some art pieces Jarene design using contemporary kowhaiwhai designs and using them to create modern art.


-
Assessment 4 Assignment
-
-
Learning Intention
Aquire and apply the techniques and processes using paint to create a sea background.
Use white and blue paint only and experiment to mix blends and use a variety of paint techniques such as blending, scraffito, dry brush, dabbing,
-
Welcome to Visual Art

Matua Brent or Mrs Newbold will be your teacher for the term and they are looking forward to working with you.
The focus for the term is "Forest and Birds'. Throughout your time in Art you will be practising to improve your observational drawing skills, learning how to use colour and learn how to create balanced compositions. The end result should be an eye-catching piece of art.
Achievement Objectives covered during this term
Understanding Visual Arts in Context
Students will investigate the use of colour and form in a variety of artist models works and identify the contexts in which they were made, viewed or valued.
Developing Practical Knowledge
Students will explore and use the art-making conventions such as drawing and painting, applying their knowledge of the elements of colour and line, through the use of processes and materials.
Developing Ideas
Students will develop ideas and thoughts to create an artwork based around a forest and bird in response to a variety of motivations, imagination and the study of other artists works
Communicating and Interpreting
Students will describe ways in which meanings can be interpreted and communicated in their own and others works.
Tasks to do:
- Create a title page for your art book called FOREST AND BIRD
- Practise observational drawing of a bird and a plant and add these creatively to your title page
- On the next page of your book select three different plants and a nikau palm to practise drawing
- On the next page, select three different types of birds to draw.
N.B. With all of your drawings, the focus should be on learning to look and copy with accuracy and proportion. We are just focussing on the outlines of the forms and main details at this stage
Use this image to complete one of your plant drawings. Look carefully at the marks made and try to recreate them as accurately as you can.
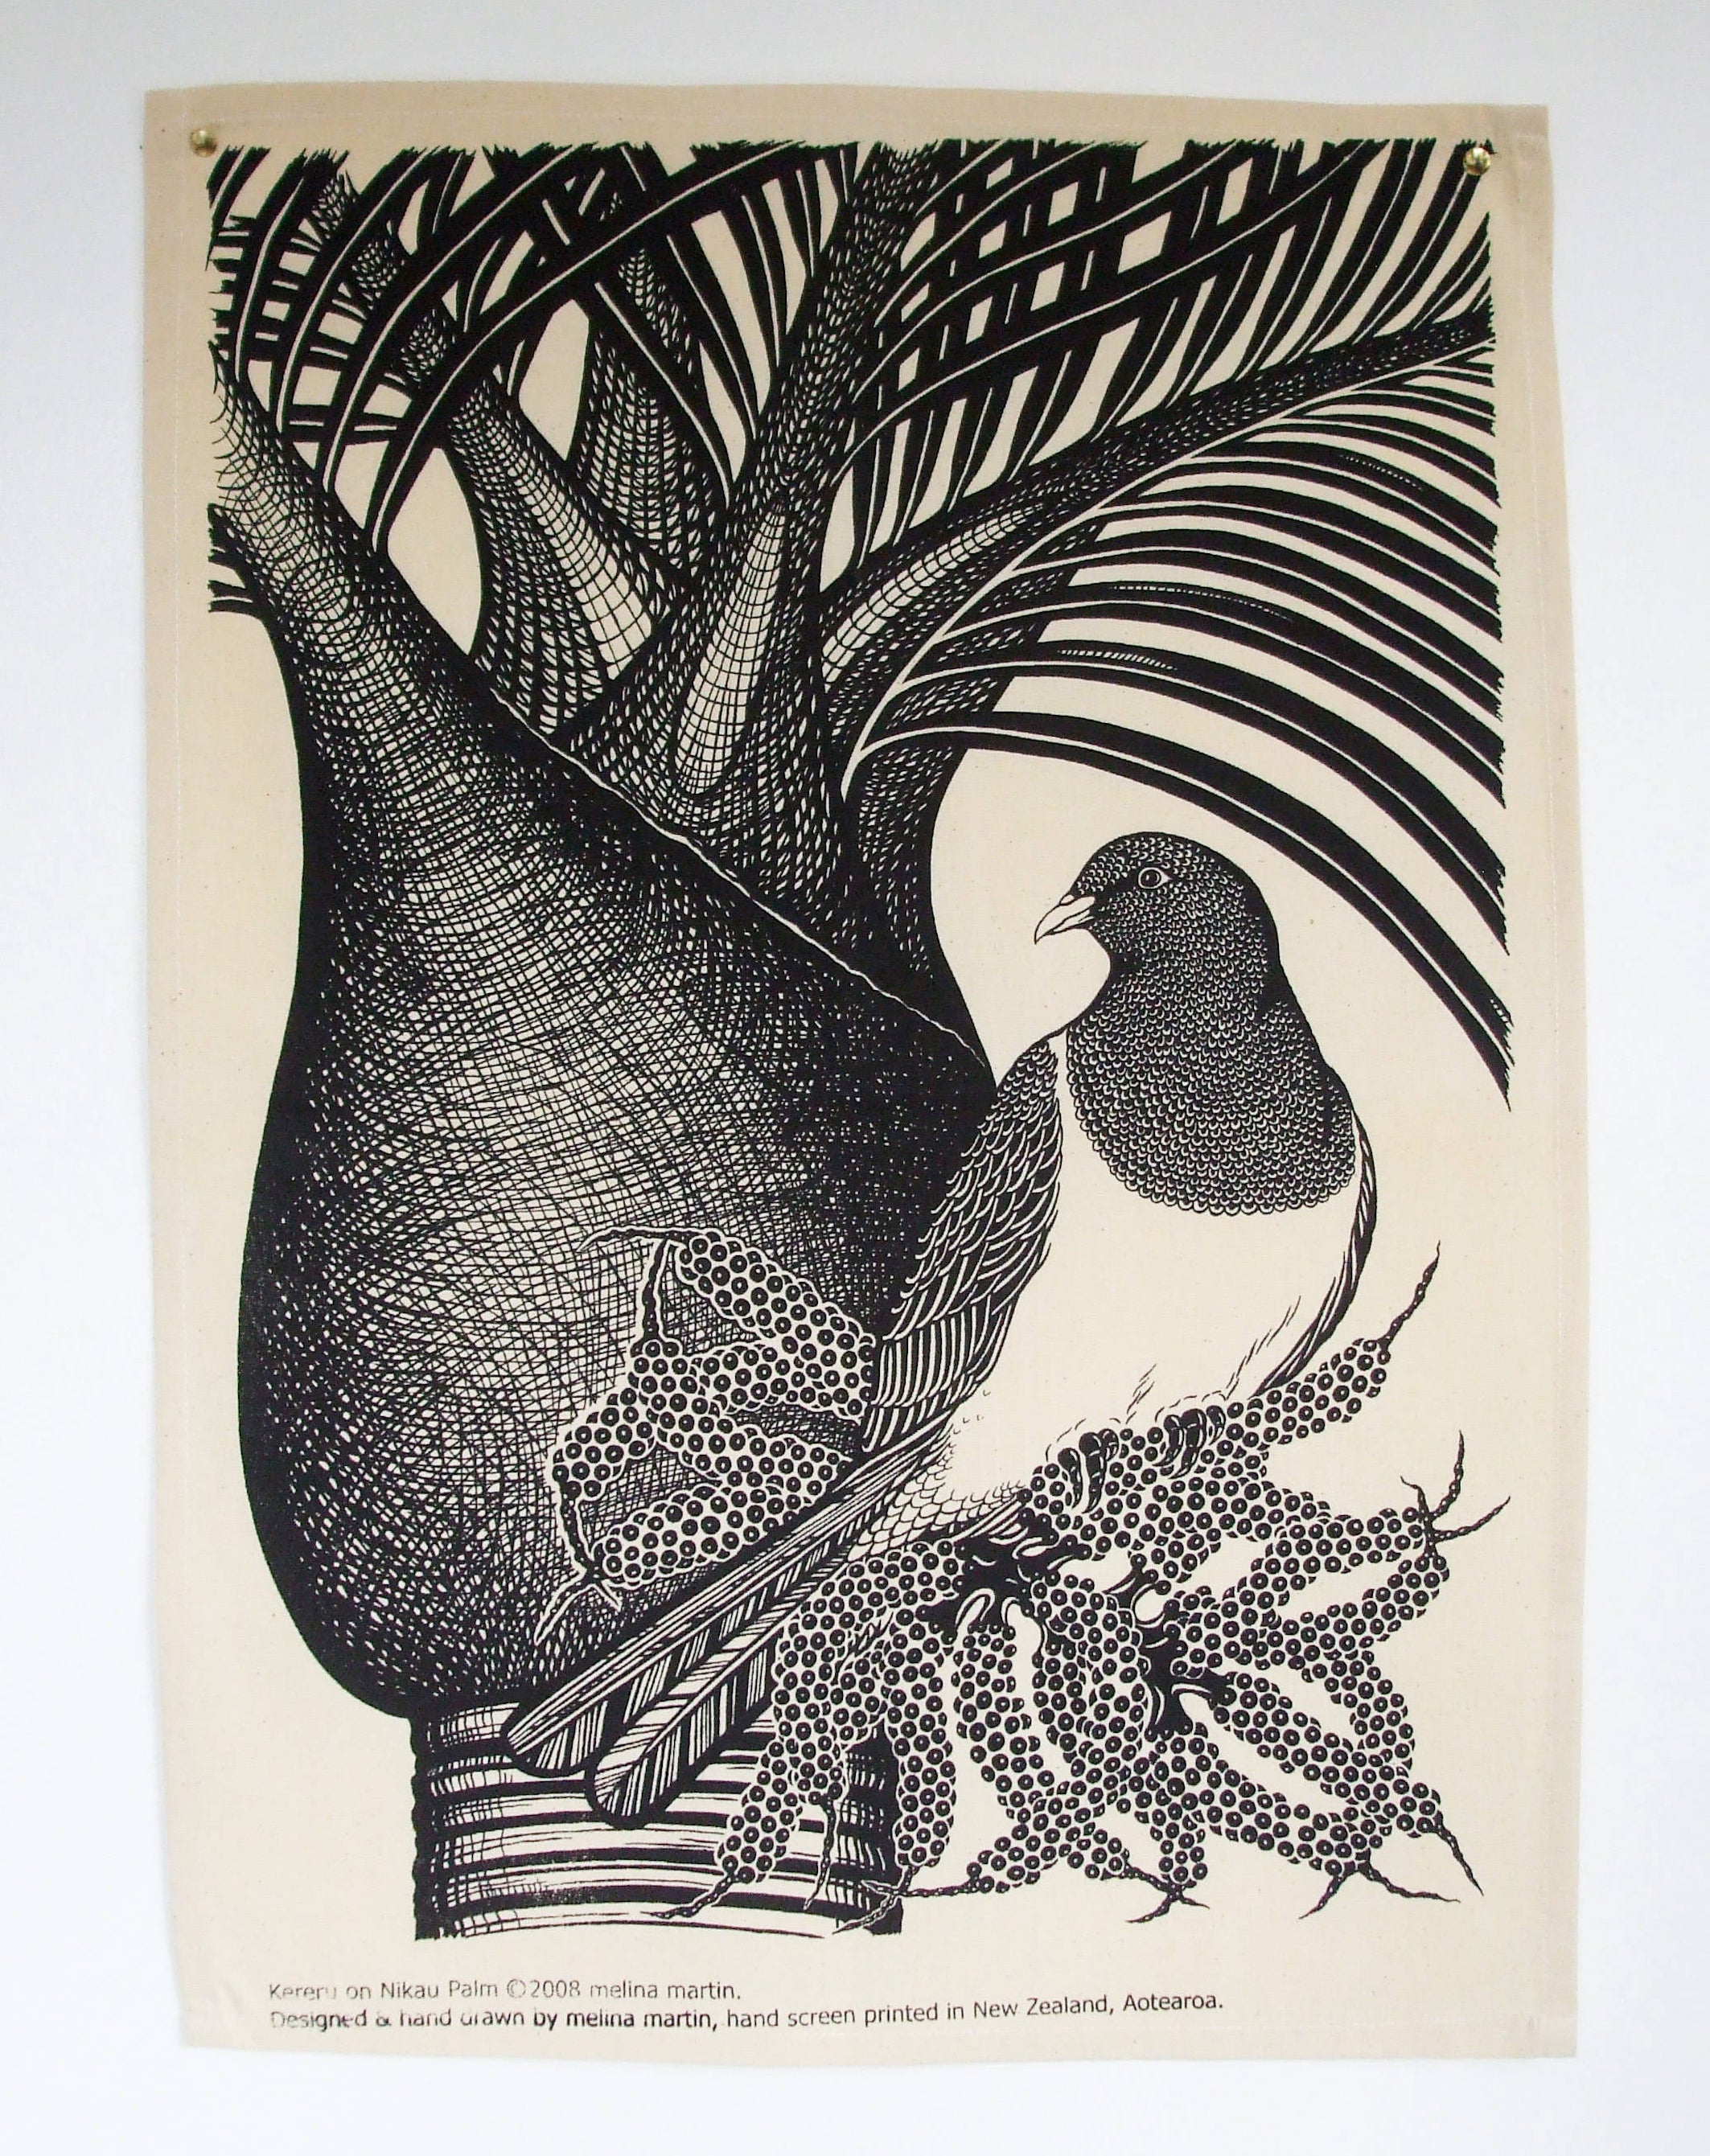
-
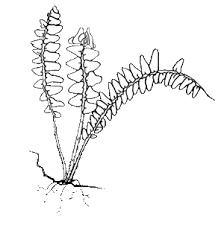 Practise this fern shape as one of your drawings
-
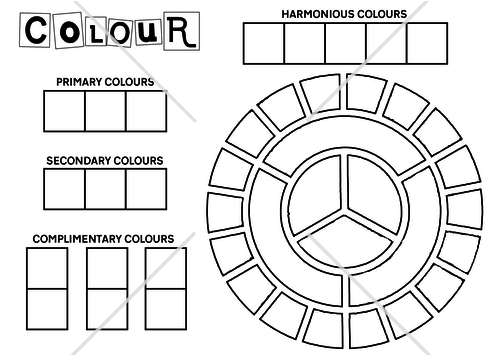
It's all about the colour
Learning Intention/s
You will develop your understanding of how basic colour theory works so that you can apply the rules in your final artwork
Success Criteria
Your art workbook will have a page/s dedicated to show your understanding of colour theory. It will contain a colour wheel, description of primary colours, secondary colours and complimentary colours. There will be examples of harmonious colours and triadic colours.
Use 2 pages of your workbook to dedicate to colour theory. Make your pages as creative as you can. Look online to see the different ways you can display information.
-
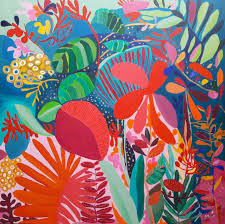
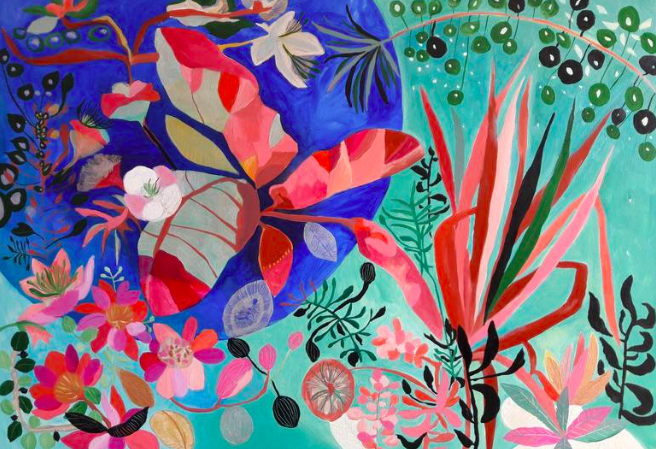
We will be learning about artists who uses the environment around her to draw inspiration from and who places an importance on using bold and vivid colours in her work.
To Do
Use the two links provided to create a fact page about the artist Irene Guerriero or Este MacLeod.
You page should include:
Where she was born, where she was educated, galleries her work is displayed in, what motivates her as an artist and any other interesting facts you can find. Include some images of her work on your artist page.
https://www.foltbolt.com/single-post/2014/08/27/Irene-Guerriero
-
Learning Intention/s
You will develop your understanding of how basic coloring technics using pastel chalks so that you can apply the rules in your final artwork
Success Criteria
Your art workbook will have a page/s dedicated to show your understanding of color technics. It will contain a color graph with a description of the different technics as shown in the video
-
 Jane Galloway
Intention
We are learning to find information on artists
Success Criteria
Looking at the artist models of Jane Galloway, Ellen Giggenbach prepare a facts page on each artist.
See if you can find out the following information and display creatively with images of the artist and their work in your ar t book
Be sure to include the following:
- Their name as the title
- 10 interesting facts about their artwork style and their life.
- A photo of the artist and photos of their artwork.
-
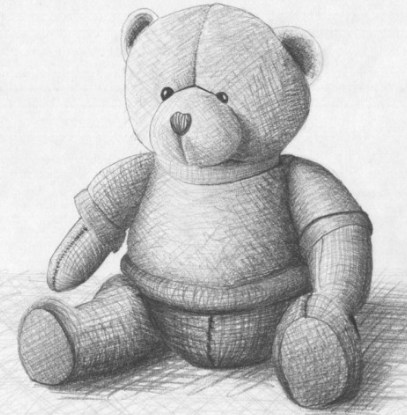
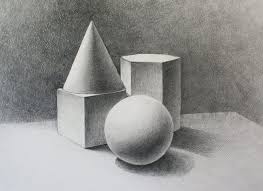
Observational Drawing week
We are learning to draw from observation using a variety of drawing tools.
To Do:
Each day this week you will be focusing on drawing a different still life picture. You will focus on copying the images to show accuracy with your forms and also show correct proportion. The next progression is to show accurate shading.

-
Rata and the Totara Tree stuff
Learning intention
We will be investigating and practising ways to compose ideas to visually retell the myth of Rata and the Canoe
Success Criteria
We will have practised a range of techniques
-
Matua Brent Class
Graphite
Developing practical knowledge
Explore and use art-making conventions, applying knowledge of elements and selected principles through the use of materials and processes.
Developing ideas
Develop and revisit visual ideas, in response to a variety of motivations, observation, and imagination, supported by the study of artists’ works.
Success Criteria
Design a block/bubble/graffiti font
Show gradient and tone through progressional shading
Use various techniques with art pencils to gain different effects
Research and develop intricate cultural patterns to use in our artwork (in and/or around the lettering)
Track my progress and ensure I am keeping within the timeline and identify ways I can lift the caliber of my work
Self-evaluate the success of my work
Reflect on my successes and identify what I may do differently next time
-
The process to follow for developing you graphiti artwork.
Step 1- choose school value and language.
Step 2- use www.dafont.com to research fonts. Students to select 3-5 favourite fonts to experiment with. Using dafont.com needs to be explained in detail- eg. Using the preview box to view the word in a selected font. Discuss upper and lower case. Teacher to demonstrate how to turn script writing into bubble/block.
Step 3- The teacher to demonstrate how to add 3D shadows to any shape or font using the direction of sun/light as a means to explain the concept. Students to try this on their own fonts.
Step 4- Students choose their favourite font to enlarge onto their ‘poster’
Step 5- Explain ‘filling the space’ and Success Criteria. Go through the mathematical process of dividing up the page. (See handouts and exemplars)
Step 6- Students to LIGHTLY draw in their letters, enlarging each so that it fills the ‘boxes’ they have assigned for each letter to ensure the word fits, left to right, top to bottom.
Step 7- Add in the outline of 3D shadow- Do Not start shading. All shading is left until the end.
Step 8 – As a starter to the session, students are to practice ‘fading’ with the 6B pencil, controlling dark to light (see handout).
Step 9- Once the entire word is sketched lightly on the ‘poster’, students are to use an A4 page landscape (which is the same width as the poster) to trace through the first 2-3 letters of their word. This A4 page becomes their practice page to develop their ideas and experiment with various cultural patterns. A multitude of exemplars is provided as a reference. Discuss specific google search terms as well.
Step 10- when ideas have been developed and finalised on A4 pages, students go on to do their ‘real copy’, focusing on detailed, intricate patterns and shading.
-
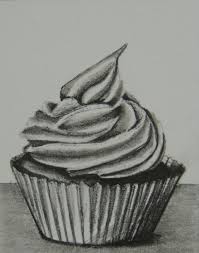
Observational Drawing week
We are learning to draw from observation using a variety of drawing tools.
To Do:
Each day this week you will be focusing on drawing a different still life picture. You will focus on copying the images to show accuracy with your forms and also show correct proportion. The next progression is to show accurate shading.
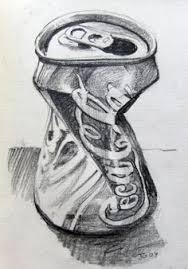
We are learning to :
Practise drawing from observation too show accuracy of shape and correct proportions
Practise shading using different tones to show form.
Shading techniques link:
 .
.  .
. 
OBSERVATIONAL DRAWING TIPS
It is really important to learn to look a lot at what you are trying to draw
Look at the outline of the shapes.... how do they look?
What shapes are in front of others?
How hard do you need to press and put pressure on your pencil to get different tones?
-
Task 1: Your task is to learn the art of drawing a realistic eye. below is a video tutorial for you to follow the step you may need to watch this a few times to really understand what is expected.
This is to develop your skills in drawing with a pencil.
Task 2: Below is a video tutorial of colouring eyes with colour pencils please watch and repeat the process. We haven't got the same pencils but you can select ones that are close to the colours he uses.
-
It's all about the colour

Learning Intention/s
You will develop your understanding of how basic colour theory works so that you can apply the rules in your final artwork
Success Criteria
Your art workbook will have a page/s dedicated to show your understanding of colour theory. It will contain a colour wheel, description of primary colours, secondary colours and complimentary colours. There will be examples of harmonious colours and triadic colours.
Use 2 pages of your workbook to dedicate to colour theory. Make your pages as creative as you can. Look online to see the different ways you can display information.
-
Your project is to create a surrealist eye that is representative of your water whanau.
you are to:
- Plan and develop an idea of your artwork
- research images and what resources you are going to use.
- begin and review as you work to finishing your artwork
 .
.  .
.  .
. -
Learning Intention
We are learning to create Op Art which is art that has an optical illusion
Success Criteria
A design that demonstrates the concept of op art where you are looking down into a point in the middle of your page
You have shaded areas to give that feel of roundness to the forms
To DO
For this task we will make a design that gives you the impression that you are looking down into a hole. Watch the You Tube video and then begin to make your own design in your book.
You will need:
a pencil
a ruler
a rectangle drawn in your book that takes up most of the page
coloured pencils
vivids/sharpies


