10 Visual Art 2
Section outline
-
Hi Everyone
Welcome to Art for 2020. I am excited to see a mixture of new and old faces from last year in class and after looking at everybody's initial drawings the other day I am sure we will all have a successful year.
I like to model the Year 10 programme as if you were sitting NCEA Level 1 so that you know what is expected should you wish to progress with art next year.
There will be a mixture of practical tasks, discussions about artist models used and encouragment for you to take risks and experiment with a variety of different ideas. You need to keep a workbook of ideas which I will be checking regularly so it is important that you are organised for each session with the appropriate materials.
-
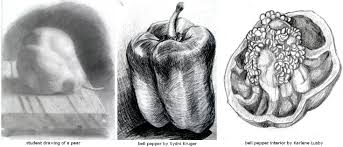
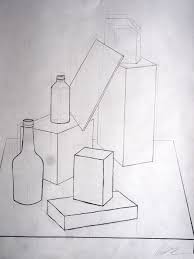
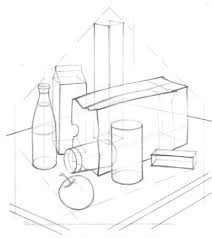
This assessment will give you an indication of your drawing abilities using a variety of mediums
-
We are Learning to:
- be organised for each session with the appropriate equipment and resources.
- draw from observation accurately while using a variety of drawing mediums
Success Criteria:
- Your workbook will be named and you will know where to practise your observational drawing skills and where to show your topic notes and planning
- You will have a diary of at least ten completely finished observational drawings at the back of your book for me to assess at the end of the term.
-
.
 .
. 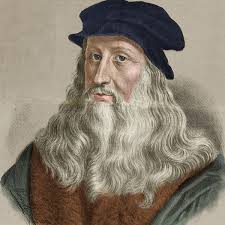
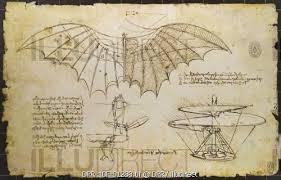
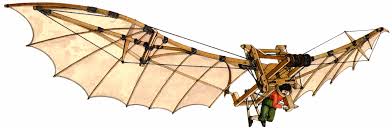
We are learning to:
- Investigate the artist model Leonardo Da Vinci: in particular his concepts and drawings which are based around flying machines
- Demonstrate accuracy and proportion in observational drawings using a variety of mediums.
Success Criteria:
- You will continue to add to your observational drawing diary at the back of your books by completing at least one fully shaded observational drawing each week.
- You will complete a two page spread in your workbook which shows evidence of you having researched the artwork of Leonardo Da Vinci. I expect to read
- facts about his art life,
- facts about his flying machine series of drawings and
- examples of images of himself and some flying machines.
- The most important aspect of this page is the addition of your personal thoughts about his work and back up your ideas with evidence.
'Da Vinci came up with plans for a number of flying machines including ornithopters. Inspired by birds and bird flight, Leonardo’s ornithopter was to be lifted and operated by flapping wings which in turn would be “powered” by the muscle energy. Man-powered ornithopters are capable of flying but only for a brief period of time and to short distances (a few hundred yards) due to the limitations of human physiology. Leonardo’s flying machine - if it could fly - wouldn’t perform any better. Nevertheless, his notes and sketches demonstrate a profound understanding of aerodynamics and concepts of flying, many of which turned out to be fundamental for the development of modern aviation. '
-
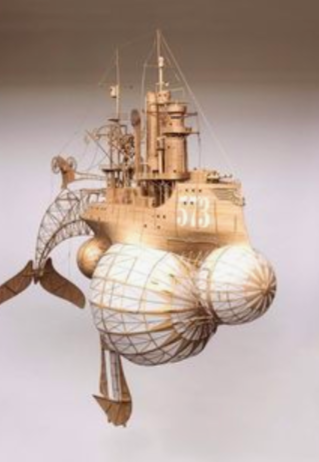
We are learning to
- plan ideas to create our own flying machine
To Do
- Using the ideas of Leonardo Da Vinci as your starting point and then looking at futuristic models of flying machines you find online, begin designing your own creation. Make at least three drawings in your visual art diary. Select the drawing that you like the most and ensure that it is detailed by completing the following:
- Complete a detailed drawing outlining what construction methods you will use and where
- Write a list of what materials you will need
- Sketch two different viewpoints of your intended model
-
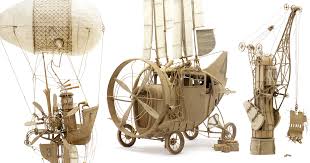
We are learning to
1. Use a variety of materials to construct our flying machine model
To Do
Continue to work on your model.
- Begin the session by setting a goal to achieve in the hour
- Ensure you have the materials needed.
- Ensure that any papier mache process is smoothe and evenly applied on your work.
-
We are learning to
1. Use a variety of materials to construct our flying machine model
To Do
Continue to work on your model.
- Begin the session by setting a goal to achieve in the hour
- Ensure you have the materials needed.
- Ensure that any papier mache process is smooth and evenly applied on your work.
-

 .
.  .
. 
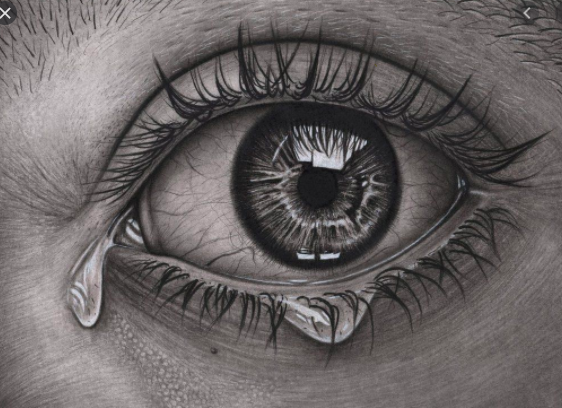
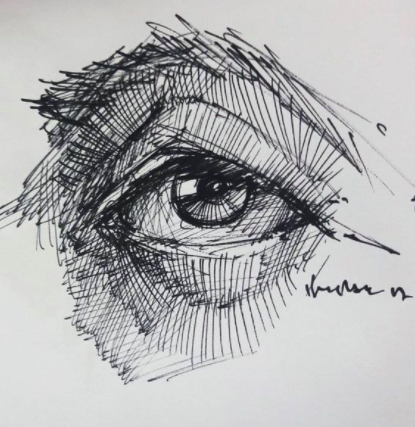
The Eyes have it.
Choose one of the eye drawings in pencil and one of the examples that uses just pen. Render them (draw them)to see how accurately you can copy. Look carefully at how the artist has used the different techniques to create form and depth of shading.
Both drawings should be in your Visual Diary by the time you return to school. If you have time, try the other examples as well to practise your techniques.
-
Mural Challenge
Mr Morrison wants to see a mural designed and painted on the right hand brick wall under the canopy at the end of the school before you walk up the steps to Valderama Drive. He has provided me with a model of a mural that demonstrates visions and goals and asked if I could design it for him. I need help.
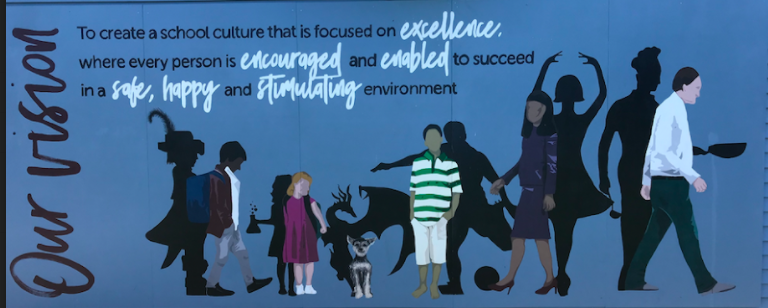
Your mission:
Using our school goals and key words listed below and looking at Mr Morrison's example as a starting point see what mural idea you can come up with. The key words and vision statement are as follows
- Growing Greatness or Kia mana ake
- Mission Heights Junior College is committed to provide innovative and evolving personalised learning to enable students to be confident, active, reflective and high-achieving independent learners.
-
Photography Challenge
We are learning to use tips and techniques to take fantastic photos from our devices.
To Do
Use this google slide show. Follow the steps to create your own alphabet photography assignment

https://docs.google.com/presentation/d/1sDnMzX-mct0Mz6i_9kvCmjE-2ROSHbA2UpDj2_GmB34/edit#sl
-

Use this google slide show to follow the instructions and create your own absurd sculpture depicting something out of lockdown.
-
We are learning to
1. Use a variety of materials to construct our flying machine model
To Do
Continue to work on your model.
- Begin the session by setting a goal to achieve in the hour
- Ensure you have the materials needed.
- Ensure that any papier mache process is smooth and evenly applied on your work.
-
We are learning to
1. Use a variety of materials to construct our flying machine model
To Do
Continue to work on your model.
- The model should be in the last stages of being finihsed.
- Check that joins are secure and paper mache is tidy.
- Shellac is the last stage.
-
We are learning to experiment with different brush techniques.
- Dry brushing to show the highlights on our objects
- Blends and overpainting to show a more abstract background
- Experimenting with brush strokes to get different effects
You should be pencilling on your composition and using a dry brush techniques to show the highlights.
Remember that dry brush techniques requires you to not have too much paint on the brush.
/paint-brushes-in-a-row-153773444-b0d3a3067cbf4e81a534a214a61bf8e0.jpg)
-
We are learning to experiment with different brush techniques.
- Dry brushing to show the highlights on our objects
- Blends and overpainting to show a more abstract background
- Experimenting with brush strokes to get different effects
Use these artist models to help you create your composition and experiment with brushstrokes to create effects
 .
. 
-
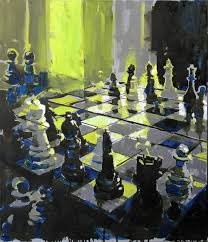
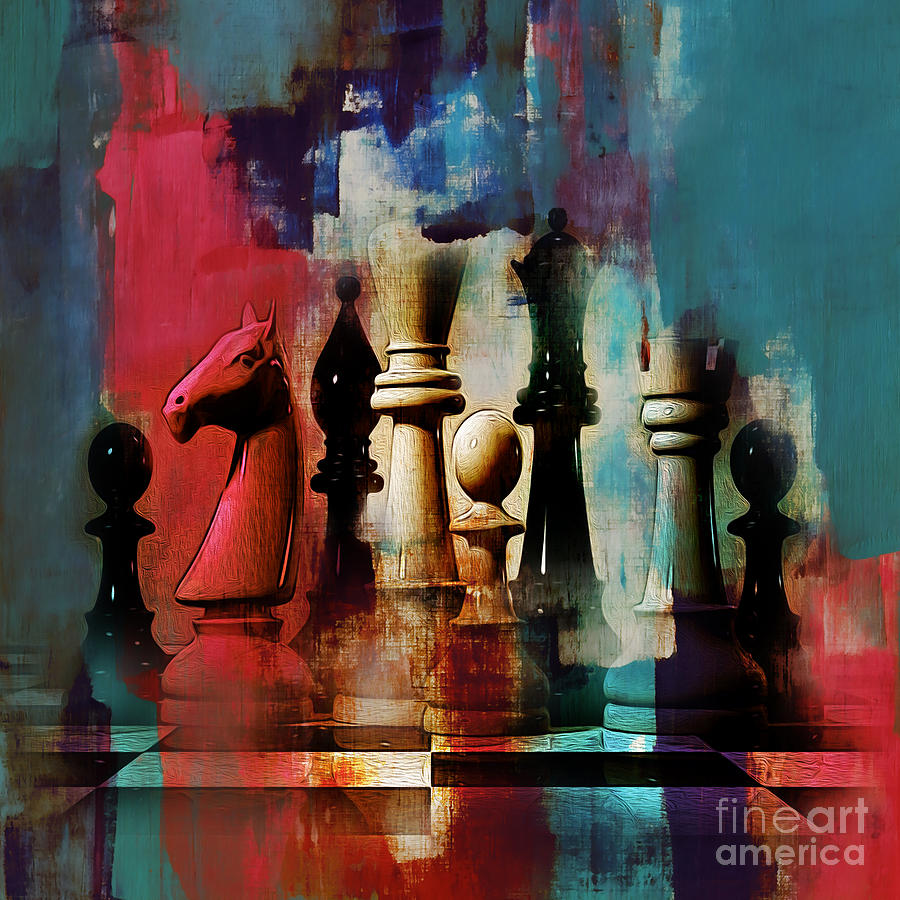
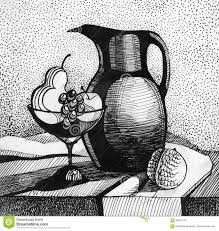
We are learning to:
- Draw from observation
- Focus on accuracy, proportion and shading using a directional light source

Choose one of these compositions and copy it into your visual art diary.
Creating a light source that is shining from the right hand side of the page, shade the composition with your pencil to define the form through highlights and shadows.
-
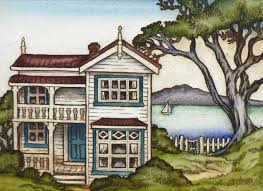
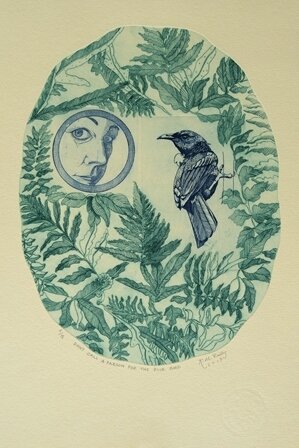
We are learning to:
draw a composition suitable to create an etching.
Criteria:
- use a variety of lines and mark-making
- Select a native bird or a NZ villa house as your drawing
- Prepare your drawing as a suitable size for either an A4 or A5 etching
Watch the following videos to help give you an understanding on the etching process
-
We are learning to:
Use our drawn image as a reference point and draw in our etched lines to the pexiplate.
To do:
- Complete your detailed drawing and show the teacher
- Refine and add more detail as needed
- Collect a sheet of plexiplate and use masking tape to secure the image behind.
- Begin the process of using the etching tool to cut away the plastic (remember, the more variation of lines and etched away parts you create, the more interesting your print will be.)
NB: The more you etch out, the darker the areas will become as this is where the ink will stick the most.
-
We are learning to:
Use our drawn image as a reference point and draw in our etched lines to the pexiplate.
To do:
- Complete your detailed drawing and show the teacher
- Refine and add more detail as needed
- Collect a sheet of plexiplate and use masking tape to secure the image behind.
- Begin the process of using the etching tool to cut away the plastic (remember, the more variation of lines and etched away parts you create, the more interesting your print will be.)

-
We are learning to draw with accuracy and correct tonal shading
To Do:
This week until we get back to school we will have some fun with an artist model called Redmer Hoekstra. Check him out on line with this link
He loves morphing one or two different objects into each other. I would like you for your drawing challenge this week to choose one of his creations and copy it. Better still.....you may like to create your own image.
Watch the video but then find an image online to use as your one to copy.
The focus is again on accuracy to draw the forms correctly and also to show the correct tonal shading.
-
 .
.  .
.  .
. 
-
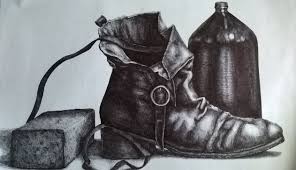
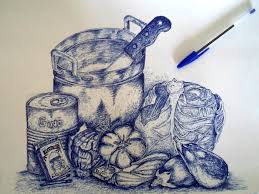
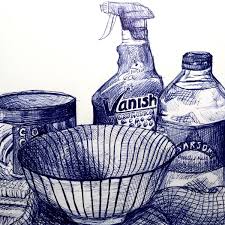
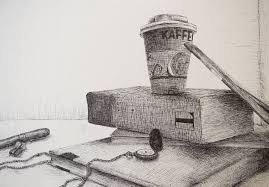
We are learning to draw and shade using pens
Watch these videos to help you understand the techniques necessary to help you draw with pen
-
We are learning to:
create a variety of marks in our etching plate to create depth and interest to forms.
1. Over the next two weeks we want to focus our sessions on etching into the mylar plastic board. You need to be patient and careful in the marks you create so that your printed image with look fabulous.
2. Keep the image taped over your drawing so that you are carefully copying the image.
Watch these videos to help you understand the importance of making marks into the plastic to ensure you get a variety of dark and light tones.
-
Take a print of your etching using pencil and paper to see how many marks are showing up. You may need to revisit areas and refine areas to ensure you show darker areas. This helps to highlight form.
Watch the process of taking a print without using the printing press.
When you think you have made enough marks, have a go at making a print without the press. At the conclusion of your effort, make sure that you wash your plastic plate thoroughly to get rid of the existing ink still stuck in the marks made.
-
Fine tuning and looking at your printmaking successes.
We are learning to reflect on the progress we have made to our final prints.
To do:

-
Fast Finishers (the rest of you have one more week to complete)
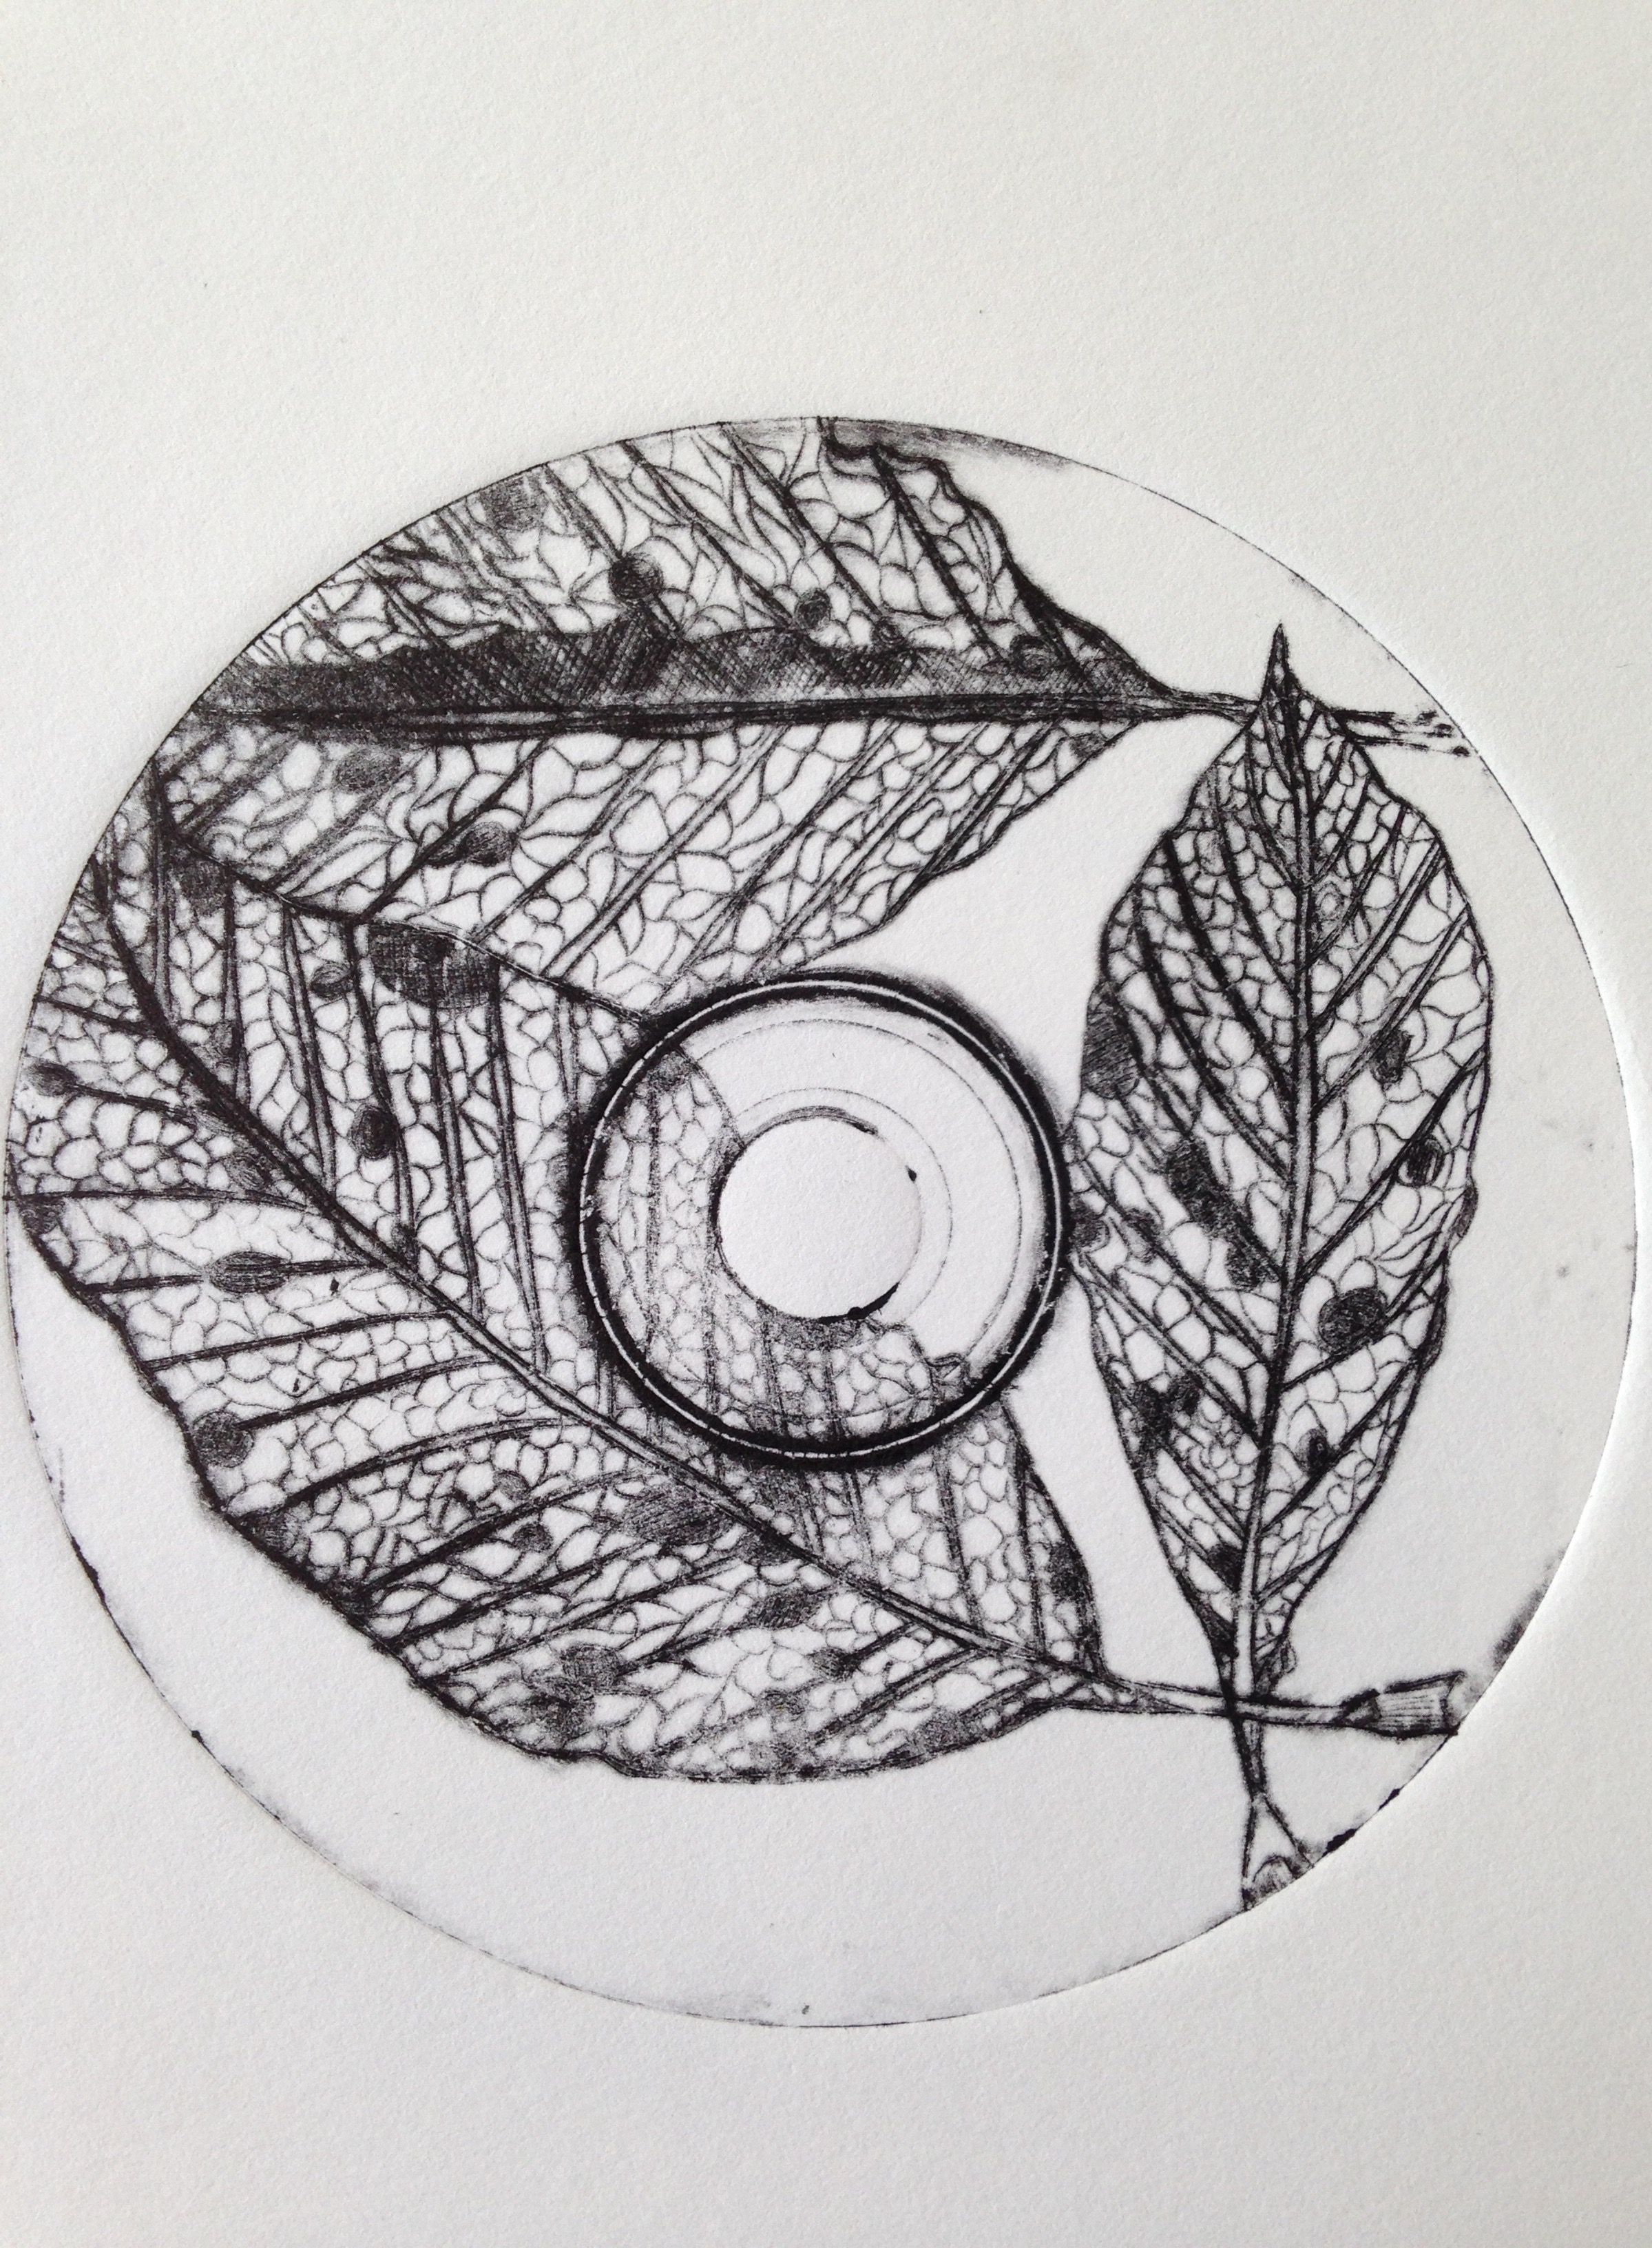
For those of you who have finished your print, take a CD and create a leaf image across it to. Make a print to see if you can create one as effective as this example
-
This week you will be going back to practising your painting techniques.
In a circle, arrange the letters of your name creatively and add extra lines.
Using two colours plus white, begin. mixing different colours and apply to the spaces you have created in your composition.
Some areas can show gradual blending.
Your goal is to complete painting all of the first layer of the composition with paint showing different tones. Next week we will look at different techniques to add over the top of the base colours.


 .
.