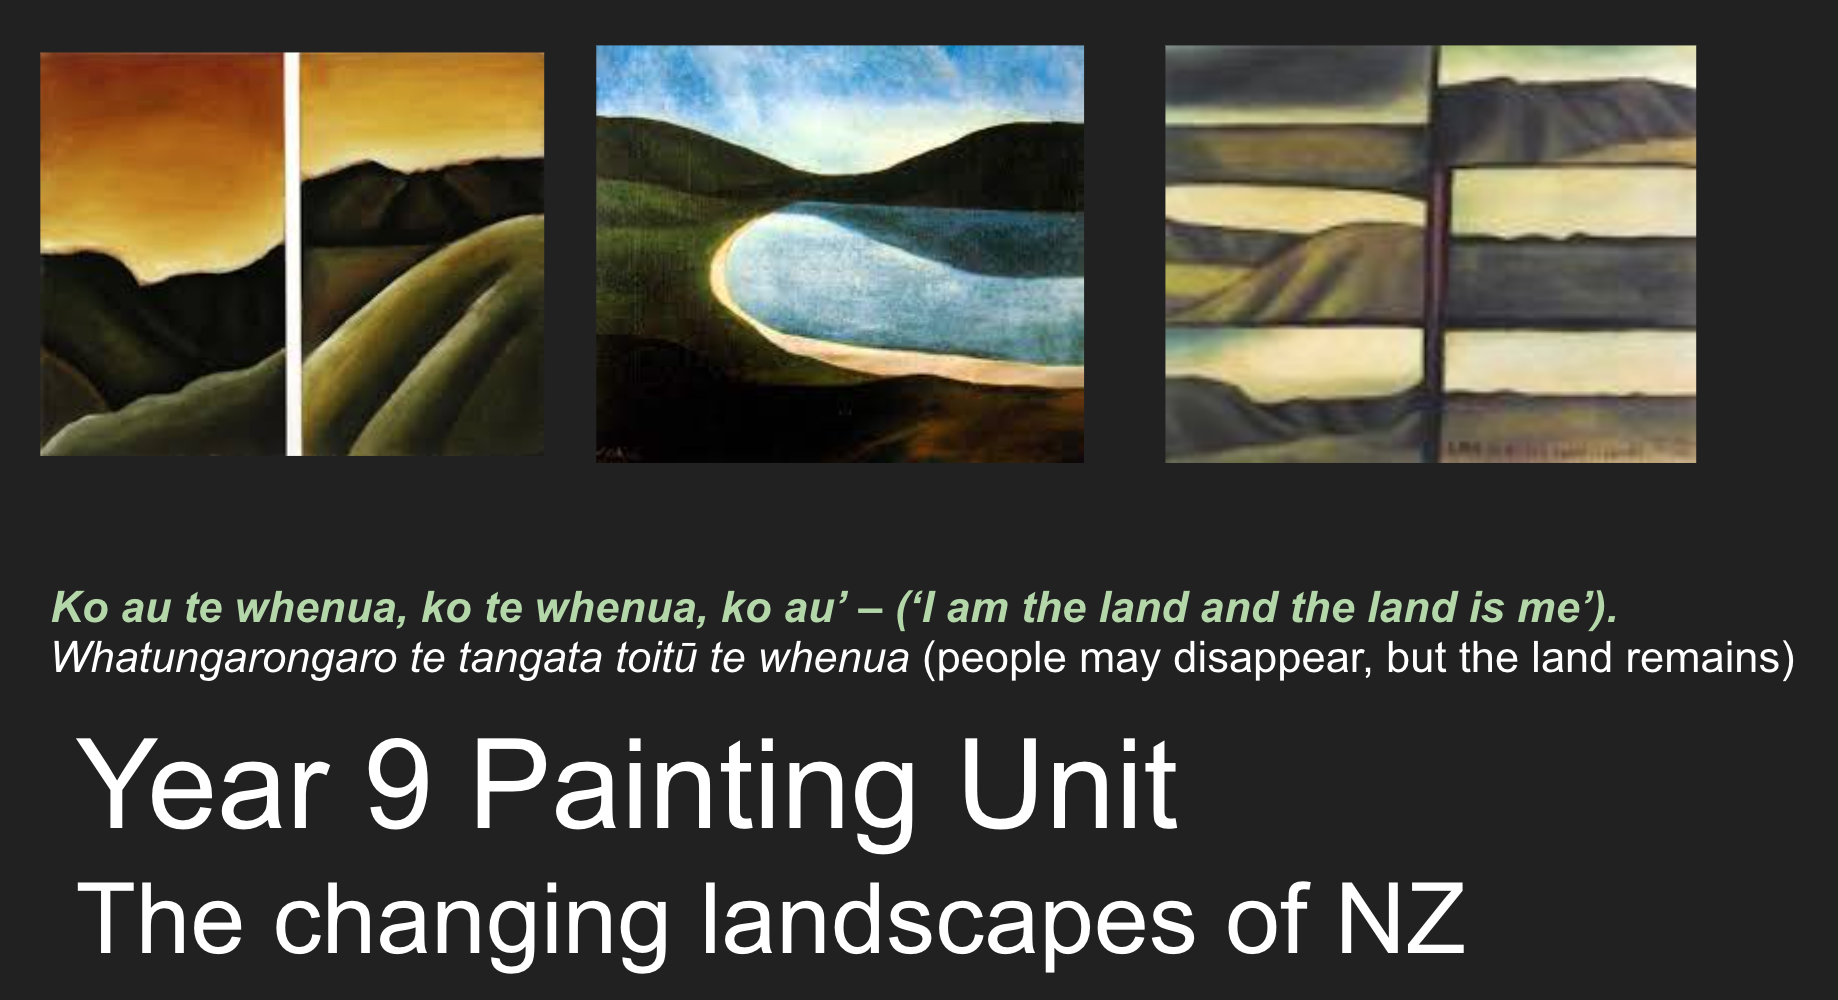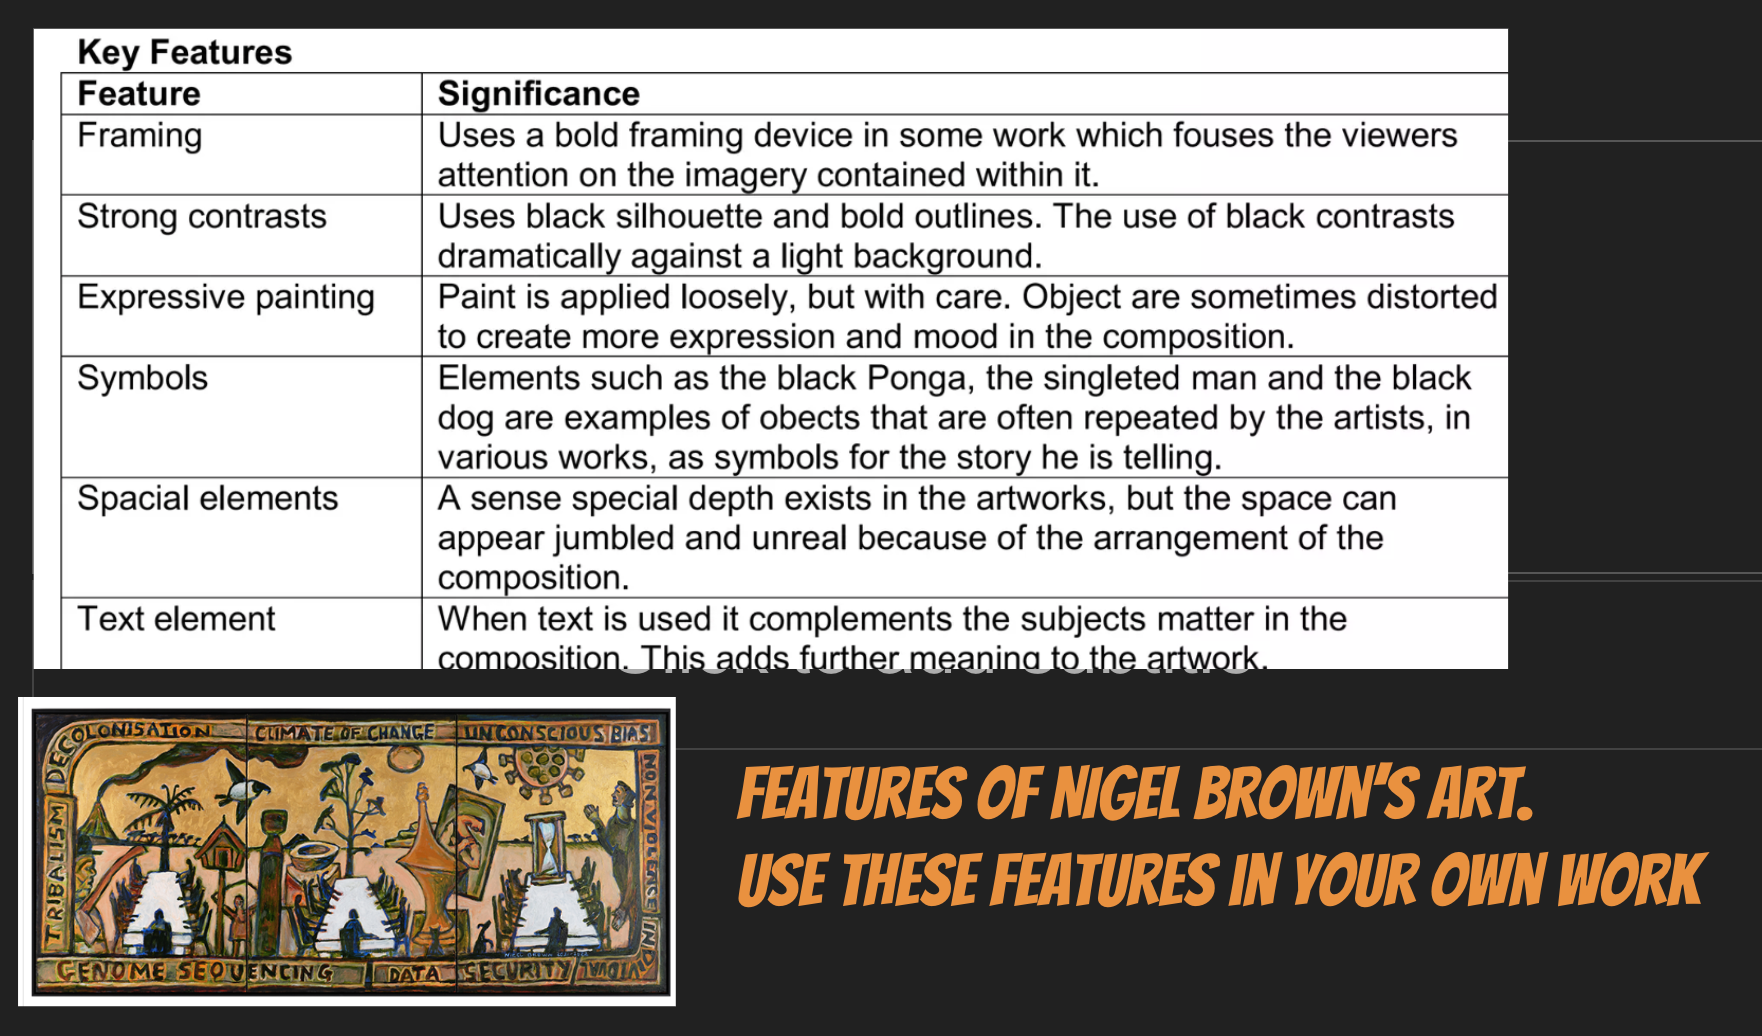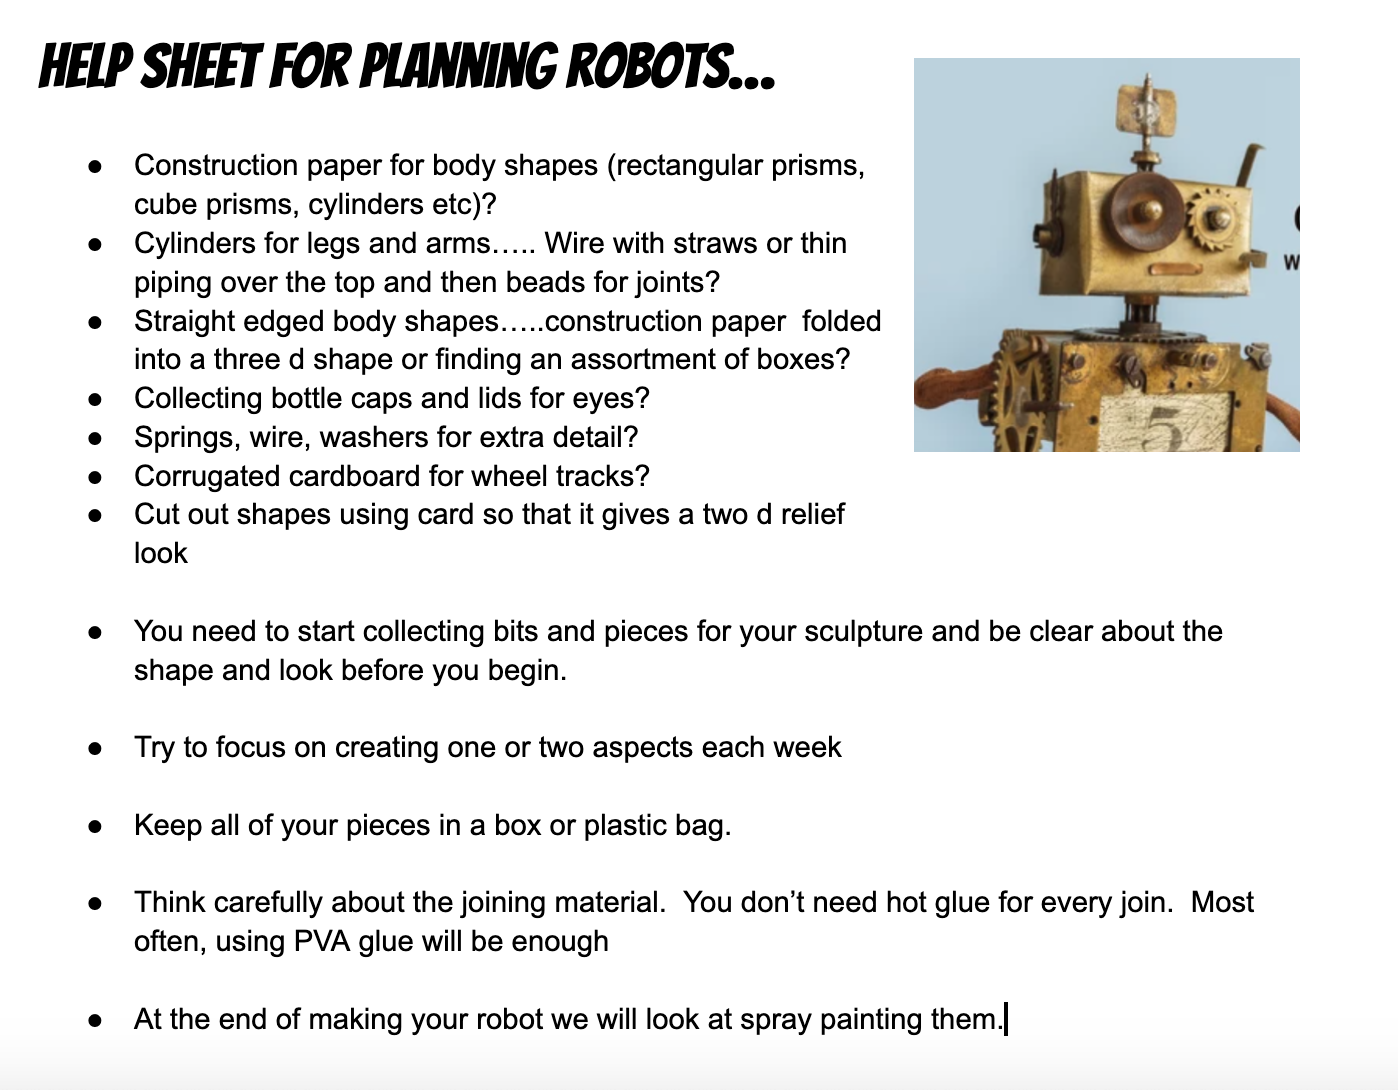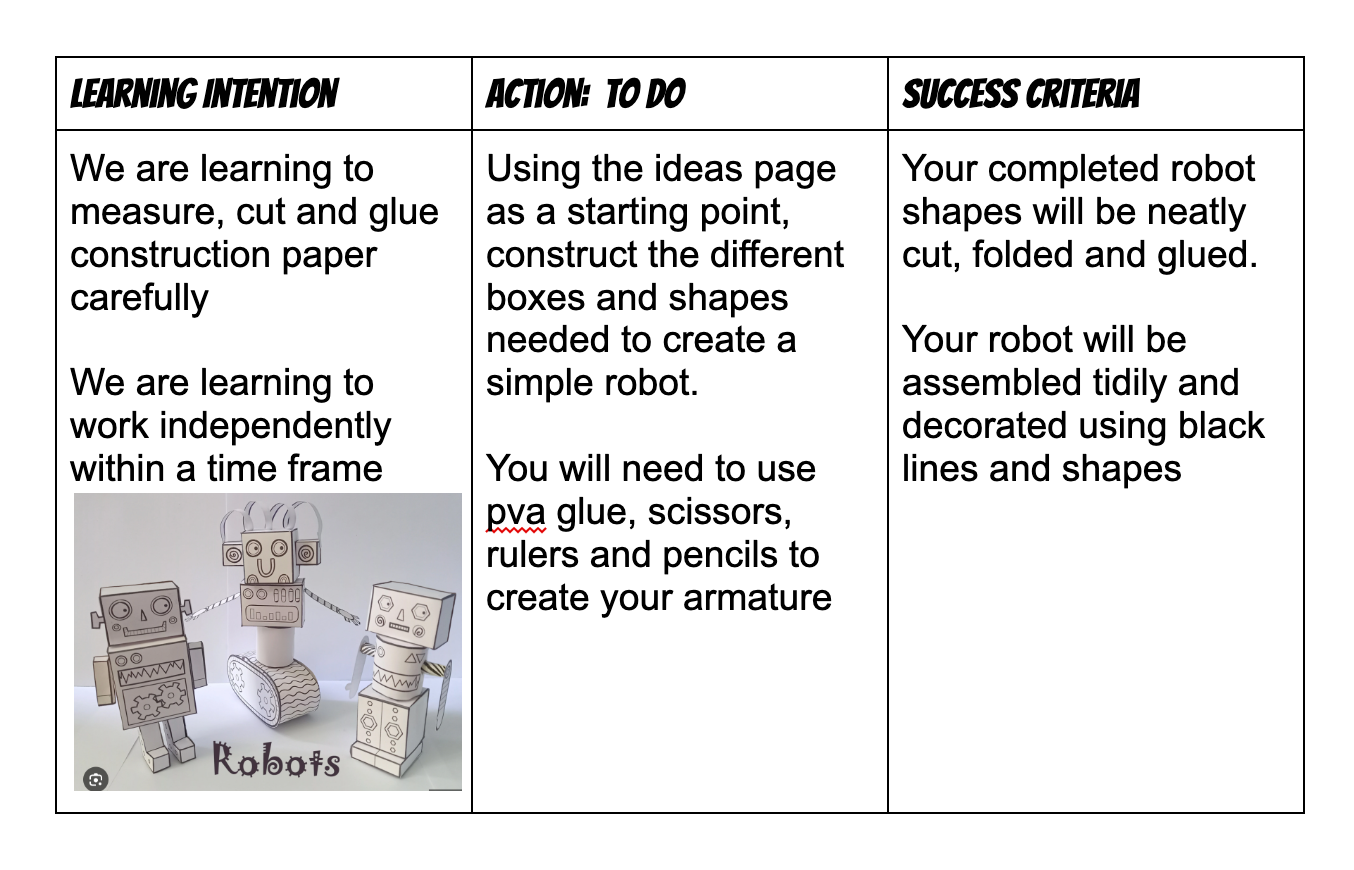
9 Visual Art 1
Section outline
-
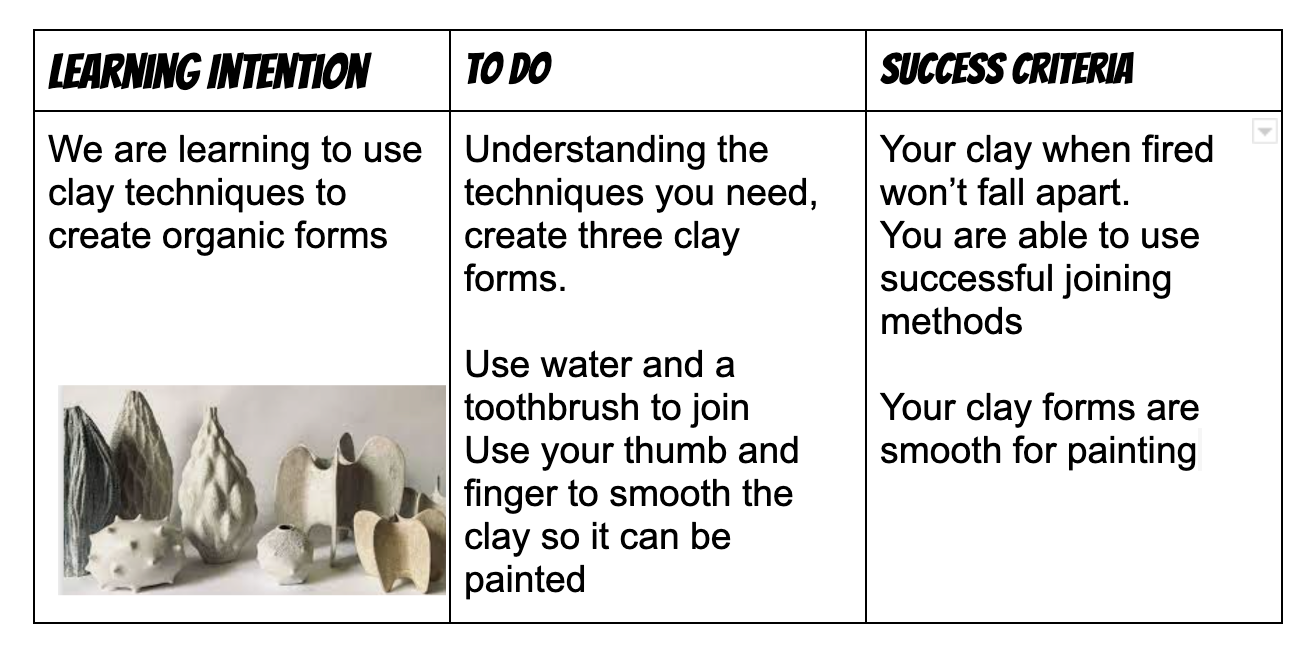
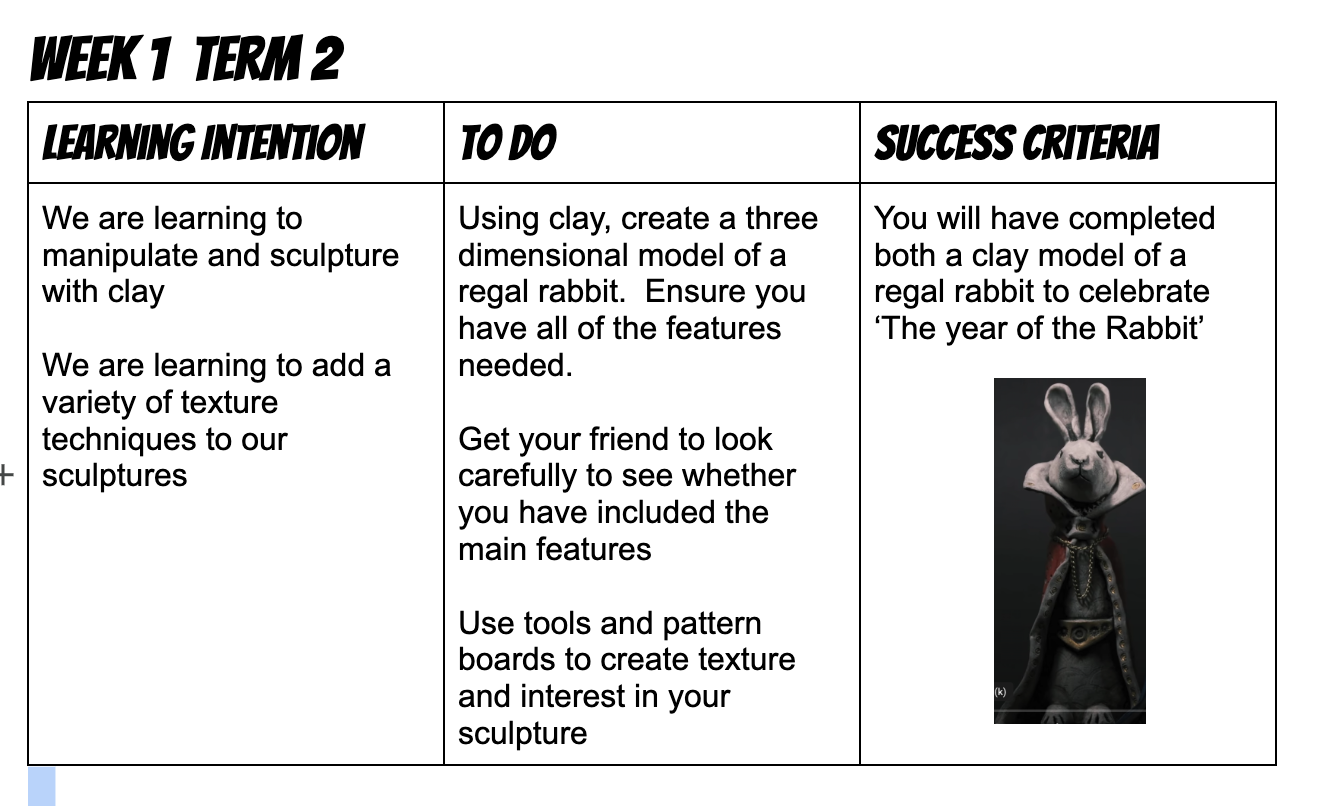
This week we are going to have a break from your painting and have a go at making a clay sculpture. Because it is the Year of the rabbit, I found this tutorial on line of how to make a regal creature. Using a rabbit face and ears, have fun with the texture boards and tools to create your own regal rabbit. You have two sessions to make the rabbit, then it will get fired in the school kiln. You will then have a further two sessions to decorate your rabbit.
-
Watch this video carefully and then use to help you follow the process needed to create your rabbit.
-
This week is our final week for the sculptures to be finished. Your reflection and photo of your work should be turned in once completed.
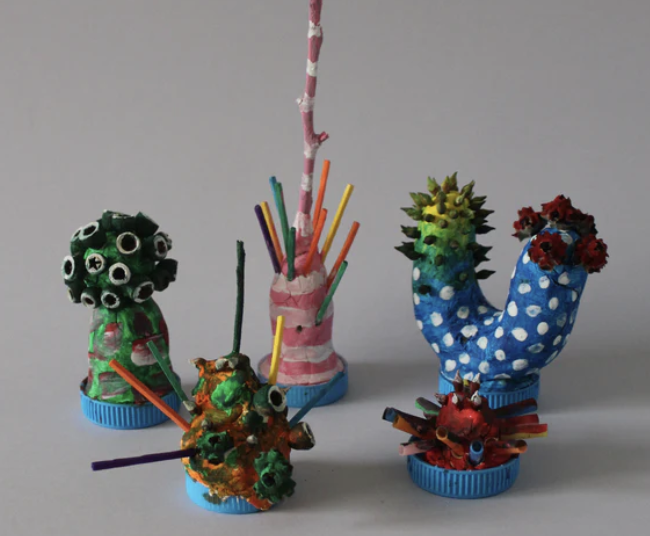
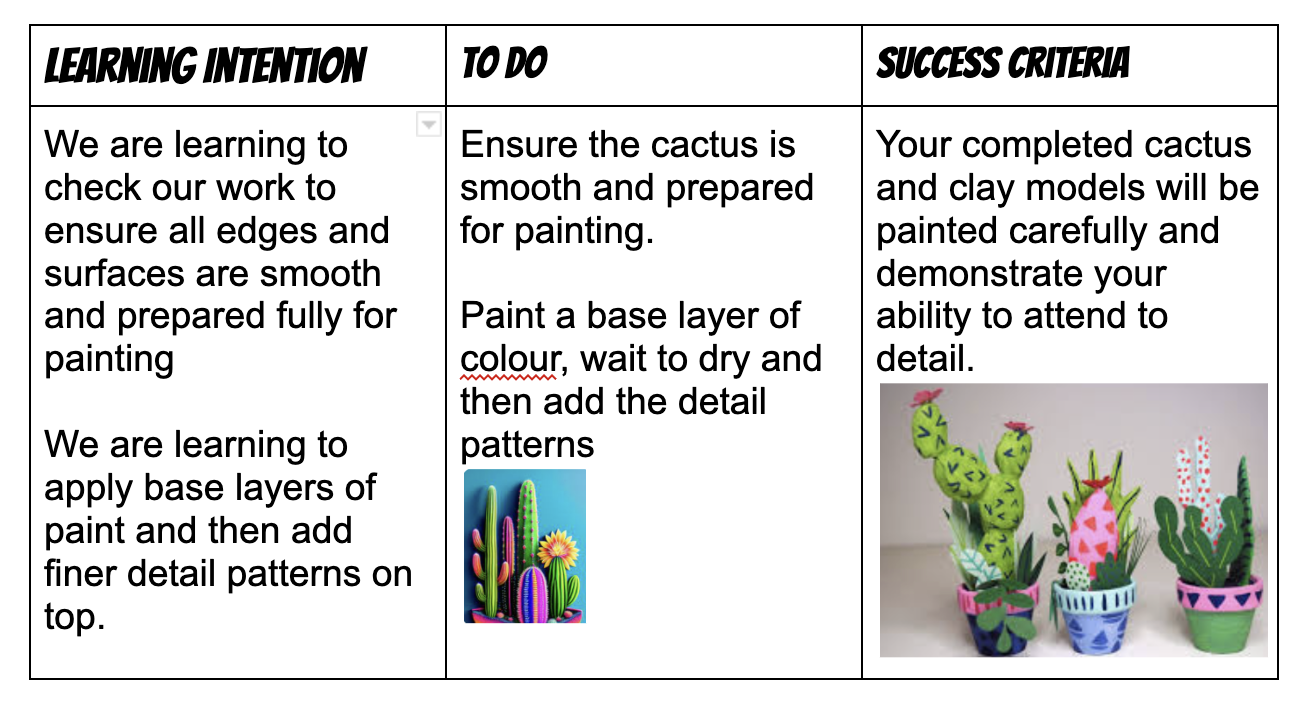
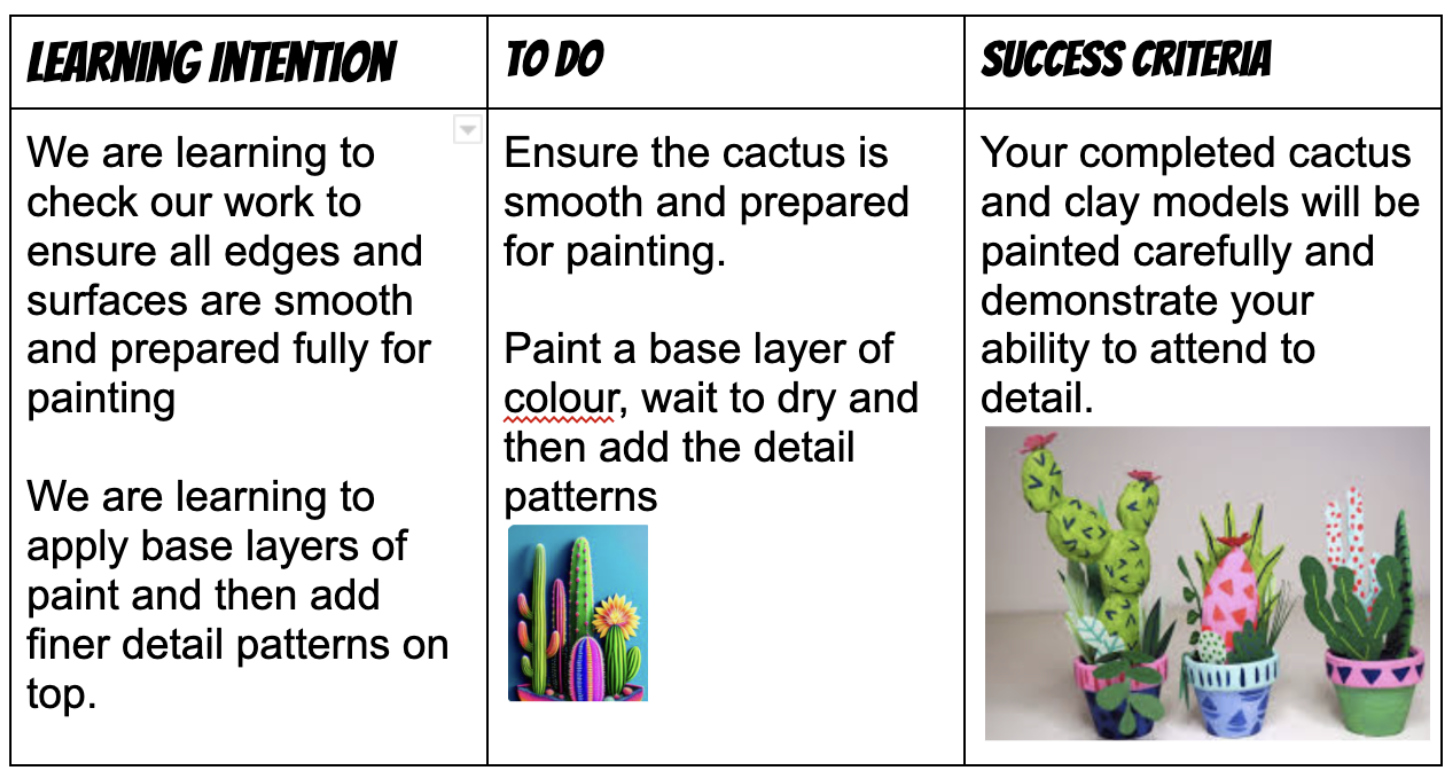
Quirky cactus
Task:
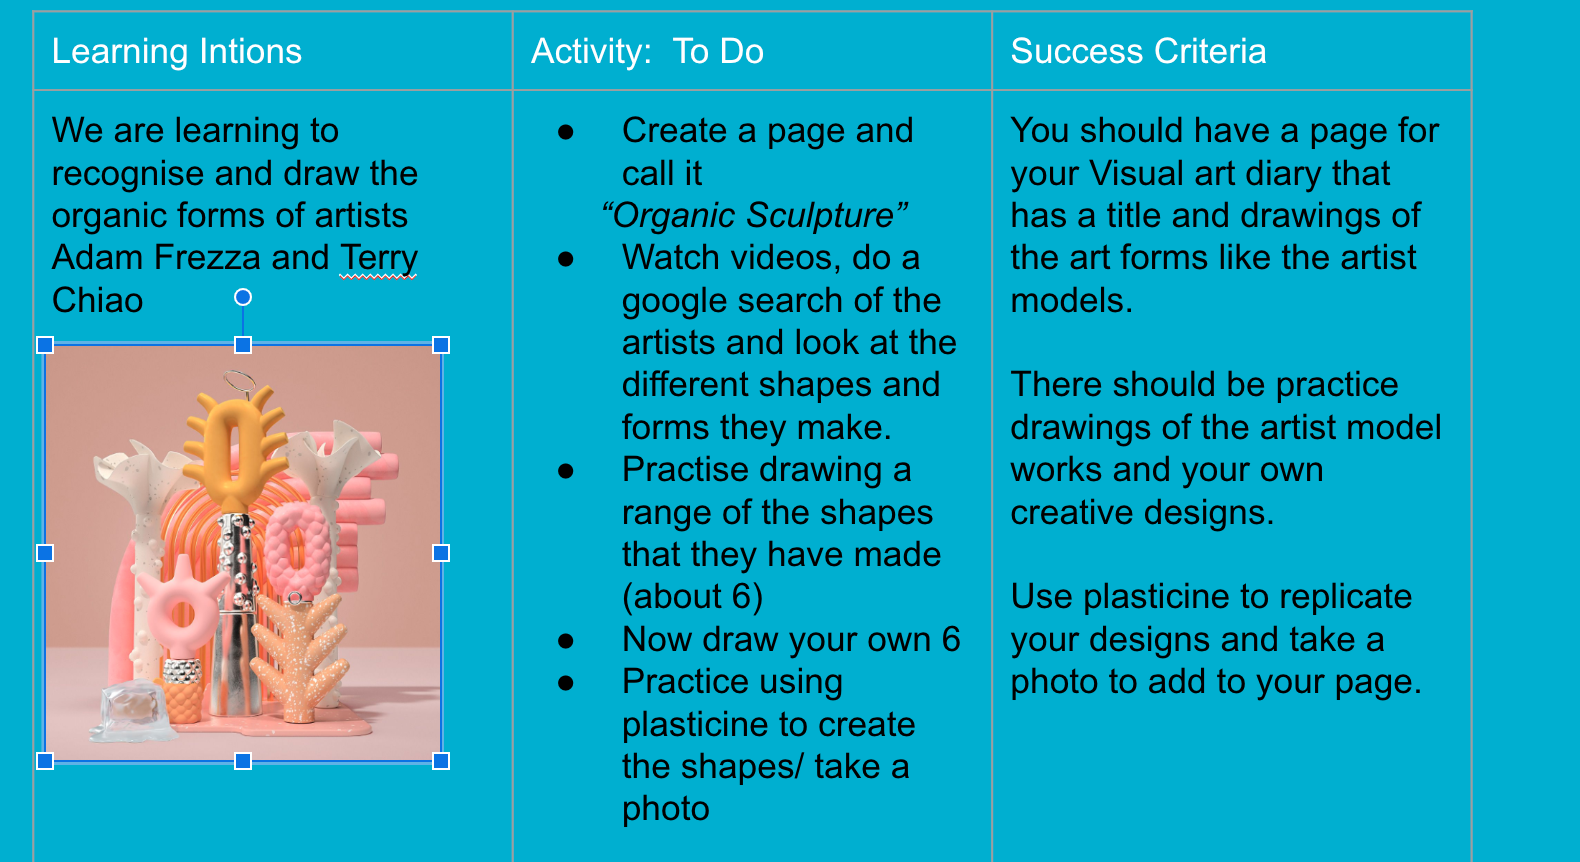
As well as experimenting with clay forms to create organic shapes, the assessment for this unit was your effort to create a quirky cactus sculpture using construction and the papier machė process. The artist models of Adam Frezza and Terry Chiao were used to inspire your idea.
Towards At Above Beyond
Building of sculpture
You have yet to construct a coherent concept or stable sculpture.
You have constructed a basic and stable sculpture.
You have constructed a creative and stable sculpture with competent attention to form.
You have constructed a well designed and balanced sculpture with additional attachments.
You required a lot of teacher direction to build your sculpture.
You required some teacher direction to build your sculpture.
You required minimal teacher direction to complete your sculpture.
You have developed thoughts, ideas and actions to complete your sculpture independently.
Paper mache process
You have yet to demonstrate an understanding of the papier mache process.
You have completed the papier mache process satisfactorily with some inconsistencies.
You have completed the papier mache process, with minimal inconsistencies.
You have competently completed the papier mache process, with smooth edges and tidy joins.
Final decorative painting
You are yet to colour your design with consistent fine detail.
You have applied colours to your design with some attention to fine detail.
You have carefully applied colours to your design to complete a clean and creative representation.
You have chosen colours and painted your design to look realistic, using a high level of fine detailing.
Time Management
You did not complete all tasks by the due date.
You did not complete some tasks by the due date.
You completed most tasks by the due date.
You completed all tasks are by the due date.
Overall Grade
Working Towards
Working At
Working Above
Working Beyond
-
Steps to creating your print.
Complete cutting all of the patterns and lines into your lino block
Check that you have a variety of thick and thin lines, shapes hollowed out and that your lines are as tidy as they can be.
Get three pieces of A2 paper, register where your prints are going to be printed.
(Measure 5 cm from the top and 5cm from the left side (the right hand side will be a bit bigger). Rule your squares very lightly. Make sure you have a cross in the corner of your print block so that you know where to place it on the paper.
Inking your block up requires patience and careful rolling
Use a 2-3 cm length of printing ink on the middle of your printing block
Roll the rubber brayer (roller) back and forth over the ink until it is sounding tacky.
(too much ink will cause slipping and too little ink will not be enough for a balanced coverage)
Don’t roll the ink all over the plate as you are just wasting it.
When it sounds tacky, roll the ink across your printing block.
Continue until all of your printing block is covered and there is an even amount of ink across it.
Carefully place your block on your registered paper. Hold your hand on top and get your other hand underneath and flip the paper without moving the block.
Use the ball of your clenched hand to smooth and apply pressure all over the block to get the ink to transfer.
Make sure you spend time going around the edges.
Carefully remove paper and put it straight on the drying rack. (Your name should be on it)