
9 Digital Technology 1
Section outline
-
Kia ora...
My name is Mr Taha and I am going to be your digital technology teacher throughout the year.
In this course we are going to explore and use wide variety of digital platforms and electronic components in circuits. We will start this week by learning about computational thinking.


-
Learning Intentions: We are learning to (WALT)...
Understand the basics of computational thinking
understand the binary numbers with a link to how computers work
Success Criteria: I can/have...
- use computational thinking to write a simple program on a computer using logical steps
Activities:
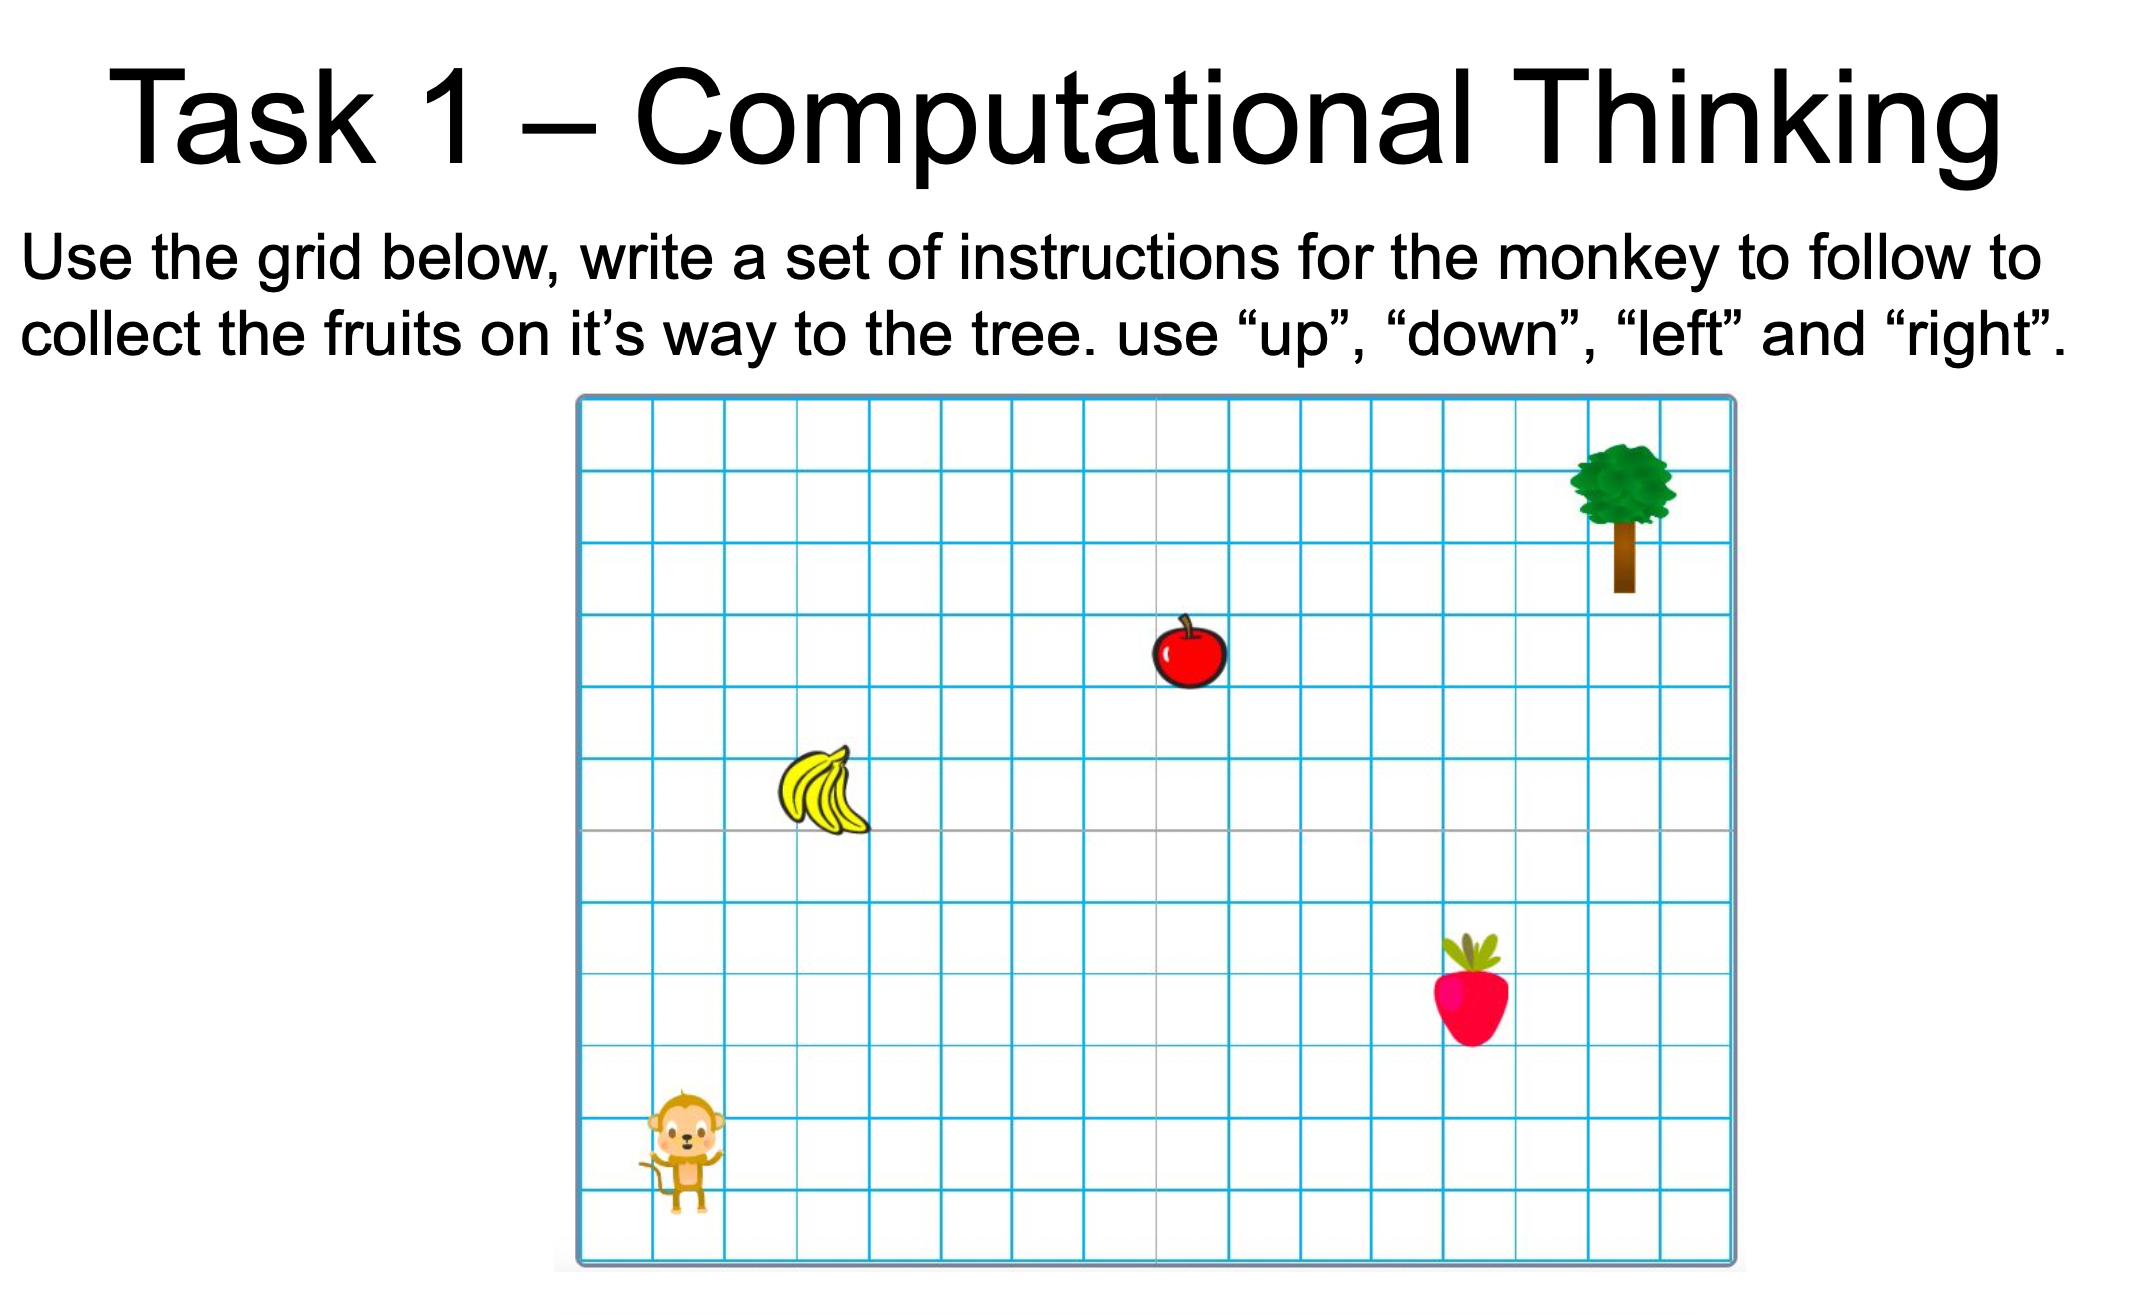
Computational thinking - task1
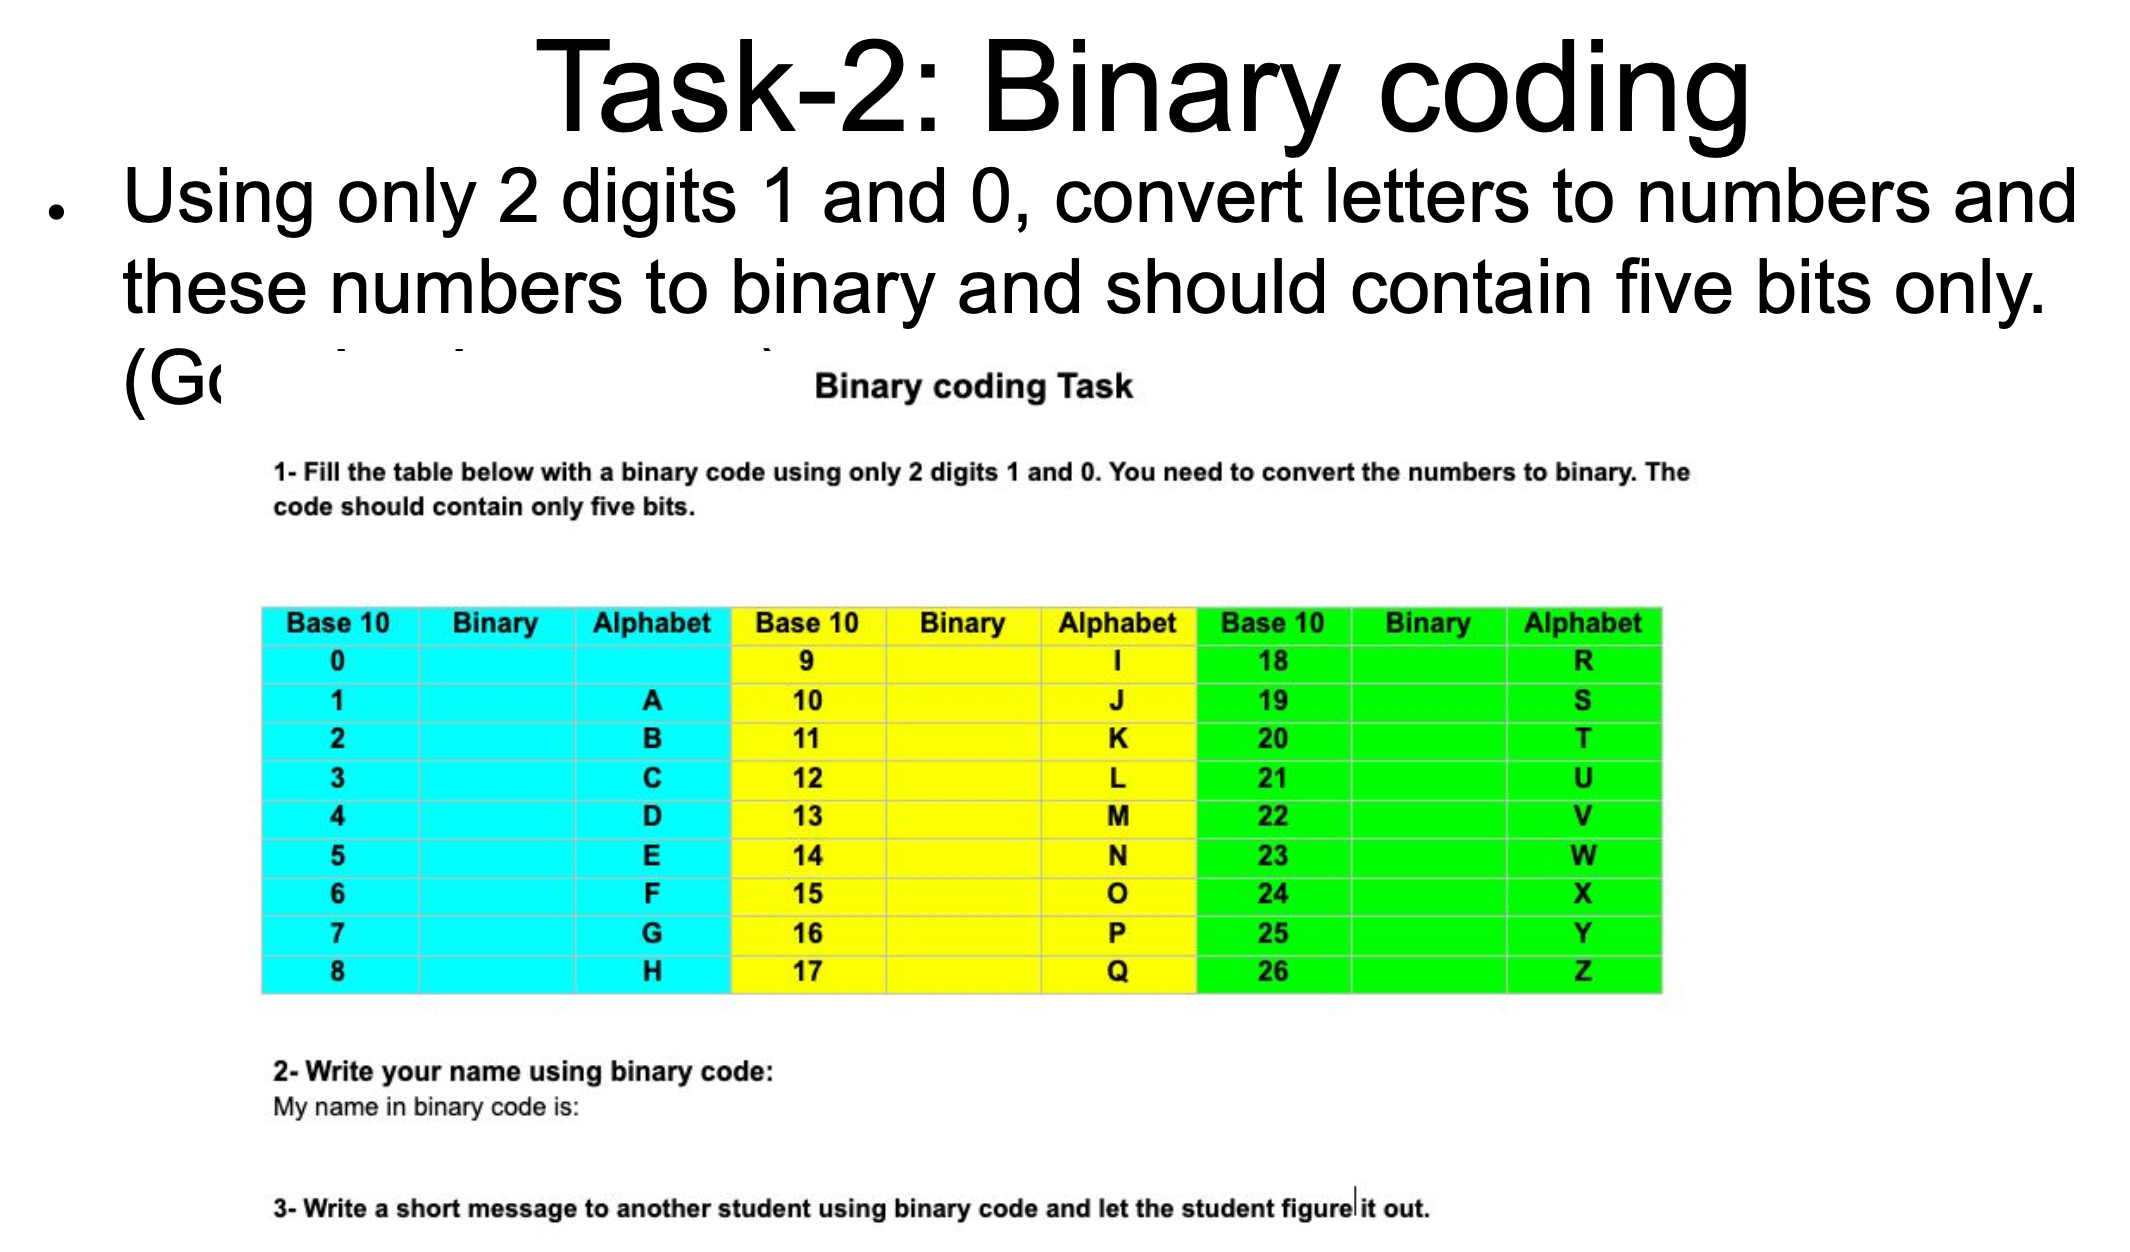
Binary numbers - task2 on Google Classroom
Homework:
Google Classroom Code: zae5y56
use Scratch app to extend your code to a more complex one.
-
Learning Intentions: We are learning to (WALT)...
Understand the basics of computational thinking
understand the binary numbers with a link to how computers work
Success Criteria: I can/have...
- use computational thinking to write a simple program on a computer using logical steps
Activities:
Computational thinking - task1
Binary numbers - task2 on Google Classroom
-
Kia ora
In this week we will start learning about App design by using MIT app inventer. It is a free website that can be used to design and create different apps and then transfer to a phone to use.
Learning Intentions: We are learning to (WALT)...
Understand the basics of computational thinking
understand how MIT app inventer works and how to create new apps

Success Criteria: I can/have...
- use computational thinking to write a simple program on a computer using logical steps
Activities:
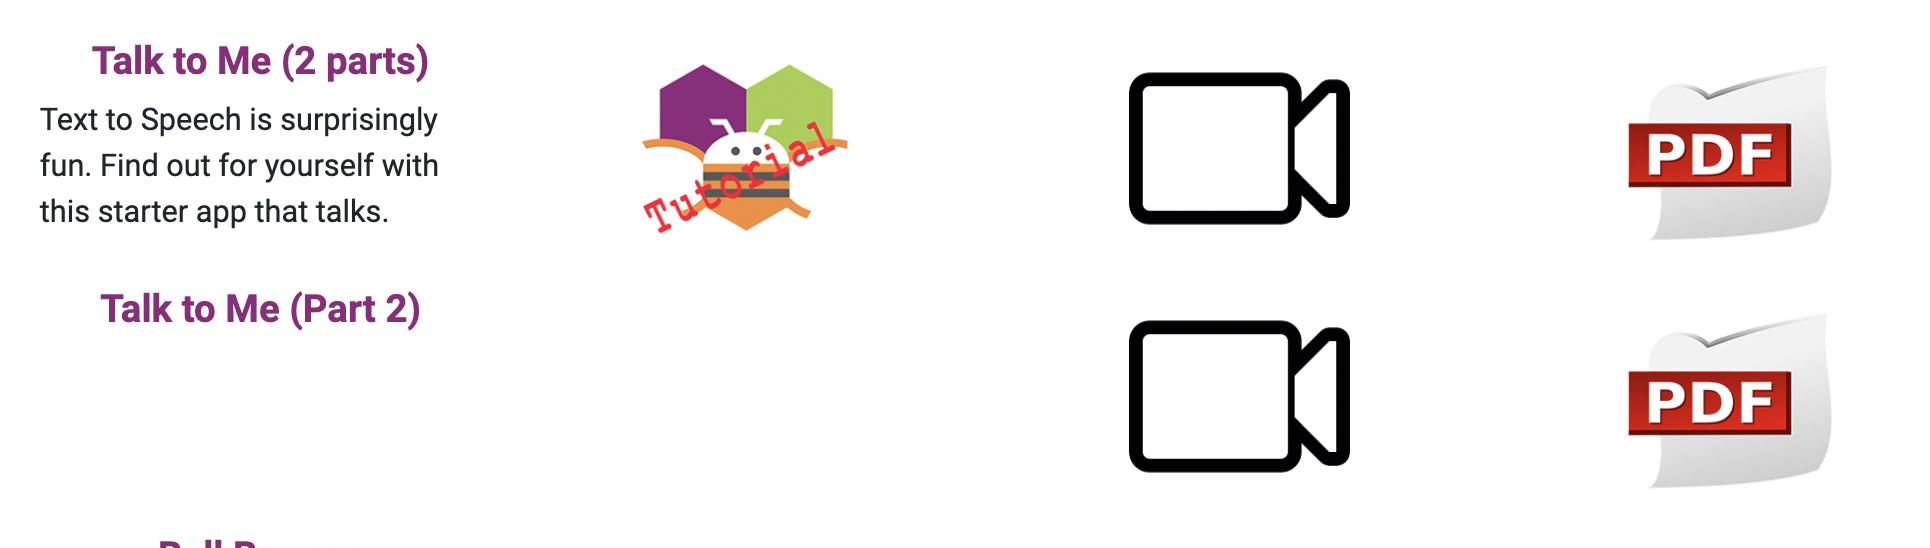
Start with beginners tutorials on the MIT app inventer website - Hello Codi

-
Kia ora
In this week we will continue learning about App design by using MIT app inventer.
Learning Intentions: We are learning to (WALT)...
Understand the basics of computational thinking
understand how to code a basic app by following the beginners tutorials
Success Criteria: I can/have...
- use computational thinking to write a simple program on a computer using logical steps
Activities:
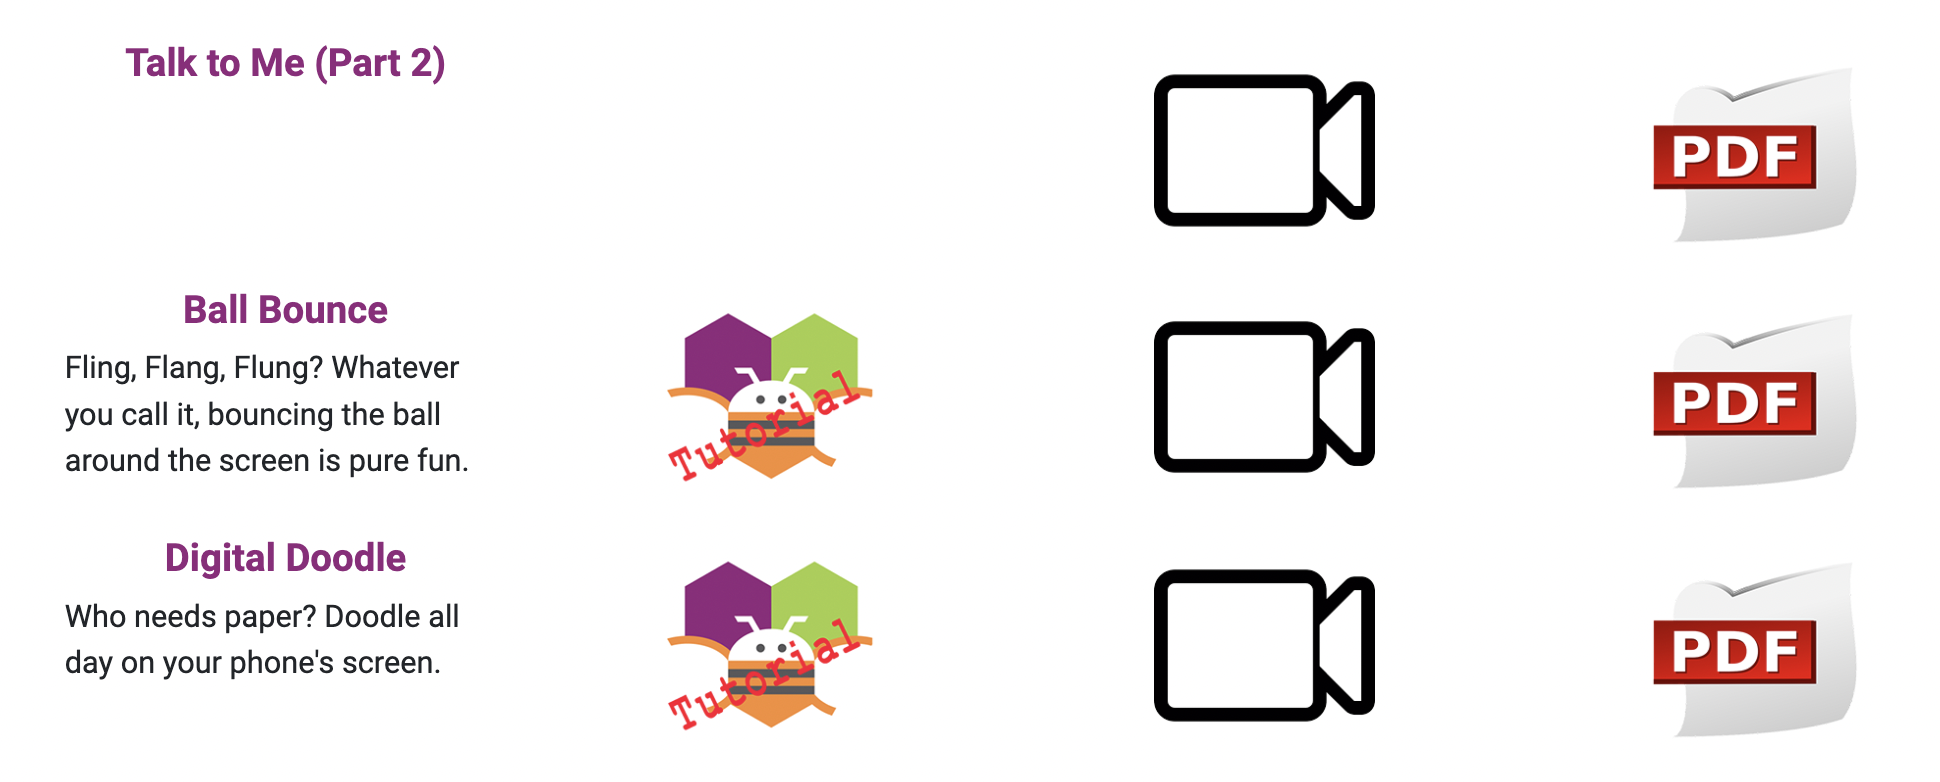
Start with beginners tutorials on the MIT app inventer website
-
Kia ora
In this week we will continue learning and practicing the App design by using MIT app inventer.
Learning Intentions: We are learning to (WALT)...
Understand the basics of computational thinking
understand how to code a basic app by following the beginners tutorials
Success Criteria: I can/have...
- use computational thinking to write a simple program on a computer using logical steps
Activities:
Start with beginners tutorials on the MIT app inventer website
-
Kia ora
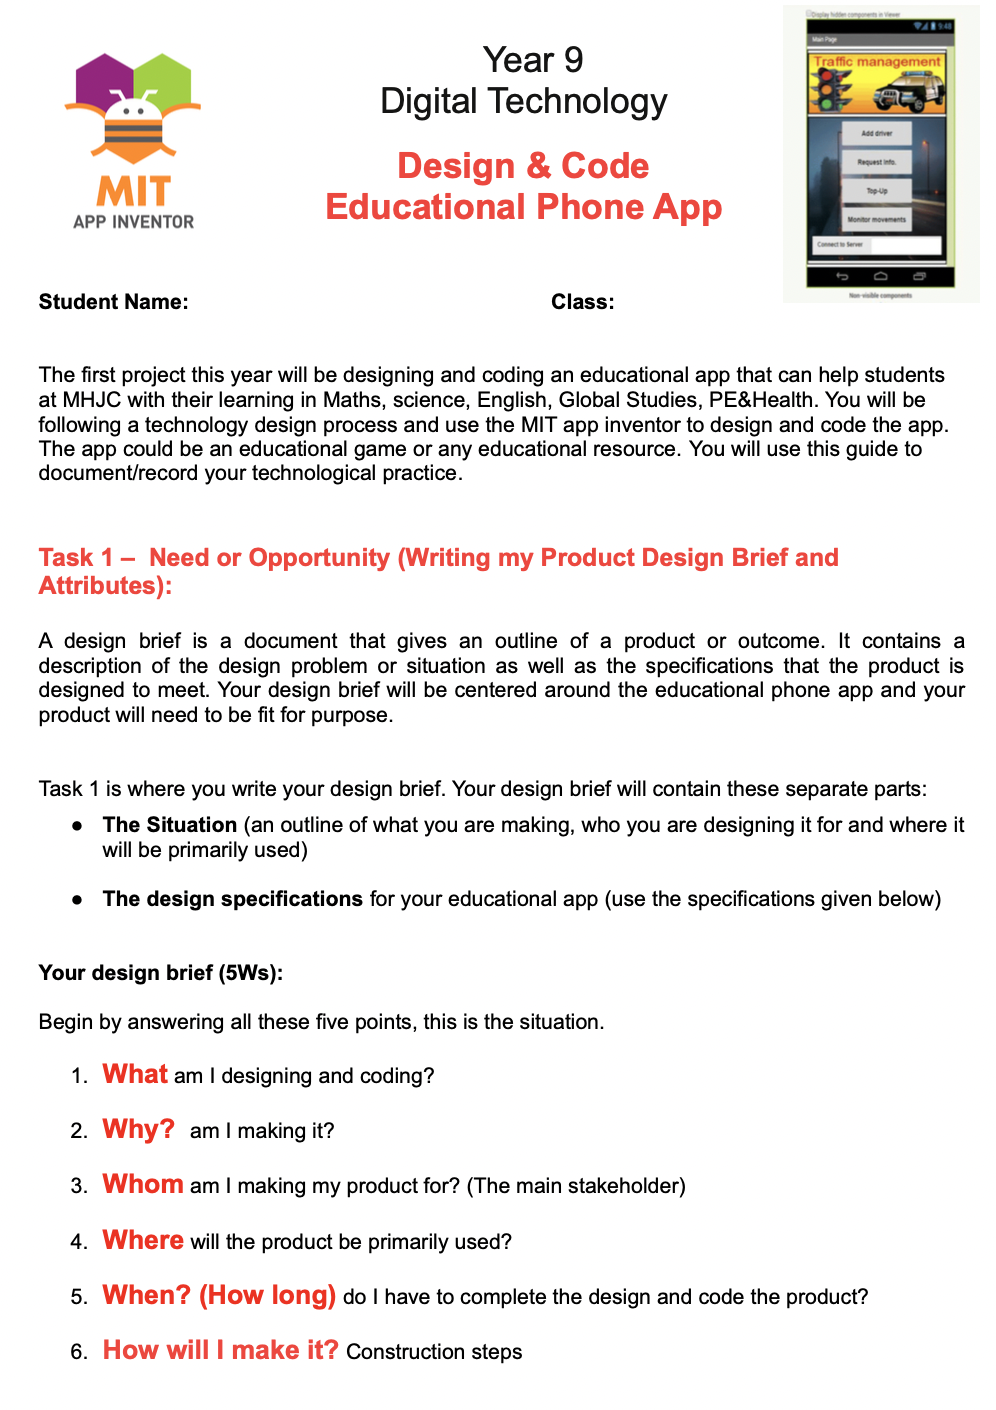
In this week we will start working on our assessment journal. It will be the outcome evaluation and development. Our outcome will be making an educational phone app for MHJC students to use for their learning and for different subjects. You will be using the knowledge and skills you have learned after exploring tutorials of the MIT app inventer.
Learning Intentions: We are learning to (WALT)...
Understand the basics of computational thinking
understand how to code a basic app by following the beginners tutorials
Success Criteria: I can/have...
- use computational thinking to write a simple program on a computer using logical steps
- apply the knowledge and skills to design and code a phone app for MHJC students.
Activities:
Start with beginners tutorials on the MIT app inventer website
Go to google classroom and click on the assessment journal and start filling it.
-
Students mustMark as done
-
Kia ora
In this week we will continue working on our assessment journal. It will be the outcome evaluation and development. Our outcome will be making an educational phone app for MHJC students to use for their learning and for different subjects. You will be using the knowledge and skills you have learned after exploring tutorials of the MIT app inventer.
Learning Intentions: We are learning to (WALT)...
Understand the basics of computational thinking
understand how to code a basic app by following the beginners tutorials
understand how to write my design brief, specs and attributes.
Success Criteria: I can/have...
- use computational thinking to write a simple program on a computer using logical steps
- apply the knowledge and skills to design and code a phone app for MHJC students.
- write my design brief and specs for making an educational app.
Activities:
Start with beginners tutorials on the MIT app inventer website
Go to google classroom and click on the assessment journal and start filling it.
-
-
Students mustMark as done
Y9 Digital Technology
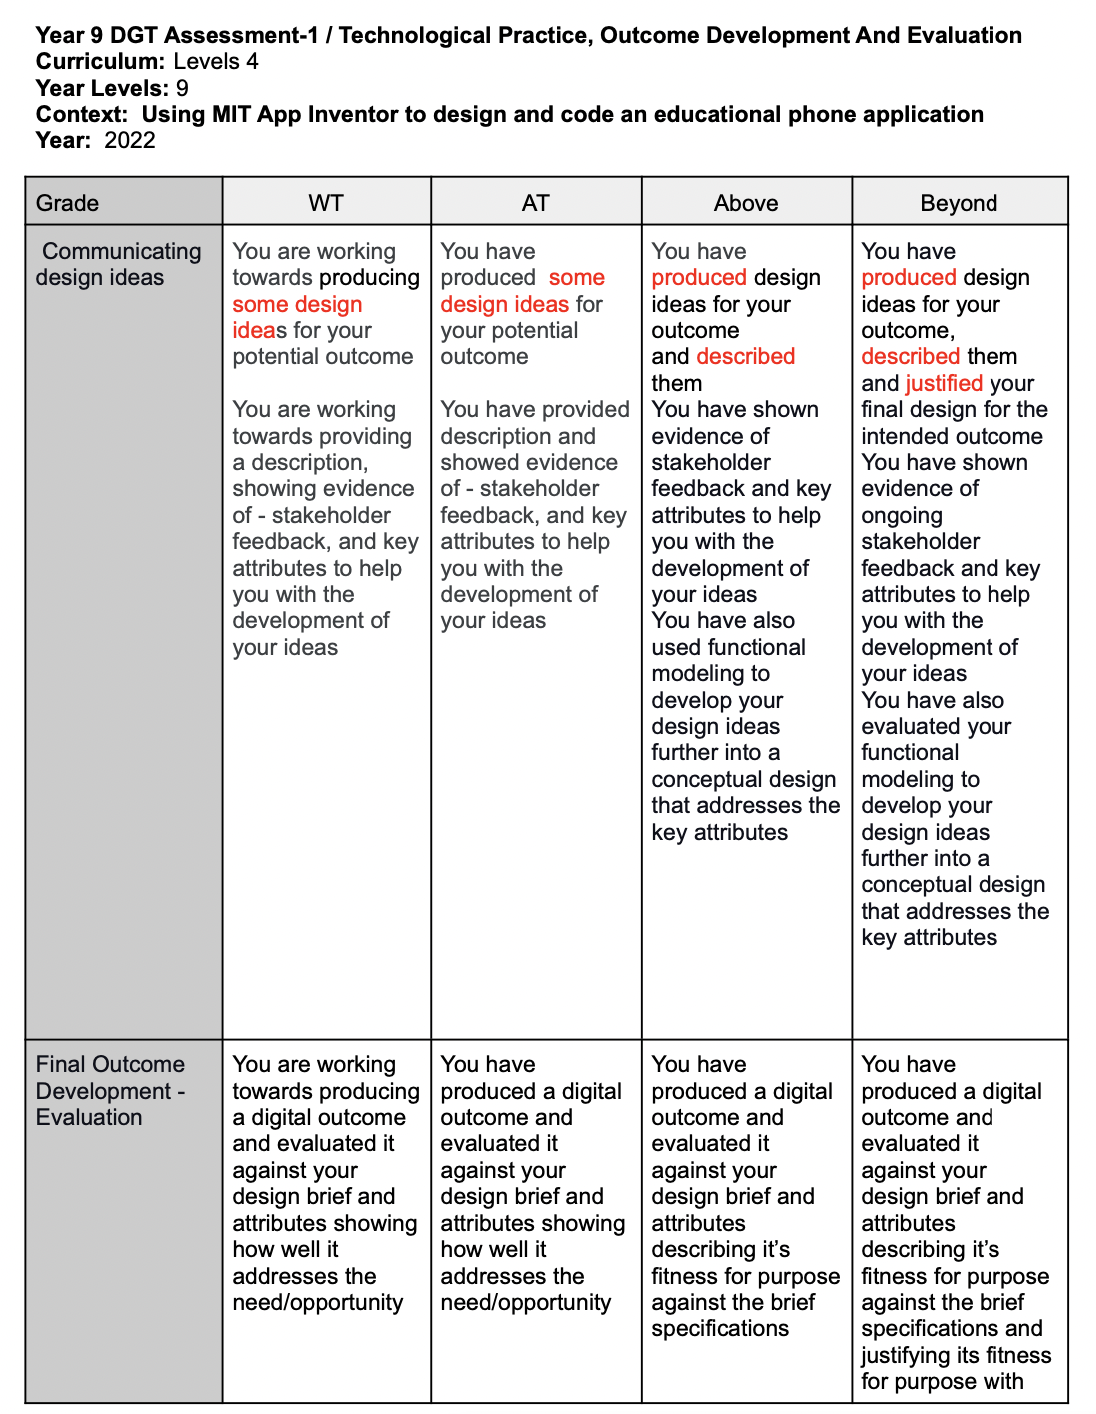
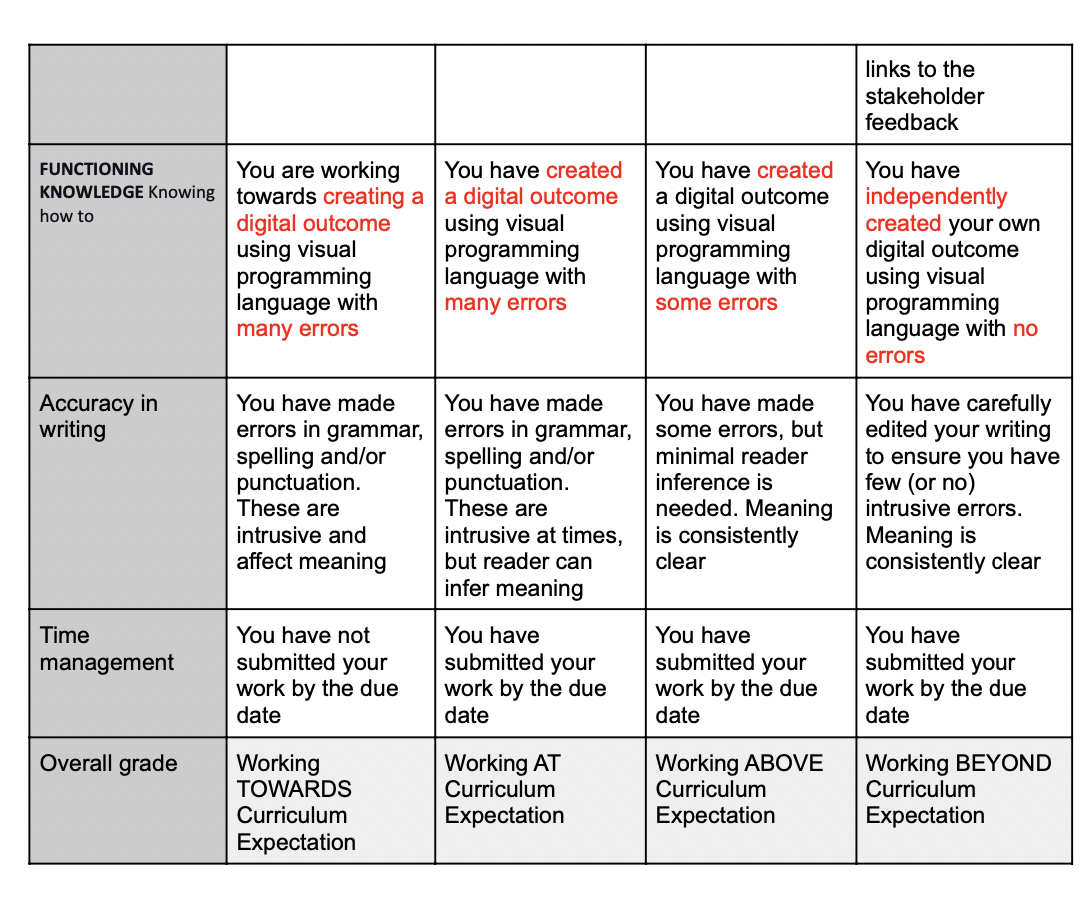
Assessing students understanding and application of making a digital outcome and coding skills
-
-
Kia ora...
Welcome back to a new term.
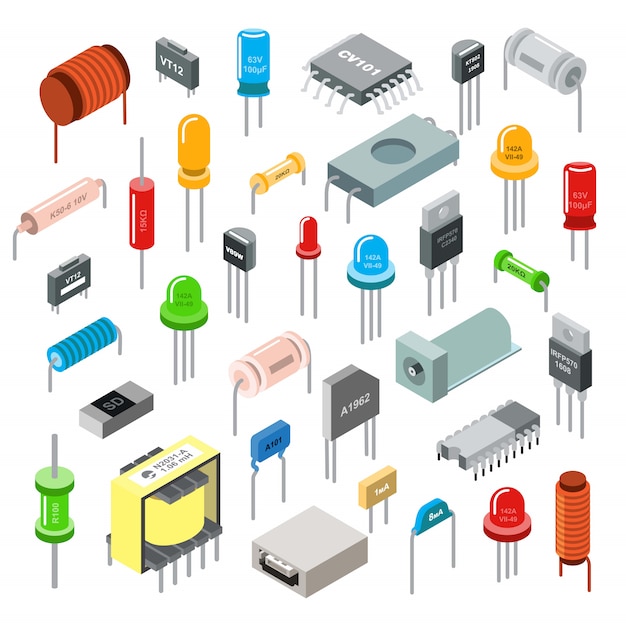
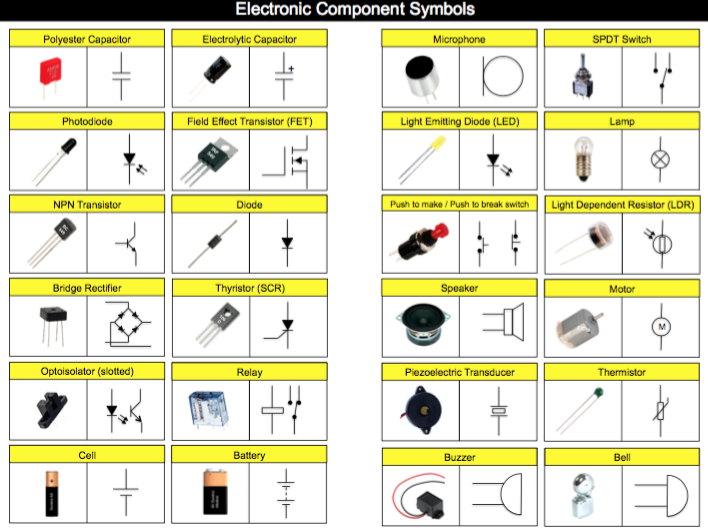
This week we will learn about electronic components and their symbols and use.
Success Criteria:
I can identify electronic components and their symbols in a circuit and explain their use.
Activities:
- Electronic components and their symbols activity on google classroom
Further Learning:
Extend your knowledge of electronic symbols by visiting Technology Student websiteLhttps://www.technologystudent.com/elec1/elecex.htm
-
Kia ora...
This week we will continue learning about electronic components and their symbols and use.
Success Criteria:
I can identify electronic components and their symbols in a circuit and explain their use.
Activities:
- Electronic components and their symbols activity on google classroom
Further Learning:
Extend your knowledge of electronic symbols by visiting Technology Student websiteLhttps://technologystudent.com/elec1/compn1.htm
https://technologystudent.com/elec1/compn2.htm
https://technologystudent.com/elec1/compn3.htm
-
Kia ora...
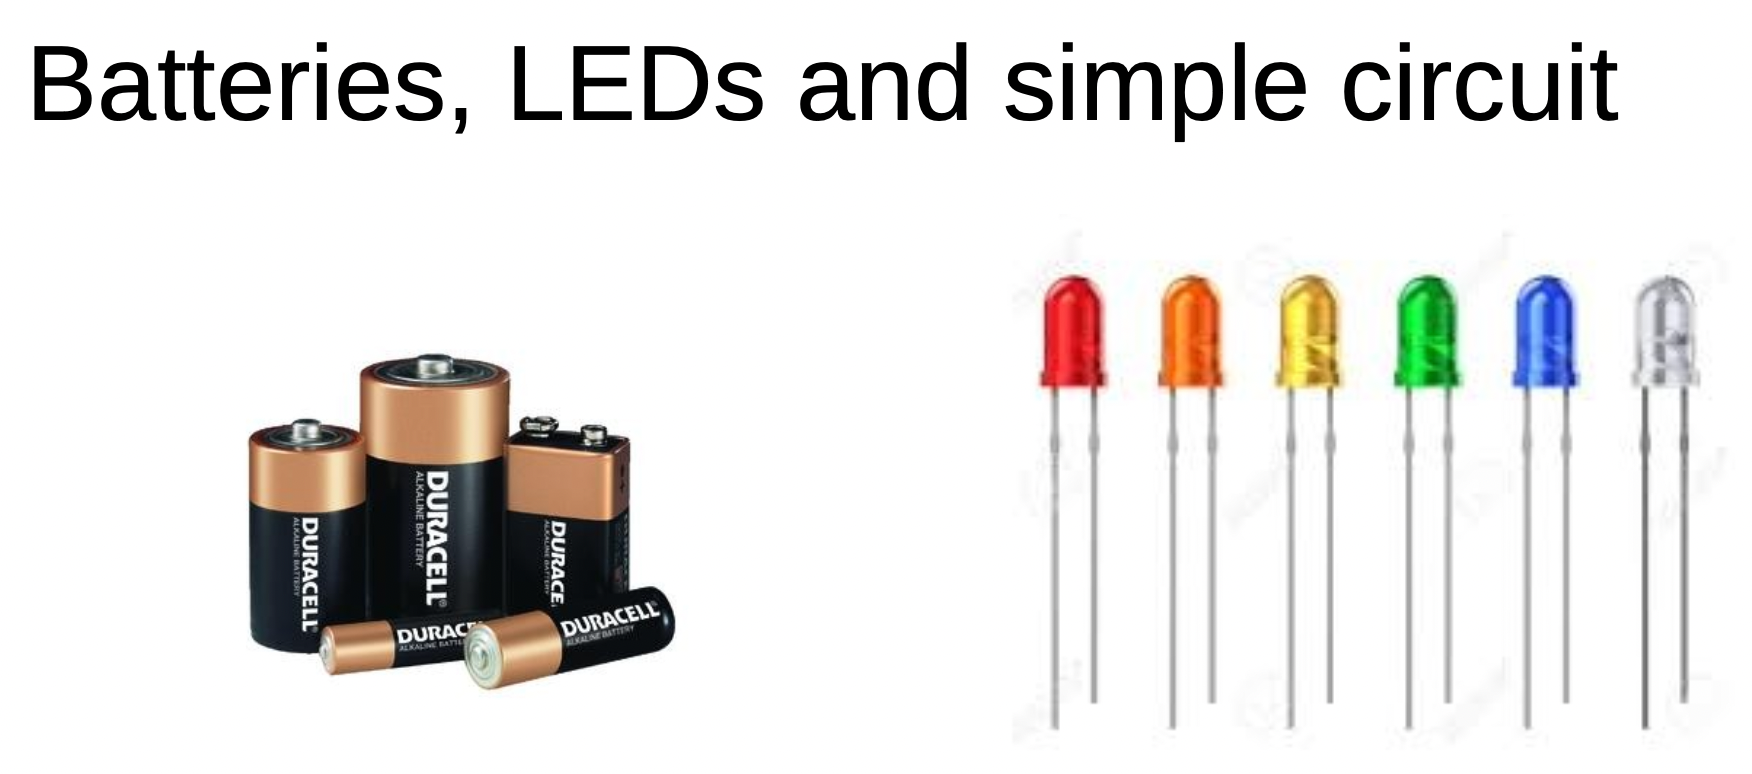
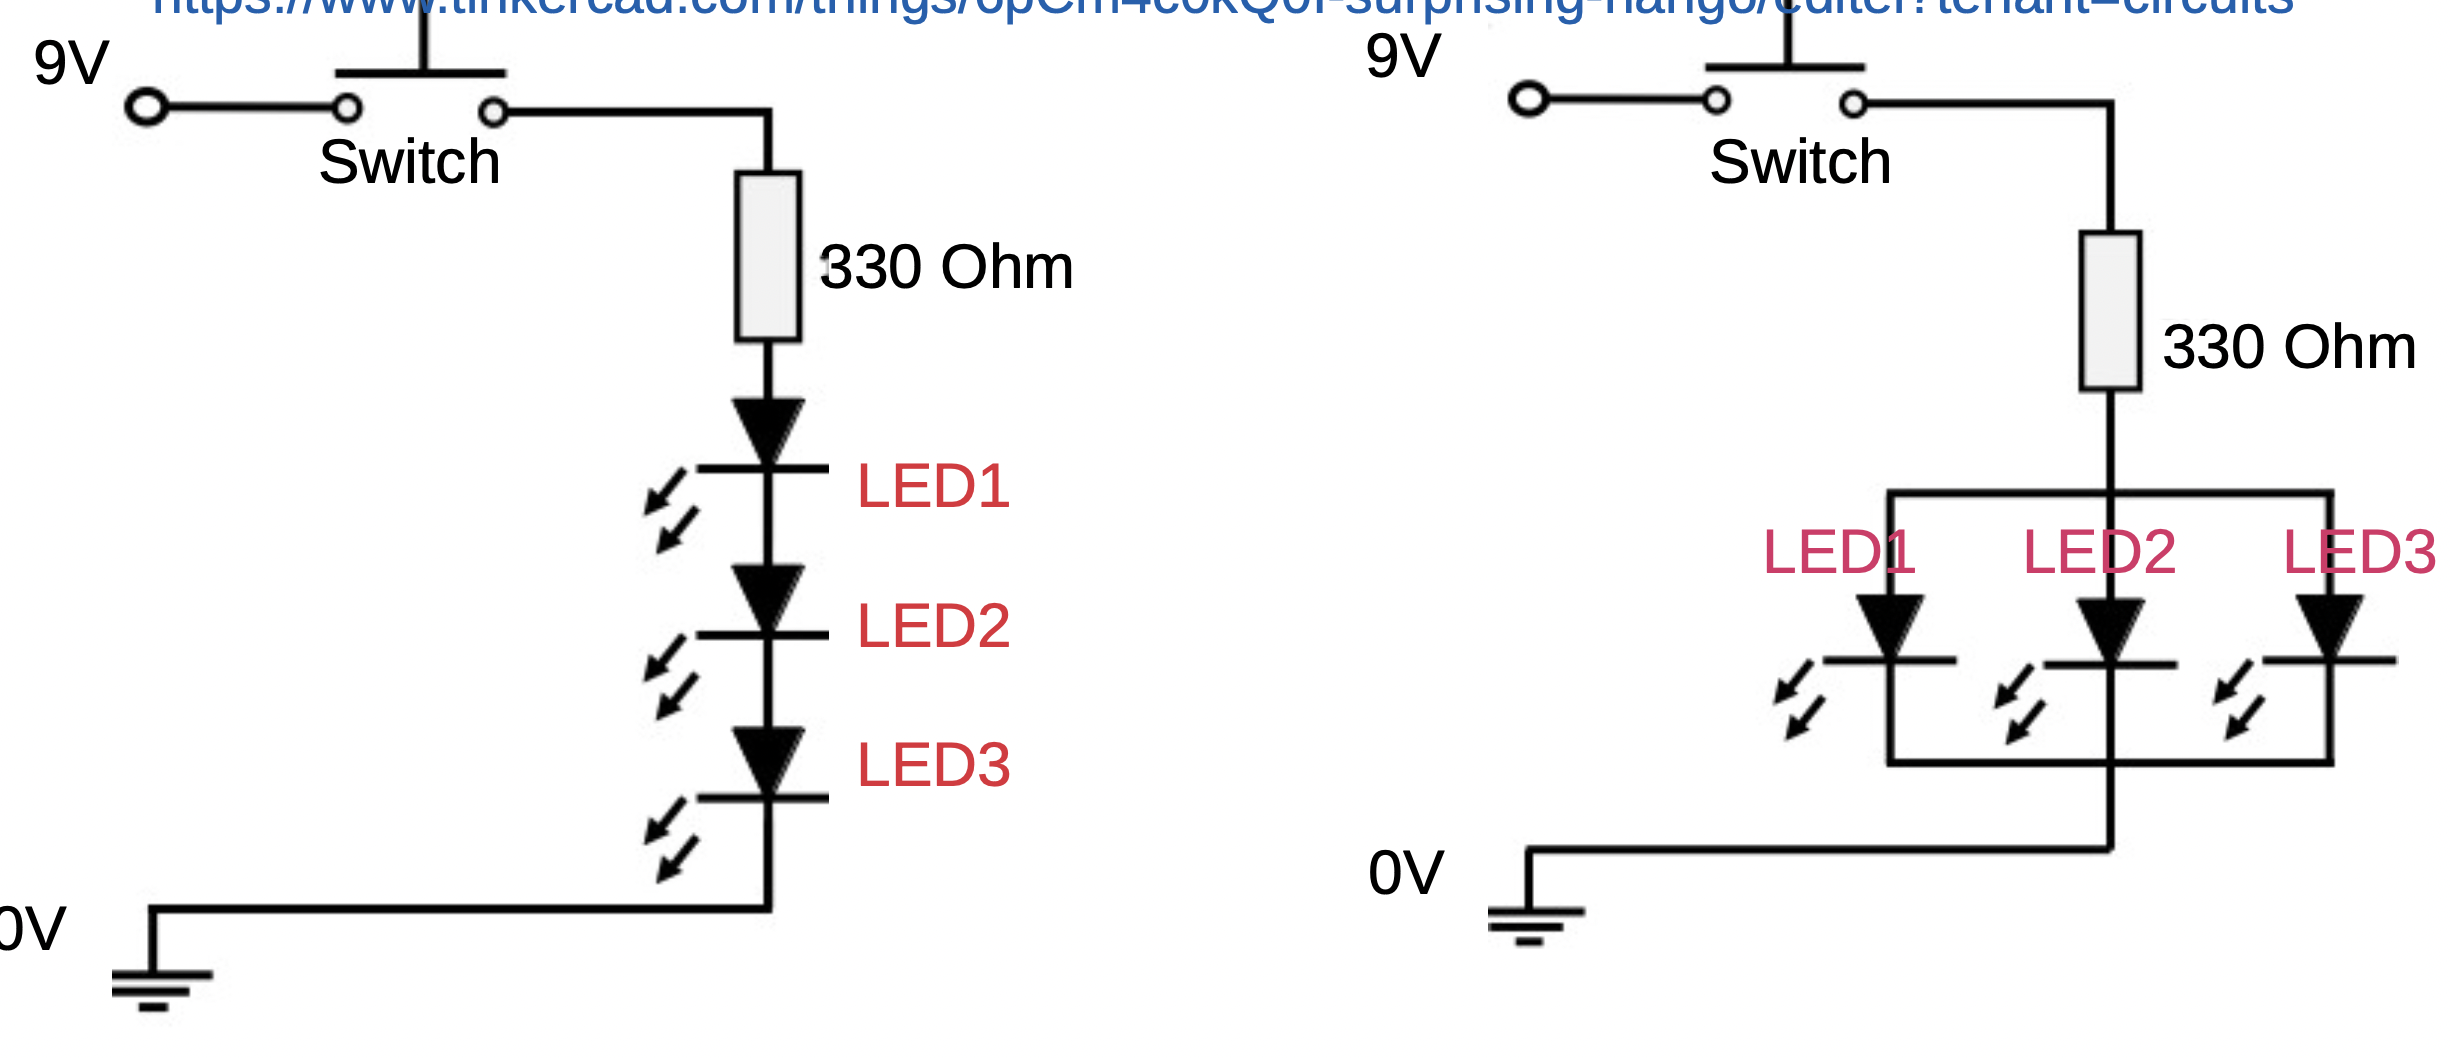
This week we will start to construct our firs LED circuit using Tinkercar software and then with electronic components with breadboard. we will also use soldering to make an actual circuit on cardboard.

Success Criteria:
1- I can draw a simple LED circuit on Tinkercad : https://www.tinkercad.com/things/6pCm4c0kQ0I-surprising-hango/editel?tenant=circuits
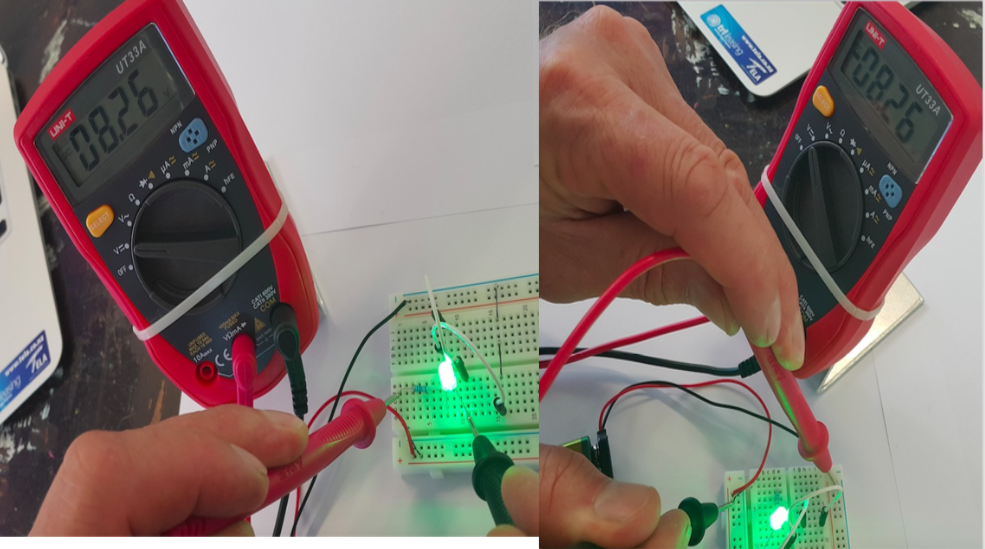
2- I can construct a simple LED circuit using breadboard and electronic component
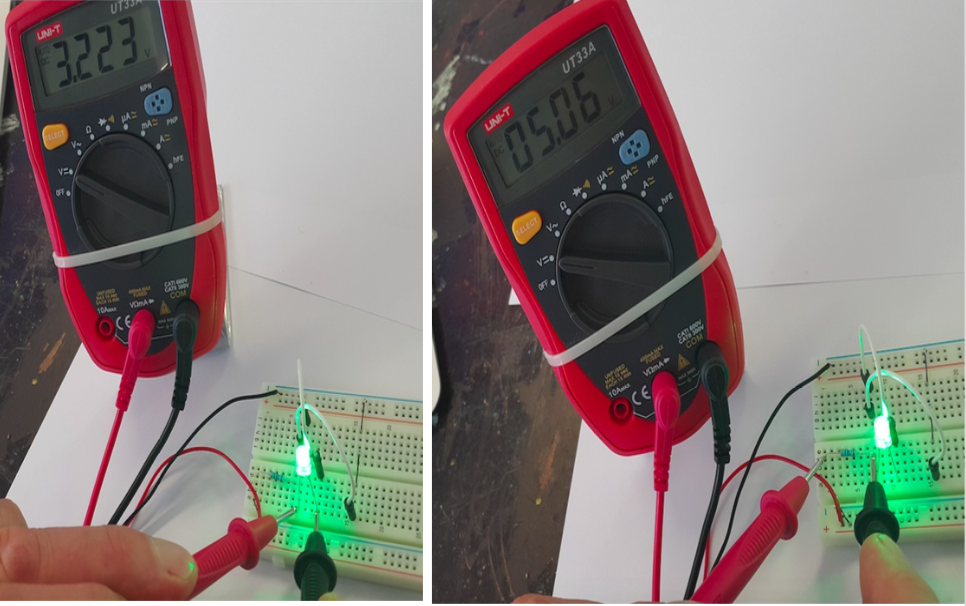
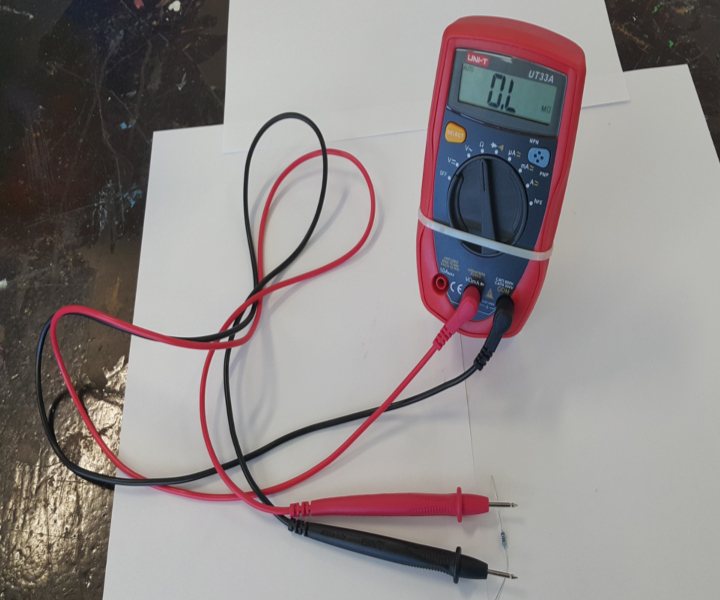
3- I can use the multimeter to measure voltage, resistance, current and continuity circuits
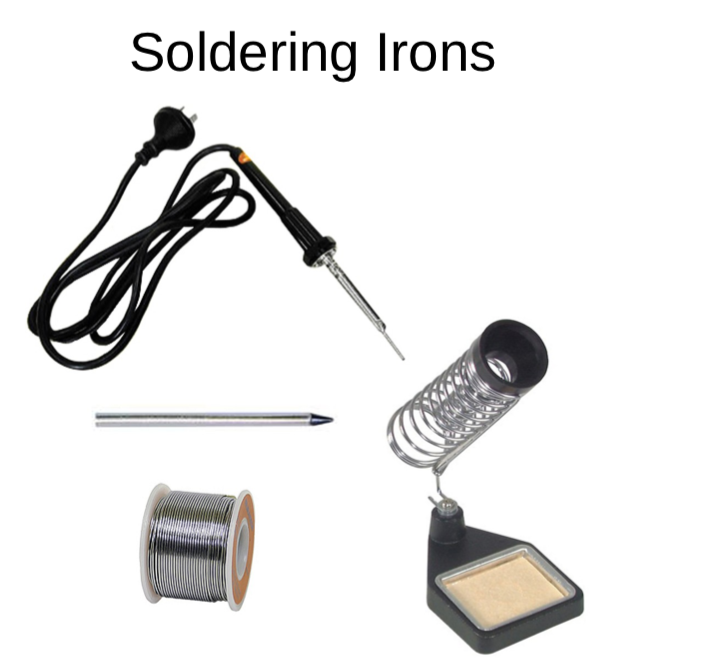
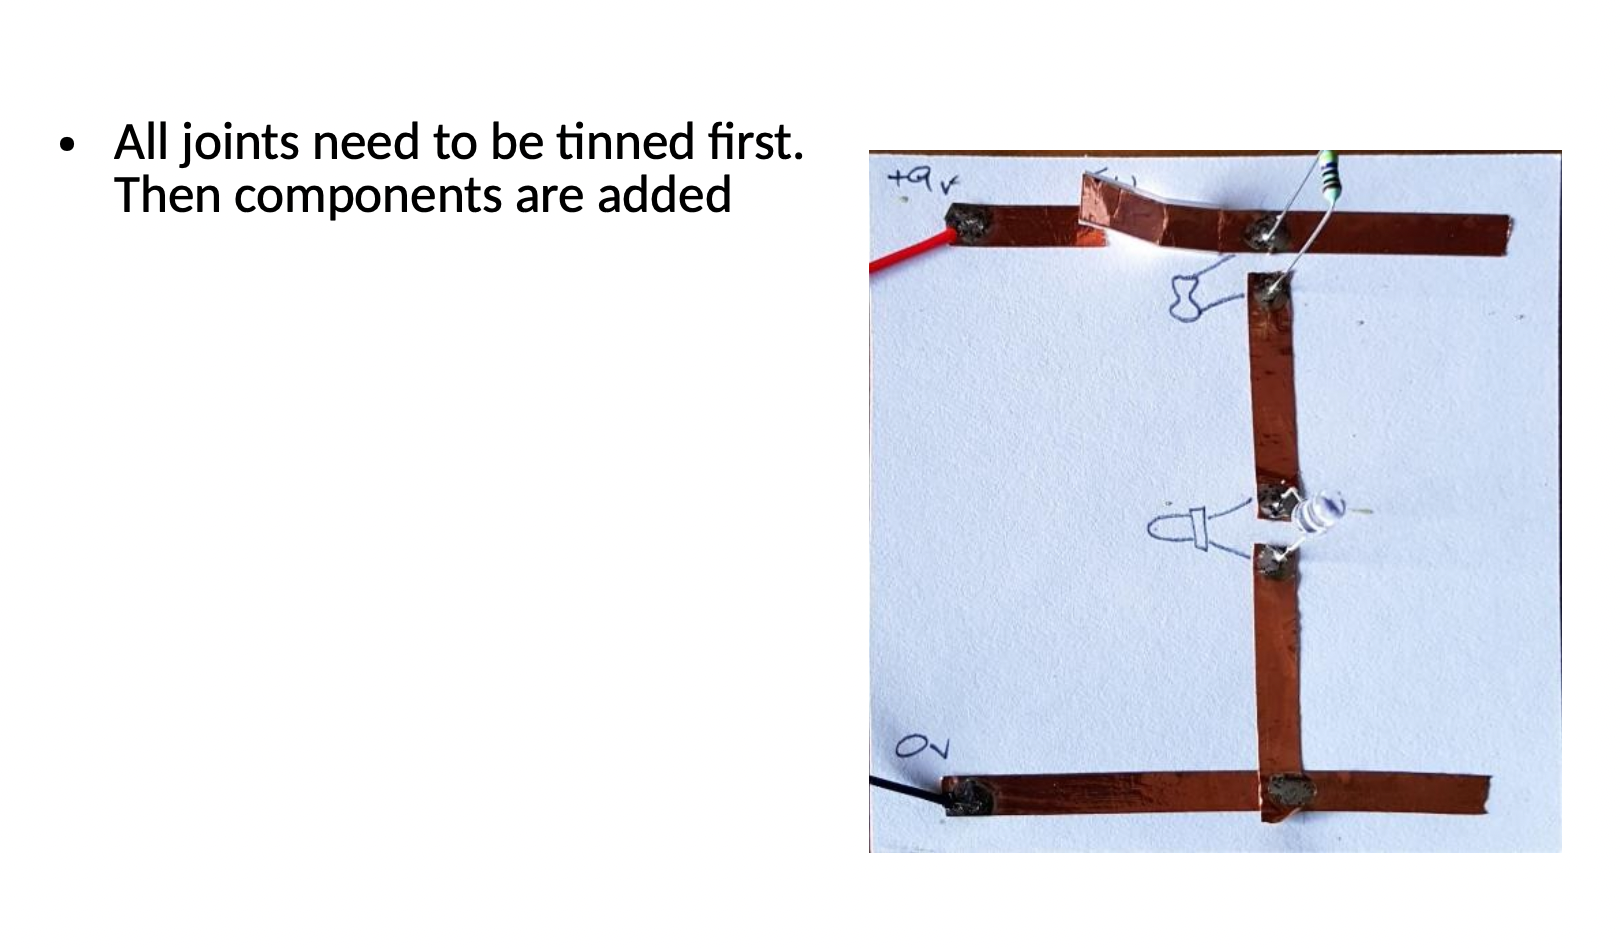
4- I can solder correctly and safely.
Activities:
- Link to Simple Electric circuit :
- Visit Simple LED circuit in the introduction to digital technology document.
- Practical activity of soldering
-
Kia ora...
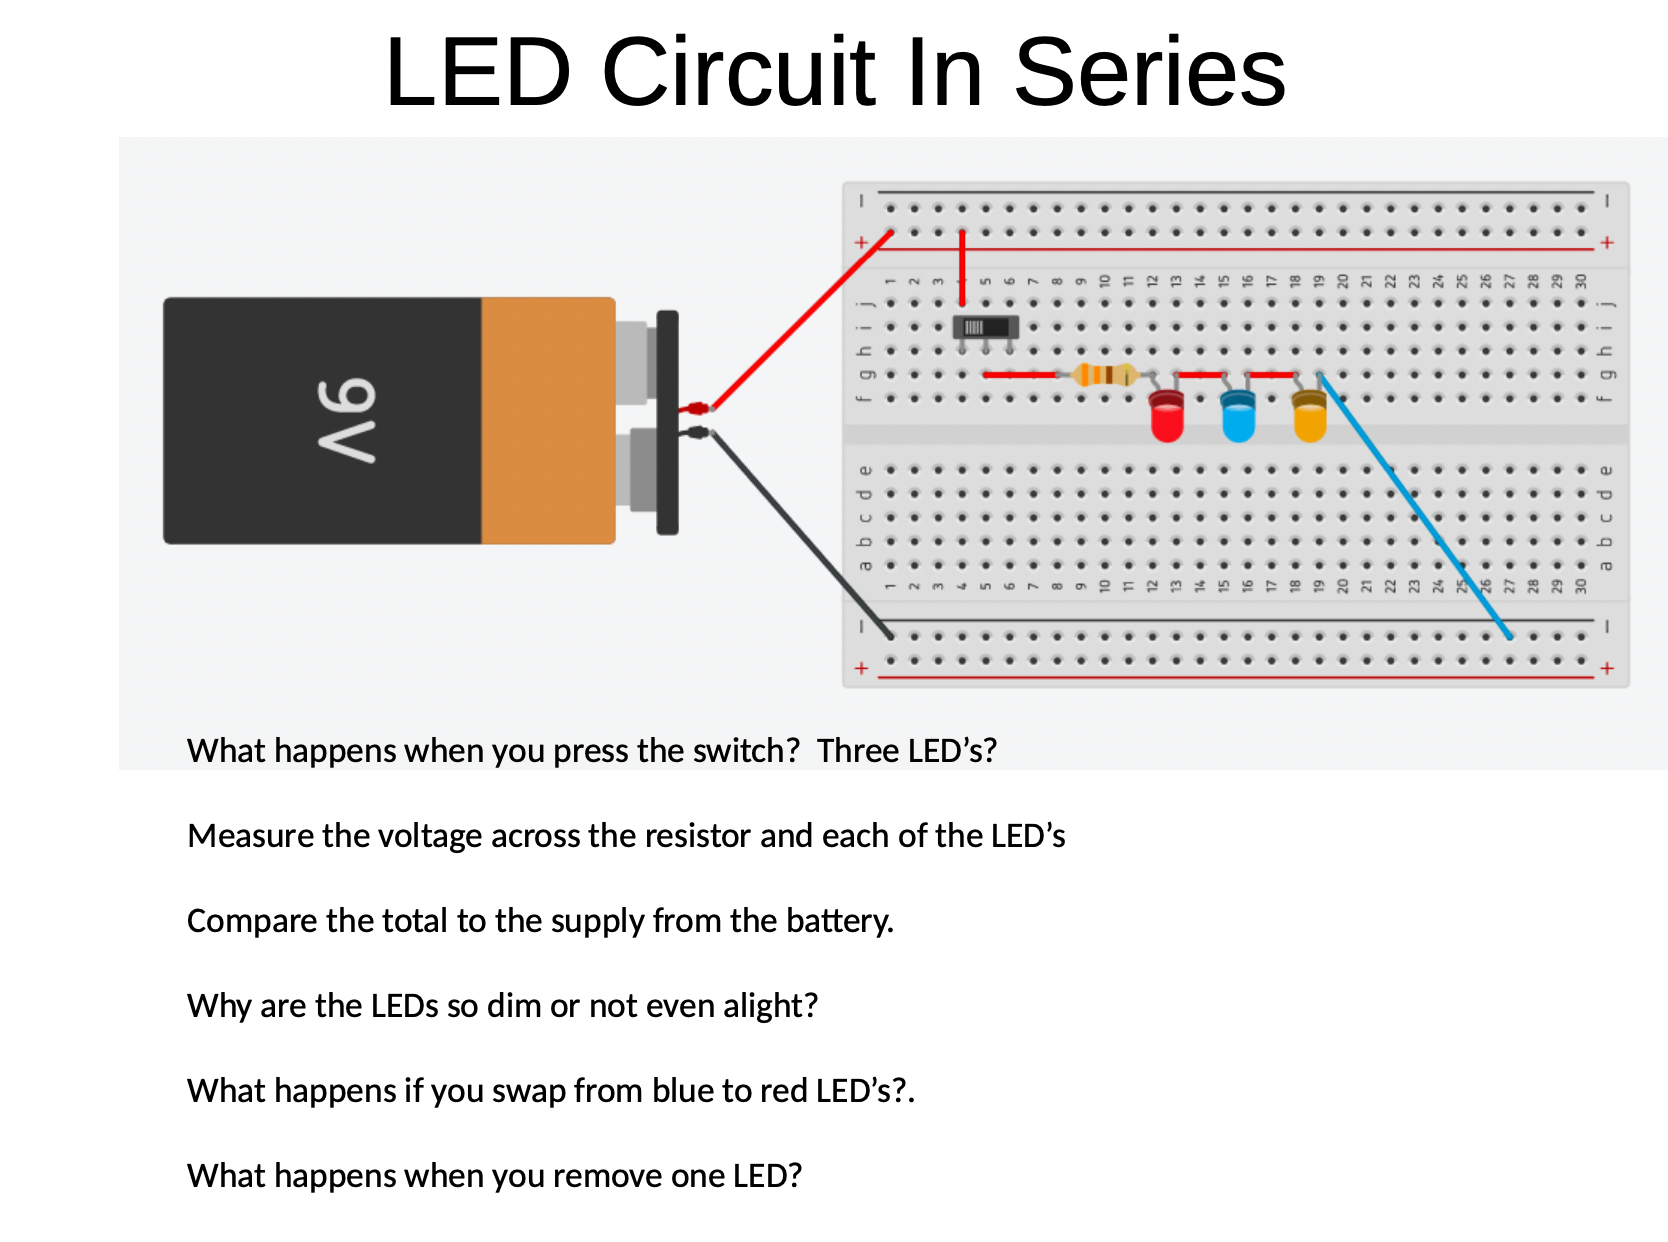
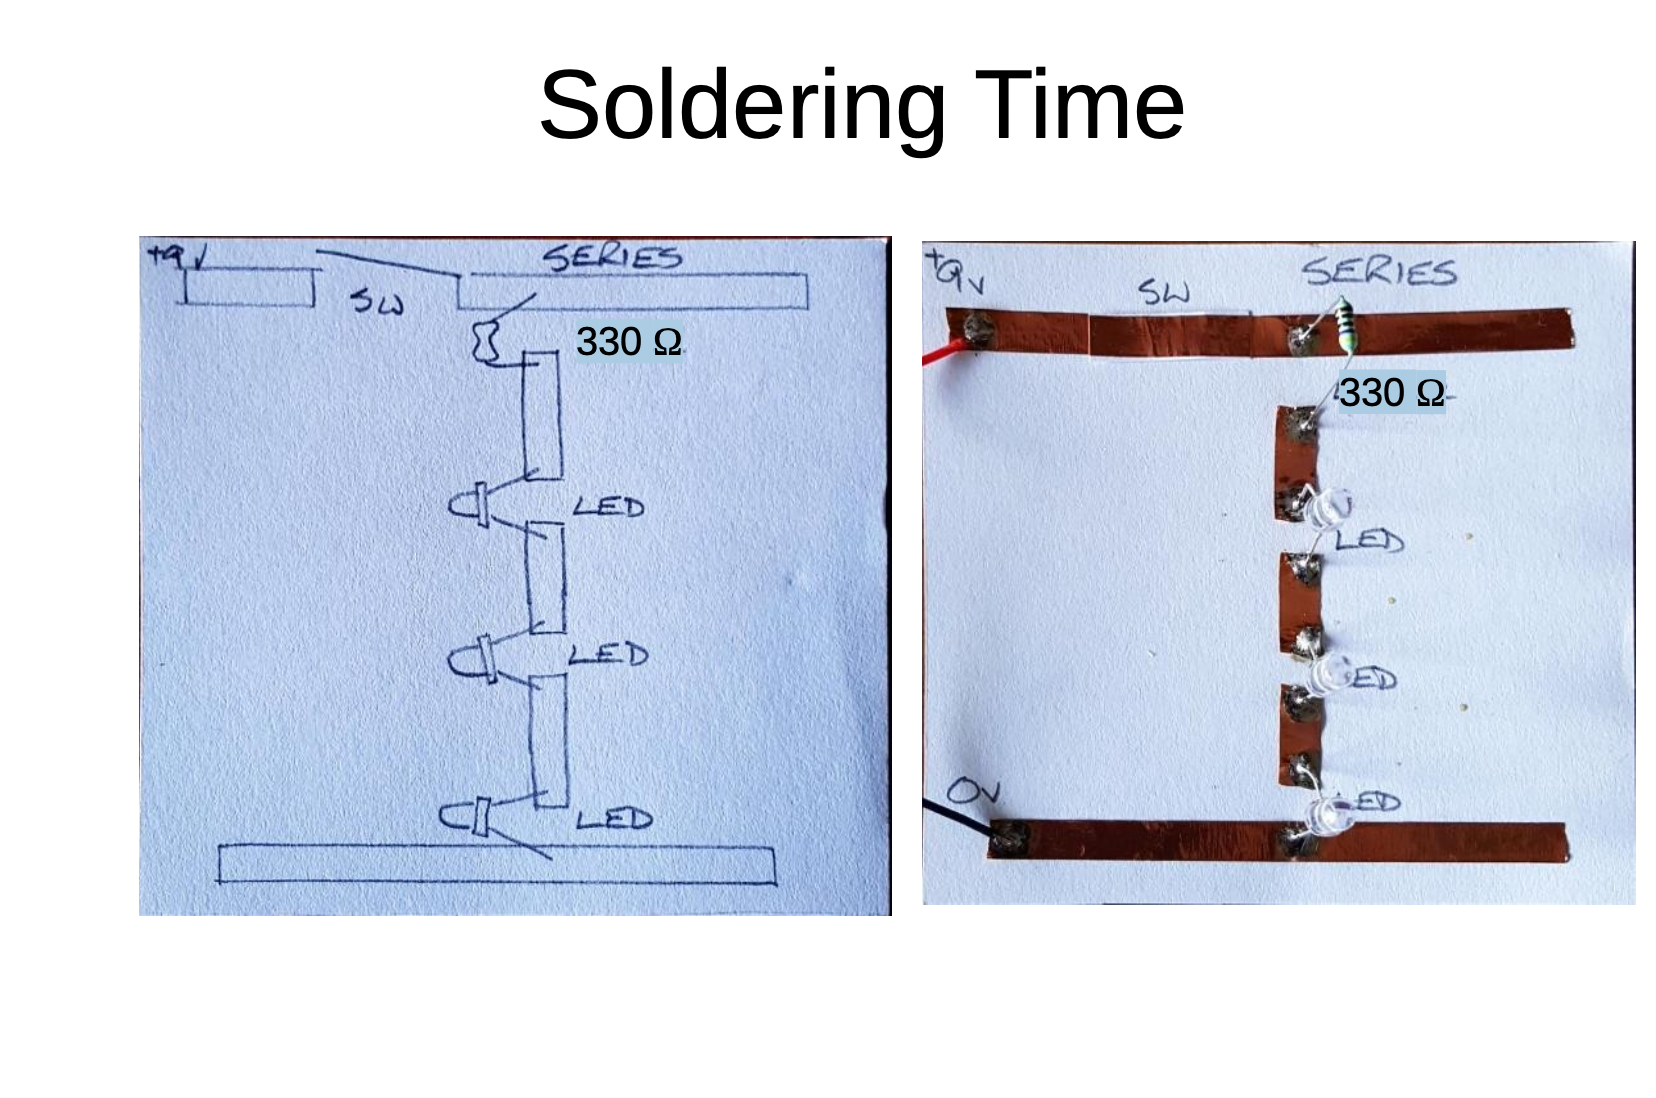
This week we will buiild our series circuit using Tinkercar software and then with electronic components with breadboard. we will also use soldering to make an actual circuit on cardboard.
Success Criteria:
1- I can draw a simple LED circuit on Tinkercad : https://www.tinkercad.com/things/6pCm4c0kQ0I-surprising-hango/editel?tenant=circuits
2- I can construct a simple LED circuit using breadboard and electronic component
3- I can use the multimeter to measure voltage, resistance, current and continuity circuits
4- I can solder correctly and safely.
5-I can construct Series circuit using 3LEDs and measure the voltage accross them
Activities:
- Link to Simple Electric circuit :
- Construct the series circuit using Tinkercad software then build on actual breadboard and components.
- Practical activity of soldering
-
Kia ora...
This week we will buiild our series circuit using Tinkercar software and then with electronic components with breadboard. we will also use soldering to make an actual circuit on cardboard.
Success Criteria:
1- I can draw a simple LED circuit on Tinkercad : https://www.tinkercad.com/things/6pCm4c0kQ0I-surprising-hango/editel?tenant=circuits
2- I can construct a simple LED circuit using breadboard and electronic component
3- I can use the multimeter to measure voltage, resistance, current and continuity circuits
4- I can solder correctly and safely.
5-I can construct Series circuit using 3LEDs and measure the voltage accross them
Activities:
- Construct the series and parallel circuit using Tinkercad software then build on actual breadboard and components.
- Practical activity of soldering

-
Kia ora...
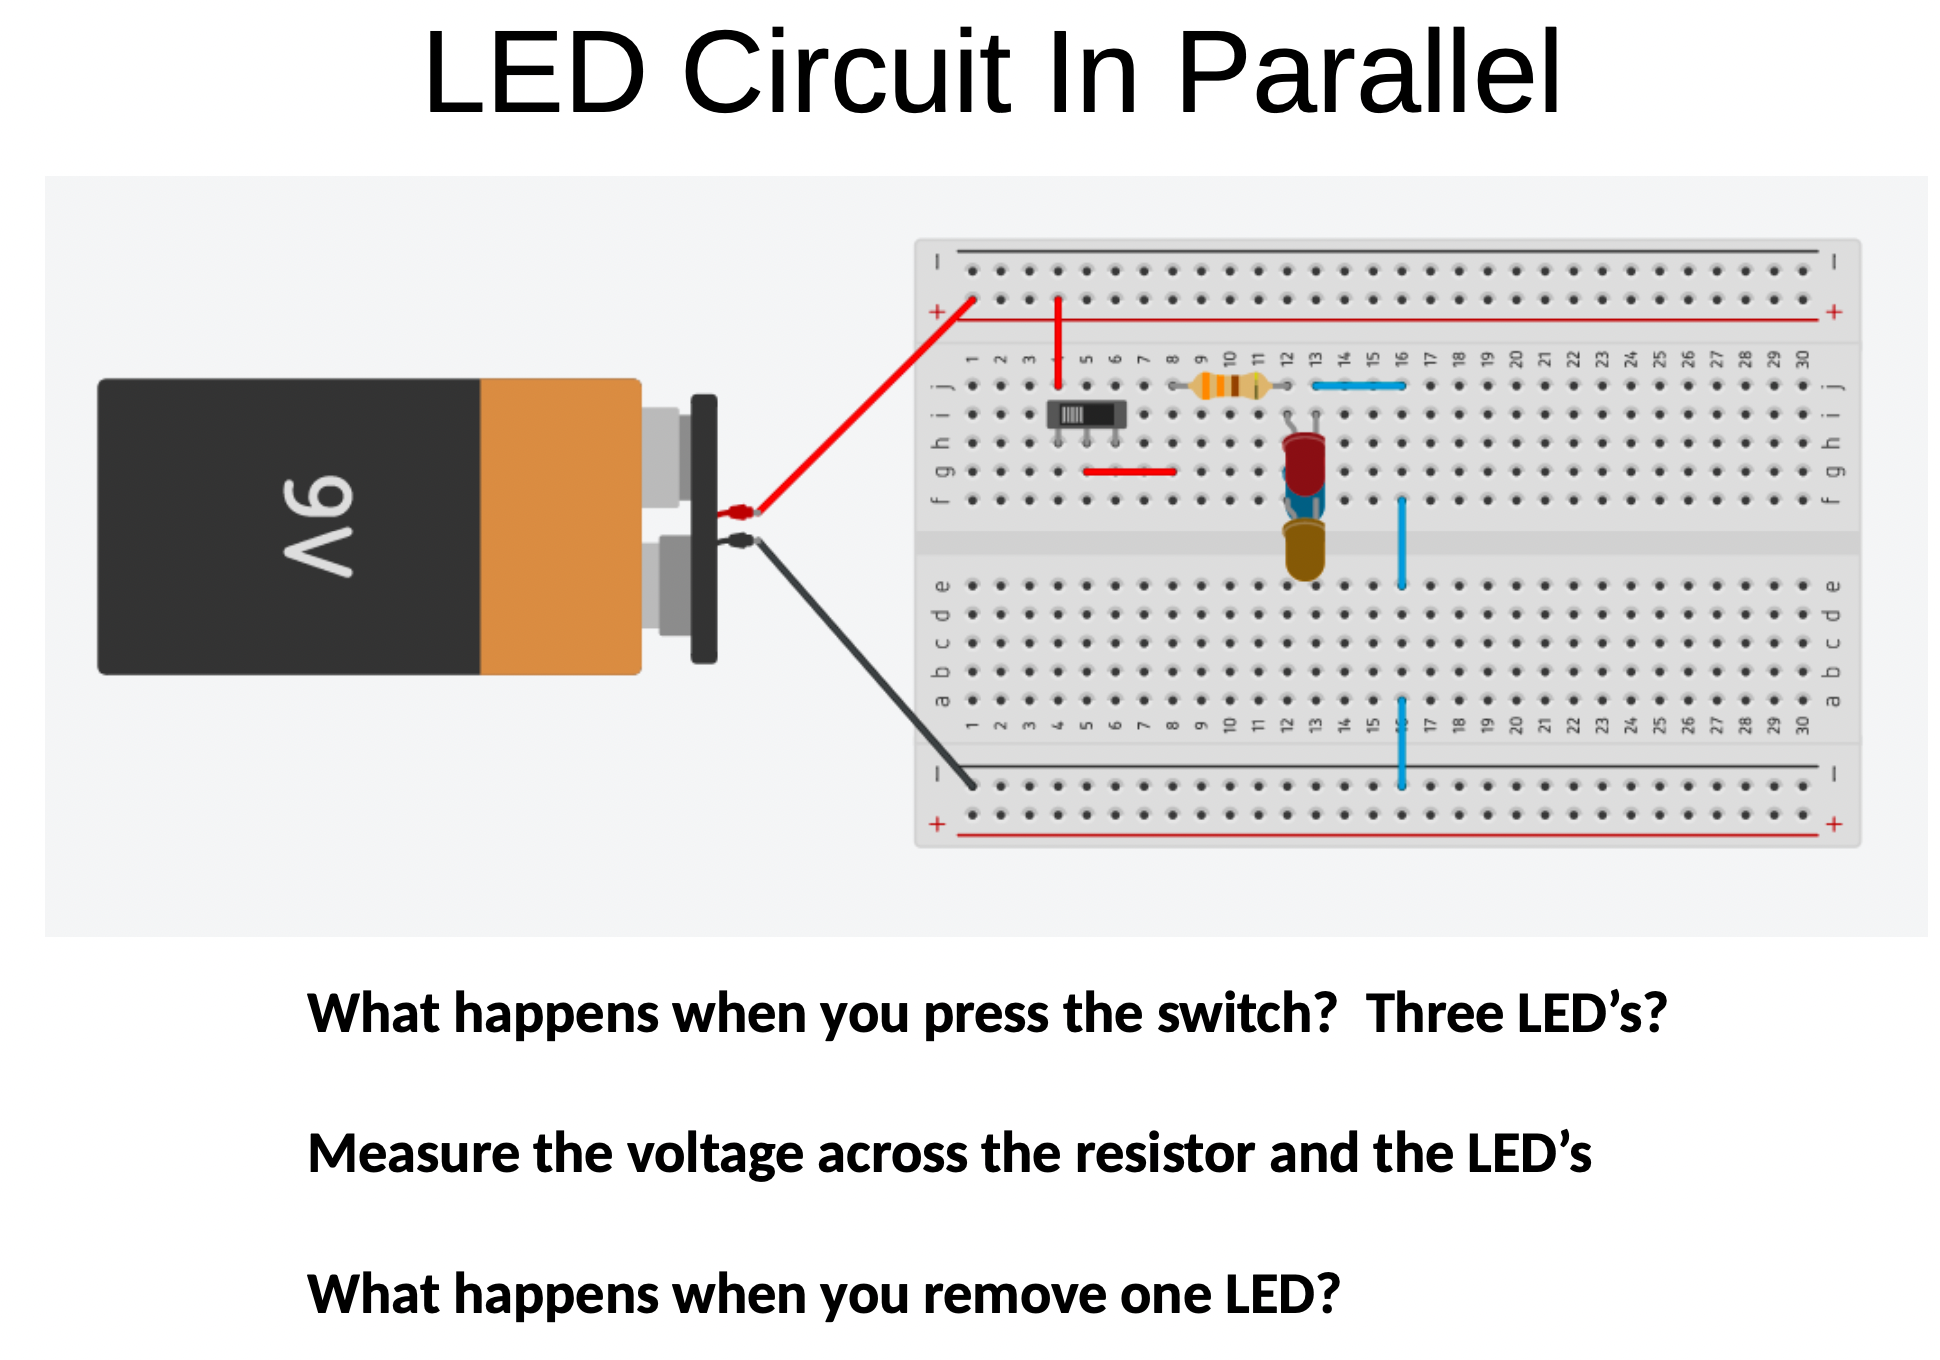
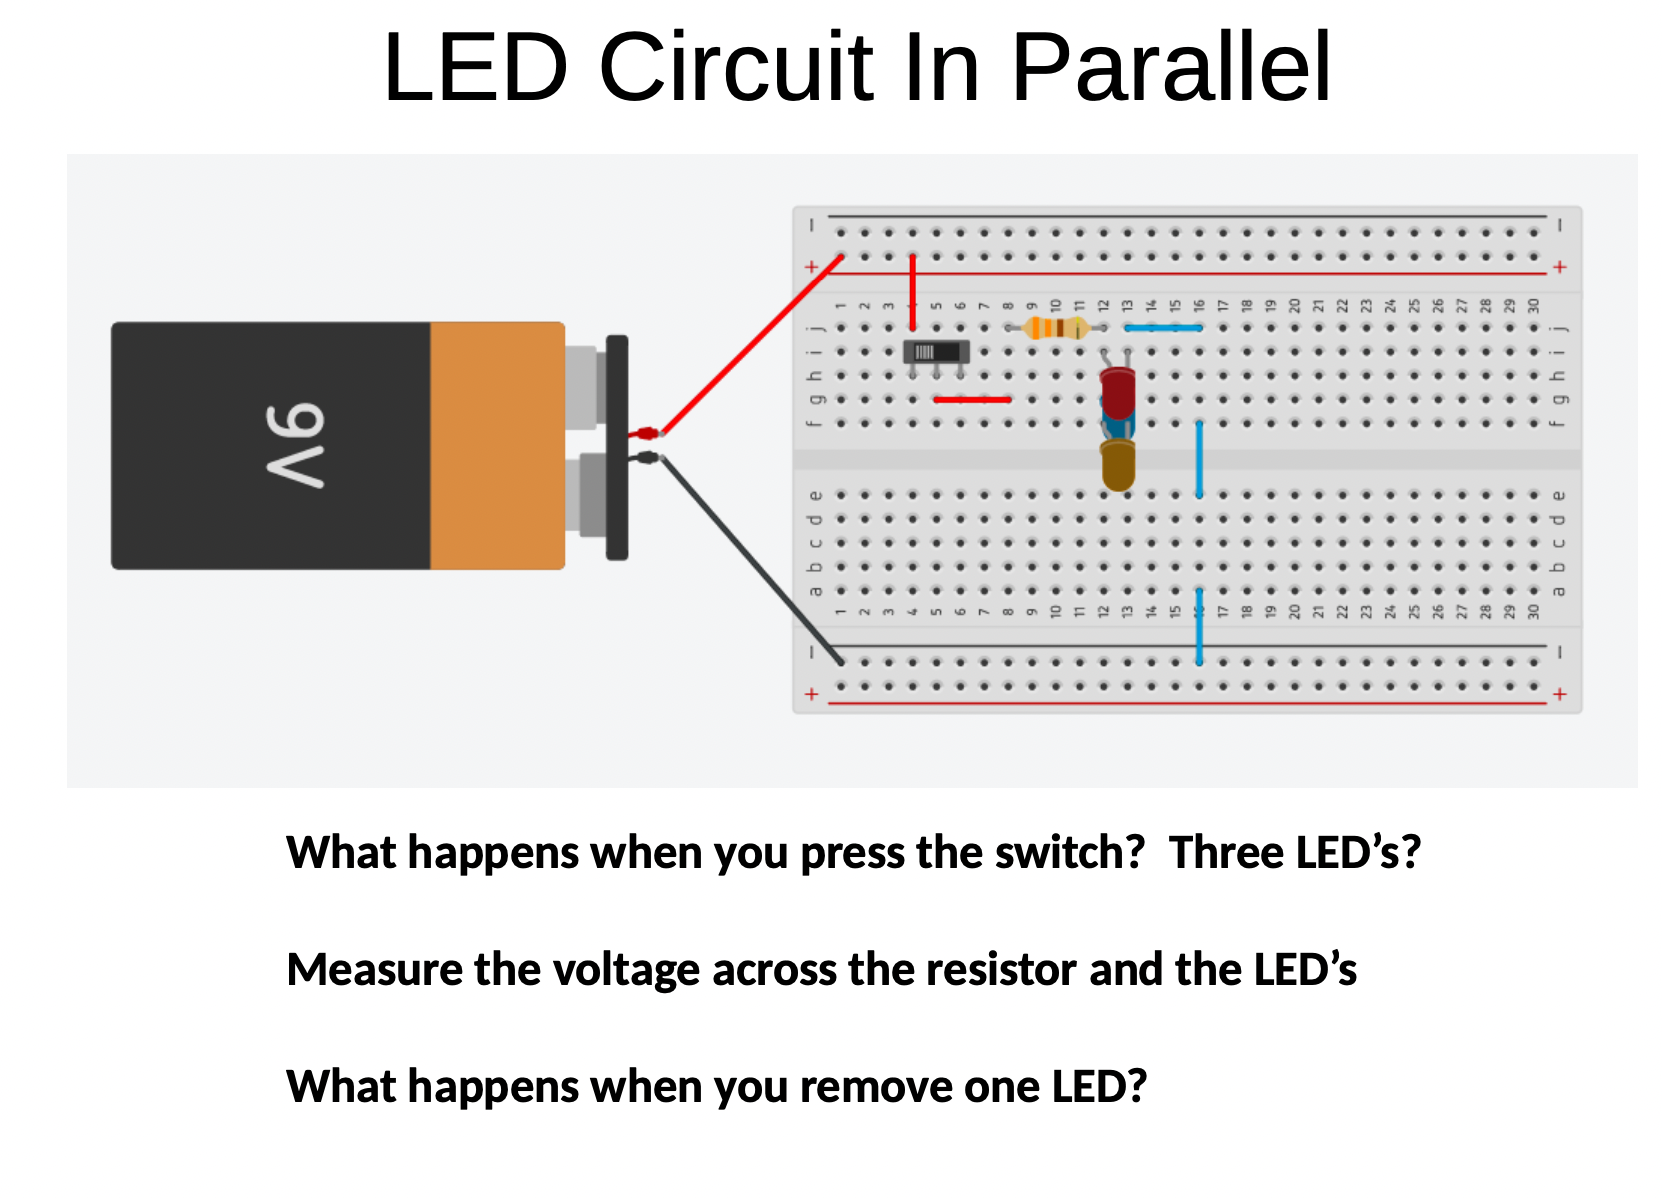
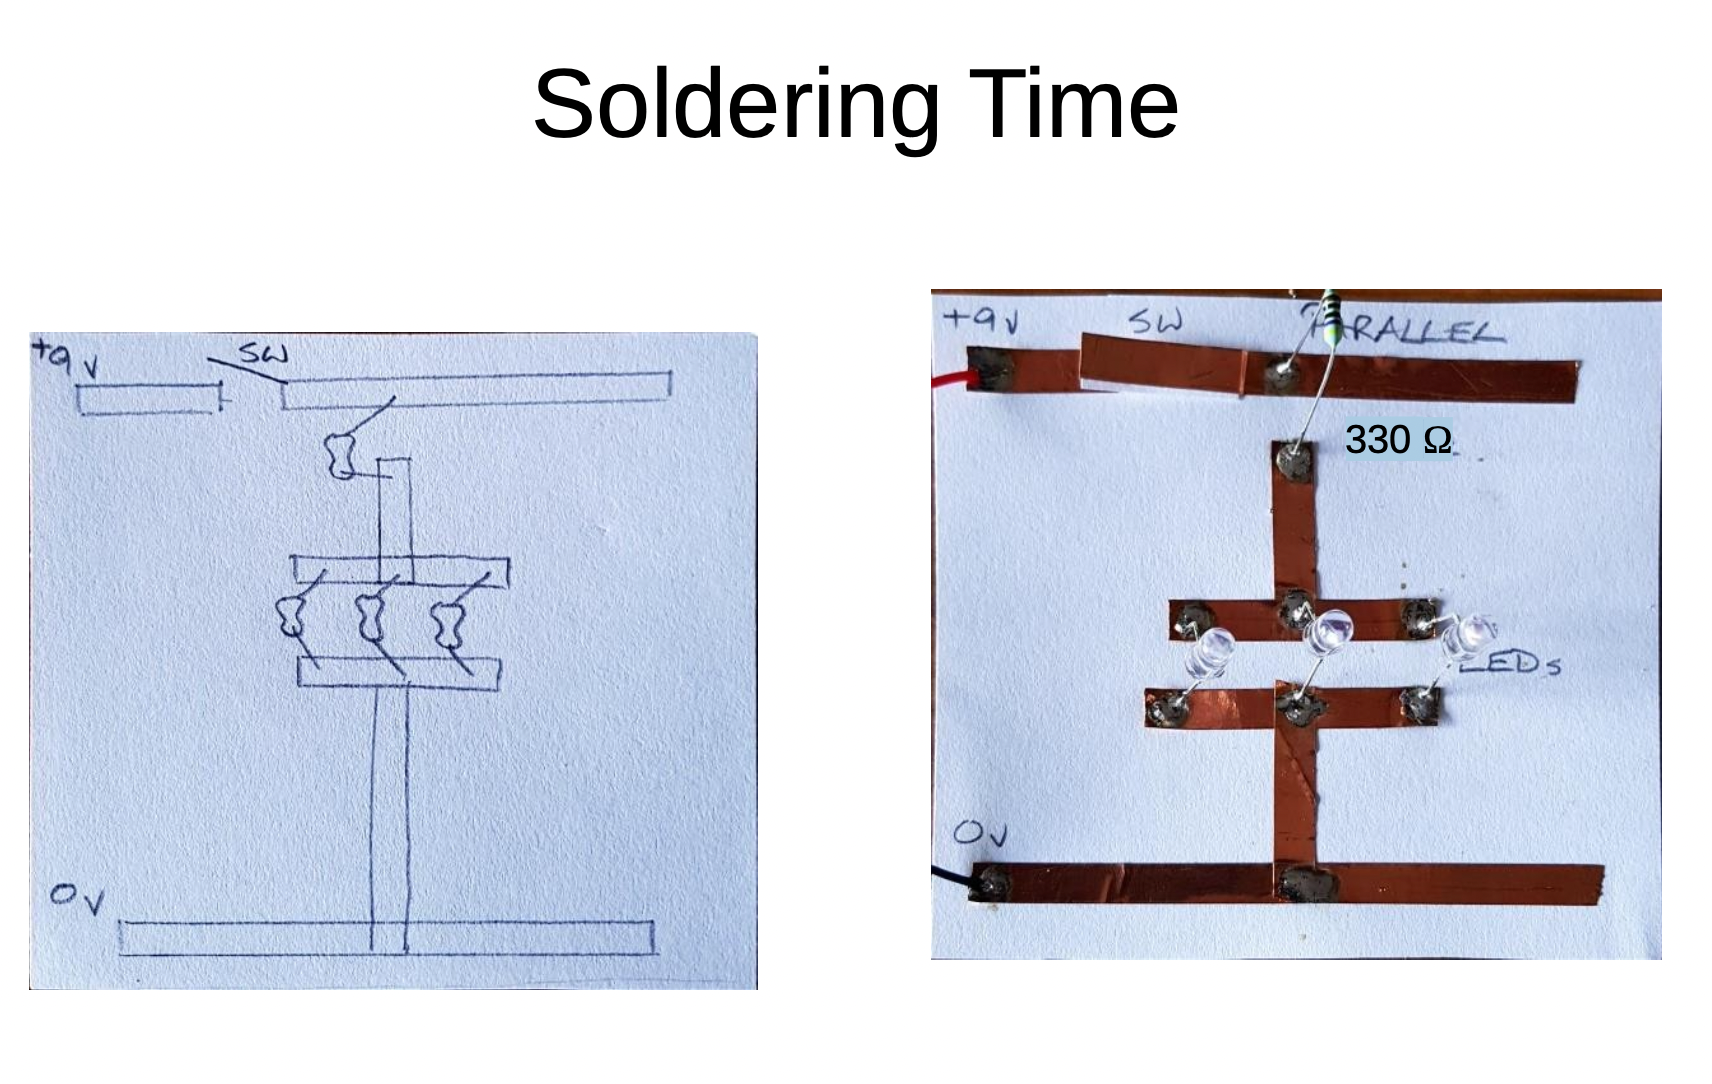
This week we will buiild our parallel circuit using Tinkercar software and then with electronic components with breadboard. we will also use soldering to make an actual circuit on cardboard.
Success Criteria:
1- I can construct a simple parallel and series LED circuit using breadboard and electronic component
2- I can use the multimeter to measure voltage, resistance, current and continuity circuits
3- I can solder correctly and safely.
4-I can construct Series circuit using 3LEDs and measure the voltage accross them
Activities:
- Link to Simple Electric circuit :
- Construct the series circuit using Tinkercad software then build on actual breadboard and components.
- Practical activity of soldering
-
Kia ora...
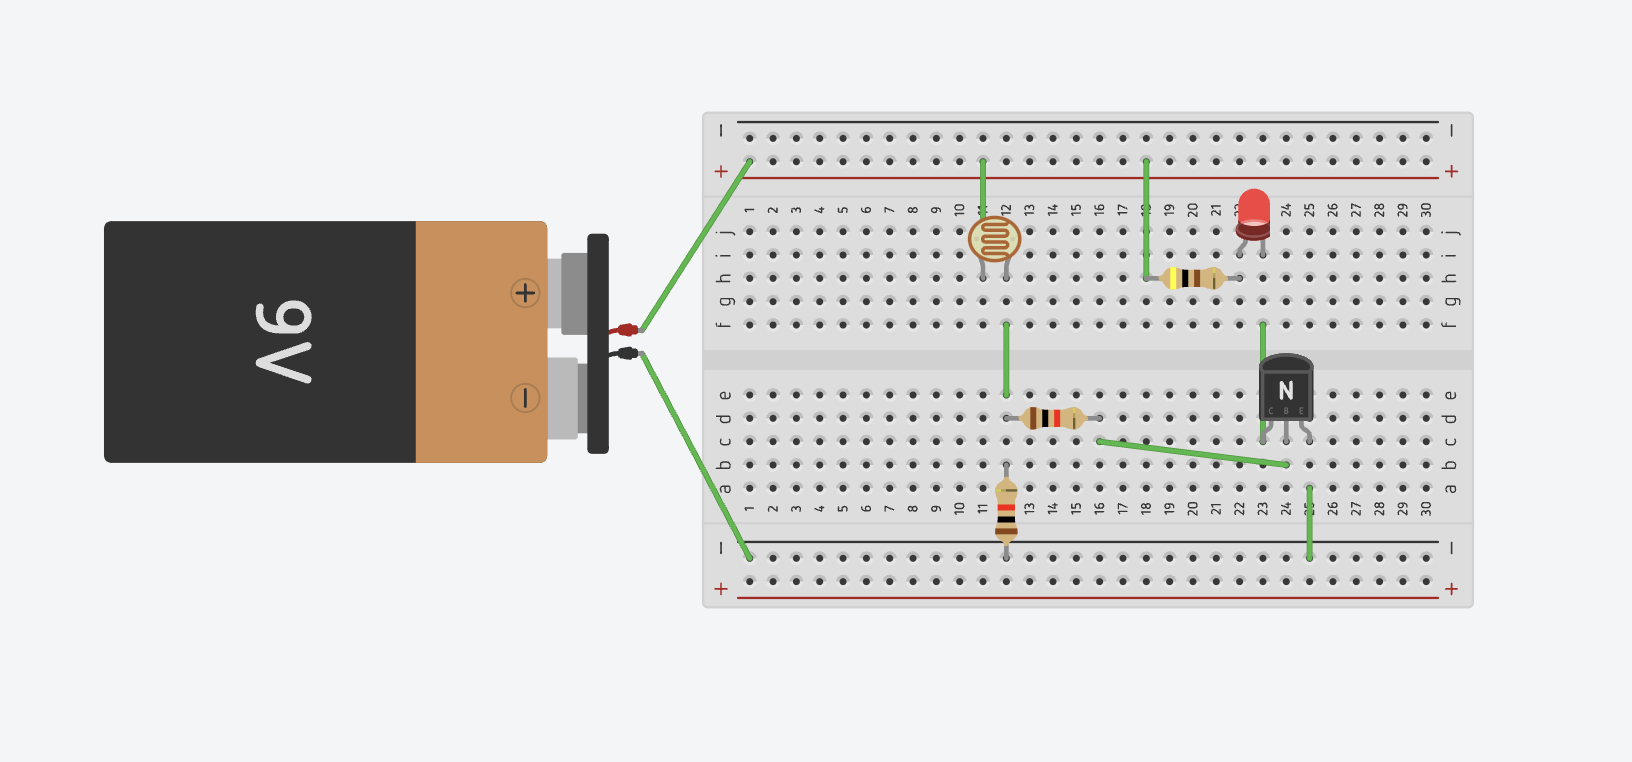
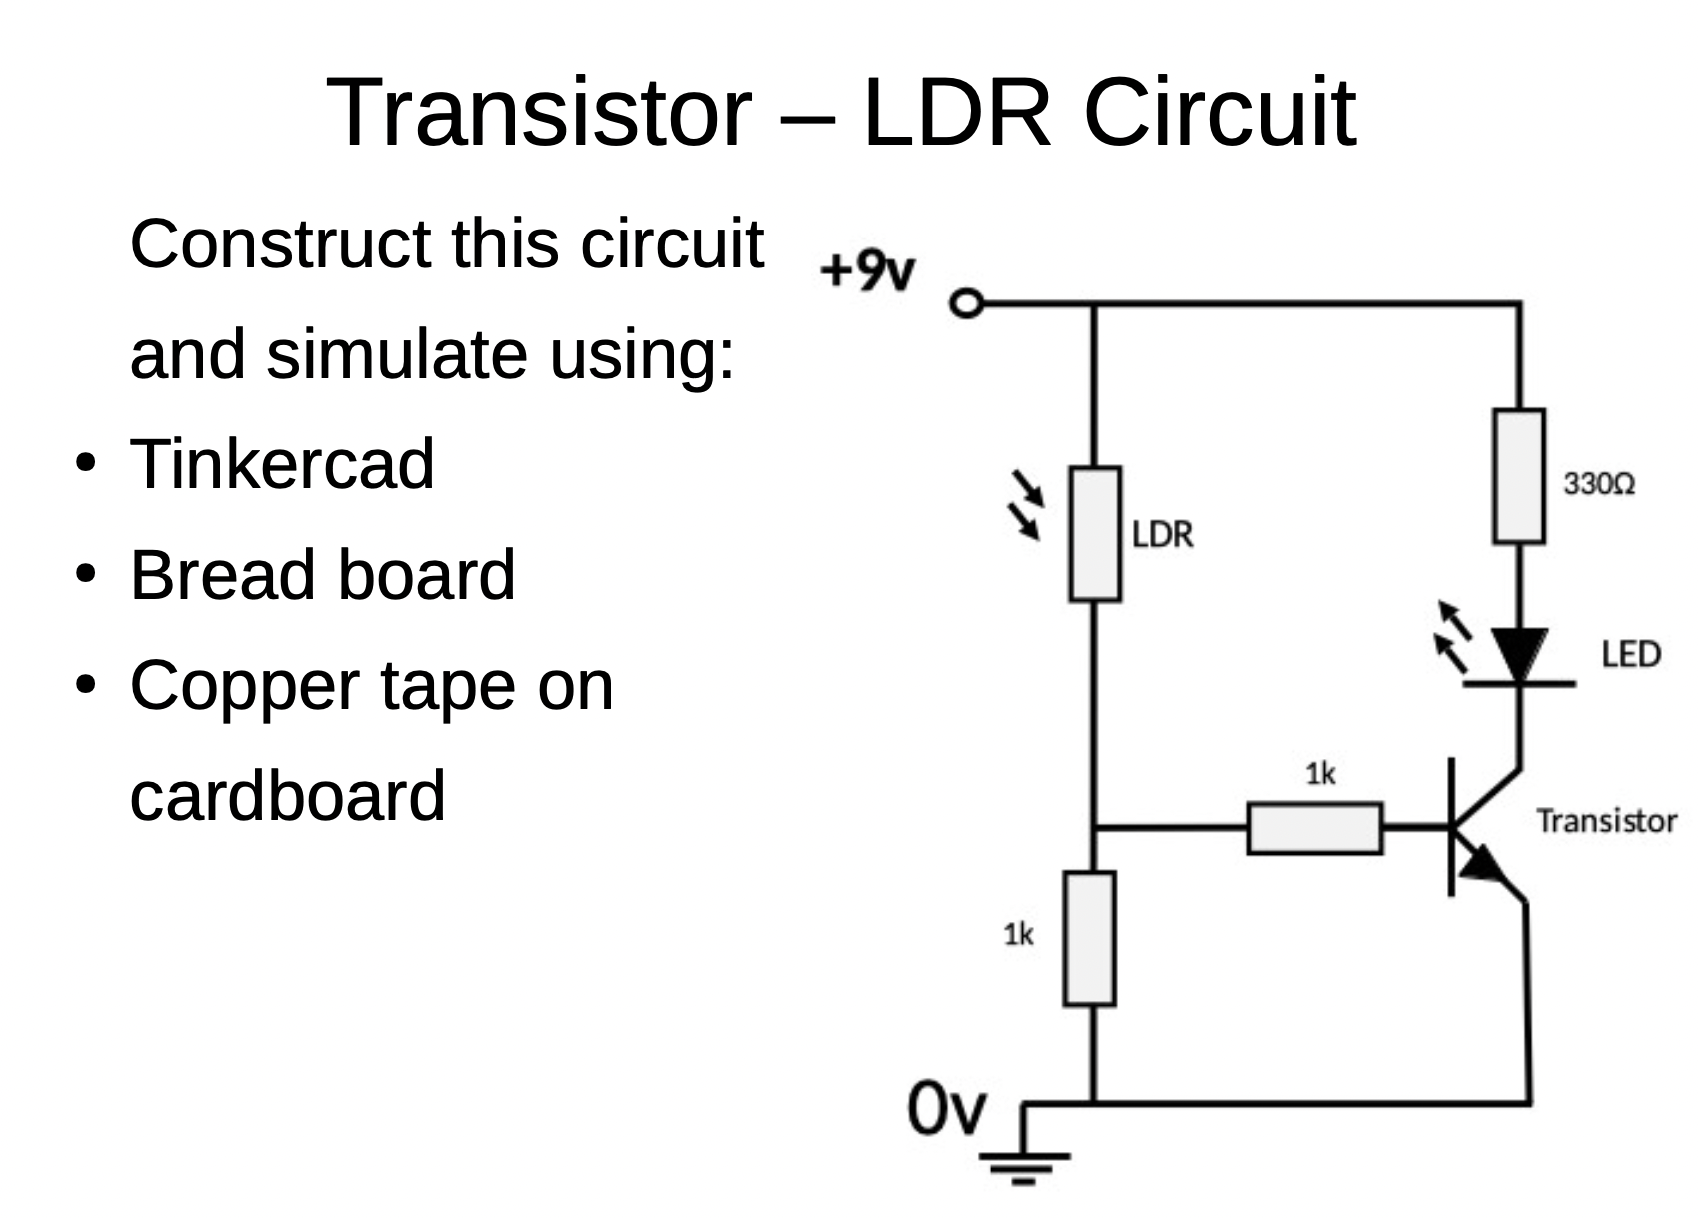
In this week we will build our transister circuit using Tinkercar software and then with electronic components with breadboard. we will also use soldering to make an actual circuit on cardboard.
Success Criteria:
1- I can construct a simple parallel and series LED circuit using breadboard and electronic component
2- I can use the multimeter to measure voltage, resistance, current and continuity circuits
3- I can solder correctly and safely.
4-I can construct a transister circuit and explain how transitor works
Activities:
- Link to Simple Electric circuit :
- Construct a transistor circuit using Tinkercad software then build on actual breadboard and components.
- Practical activity of soldering

-
Kia ora...
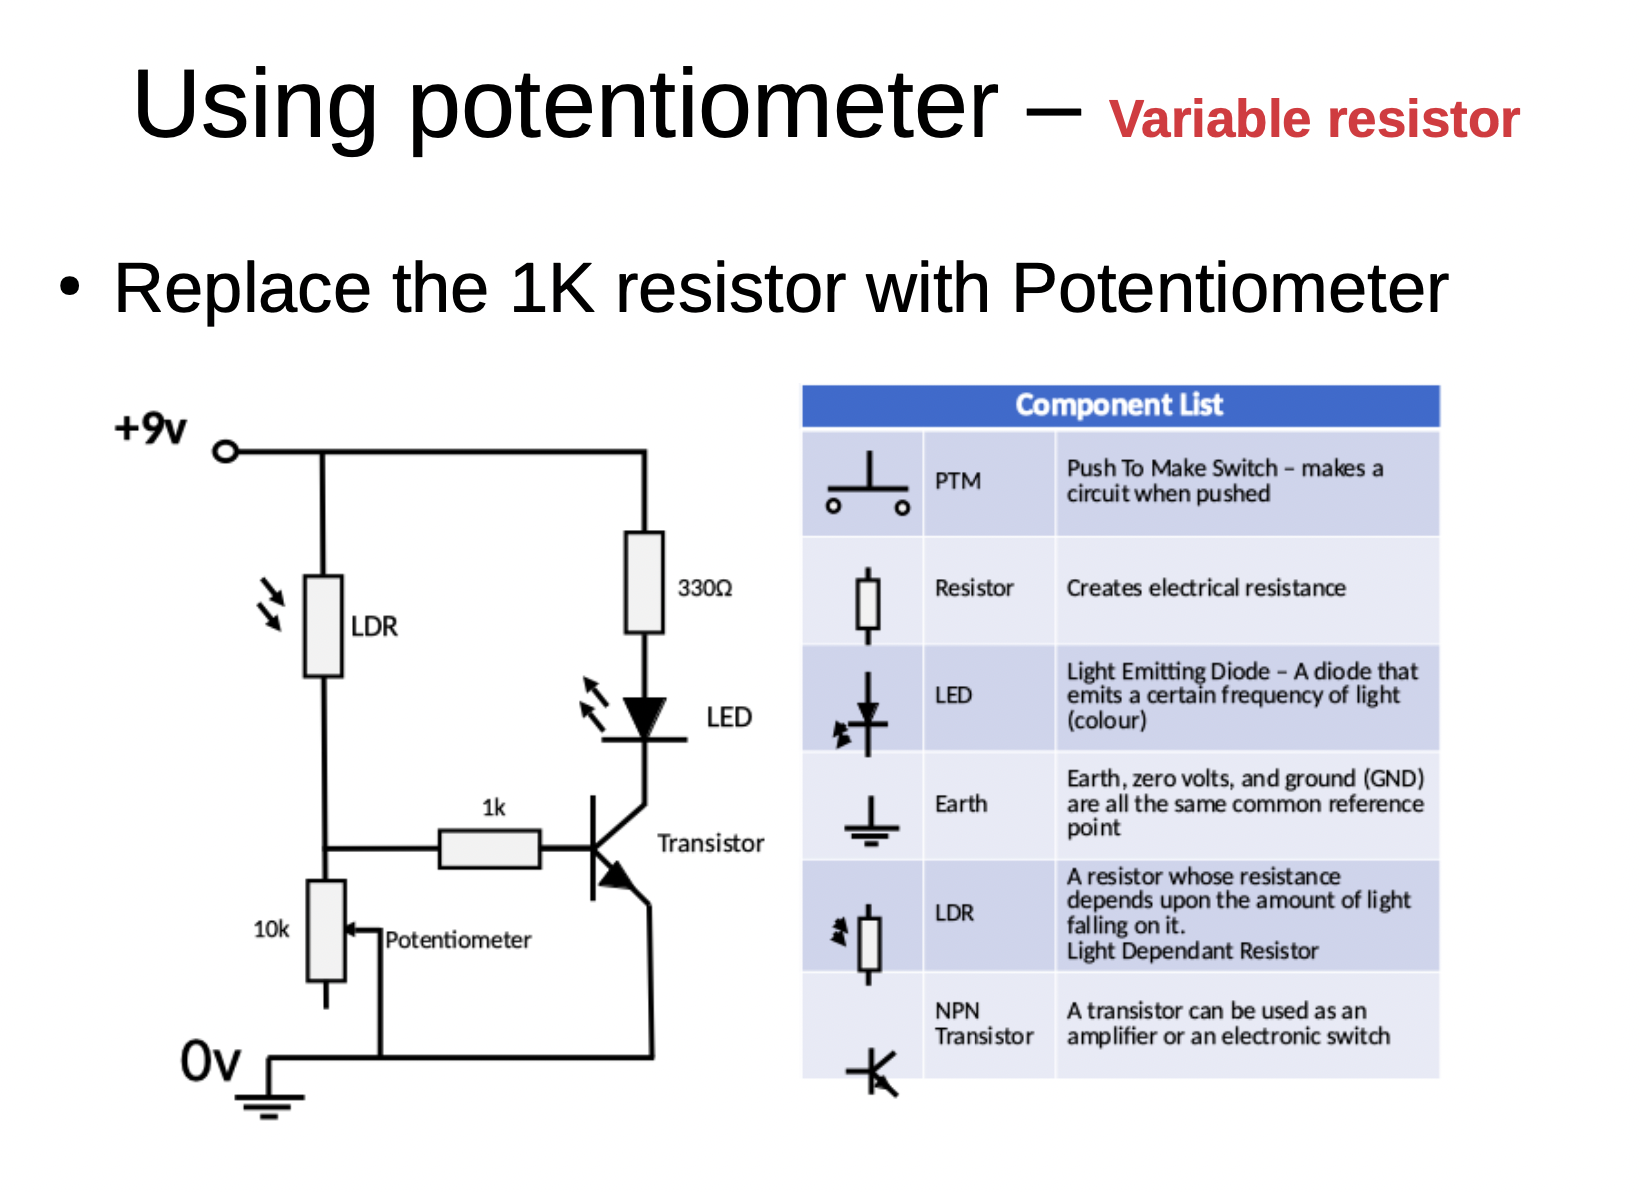
In this week we will build our transister - LDR circuit with variable resistor (potentiometer) using Tinkercar software and then with electronic components with breadboard. we will also use soldering to make an actual circuit on cardboard.
Success Criteria:
1- I can construct a simple parallel and series LED circuit using breadboard and electronic component
2- I can use the multimeter to measure voltage, resistance, current and continuity circuits
3- I can solder correctly and safely.
4-I can construct a transister circuit and explain how transitor works
5- I can use and explain how LDR works
Activities:
- Link to Simple Electric circuit :
- Construct a transistor - LDR circuit with variabl;e resistor (potentiometer) using Tinkercad software then build on actual breadboard and components.
- Practical activity of soldering
-
Kia ora...
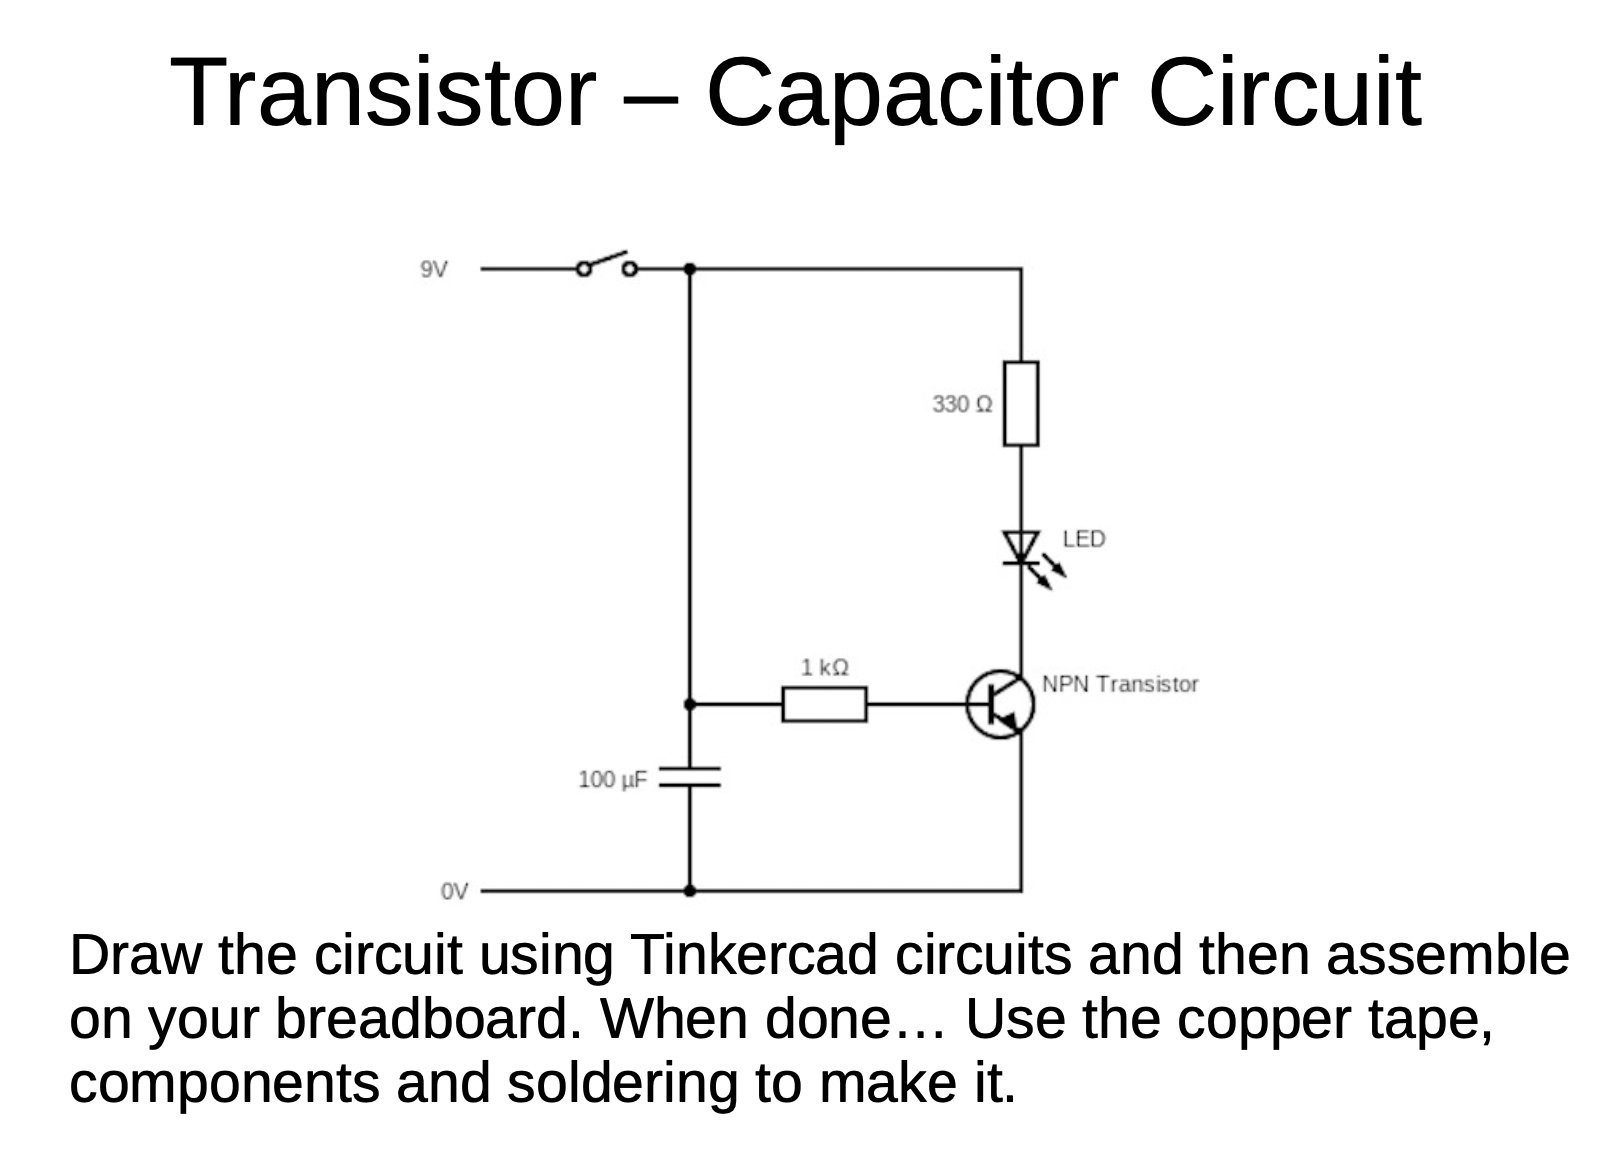
In this week we will build our transister - Capacitor circuit using Tinkercar software and then with electronic components with breadboard. we will also use soldering to make an actual circuit on cardboard.
Success Criteria:
1- I can construct a simple parallel and series LED circuit using breadboard and electronic component
2- I can use the multimeter to measure voltage, resistance, current and continuity circuits
3- I can solder correctly and safely.
4-I can construct a transister - Capacitor circuit and explain how transitor works
5- I can use and explain how LDR works
Activities:
- Link to Simple Electric circuit :
- Construct a transistor - Capacitor circuit using Tinkercad software then build on actual breadboard and components.
- Practical activity of soldering
https://www.technologystudent.com/elec1/capac1.htm
-
Kia ora...
Welcome back to the digital technology course. I hope you have had a great school break and recharged your batteries for a new term.
Welcome to term2.
This week we will start learning about the 555 timer integrated circuits.


Learning Intentions:
use a 555 timer integrated circuit (IC) to operate an output for a specific amount of time
Success Criteria: I can/have...
construct a working prototype circuit using a 555 IC
Activities:
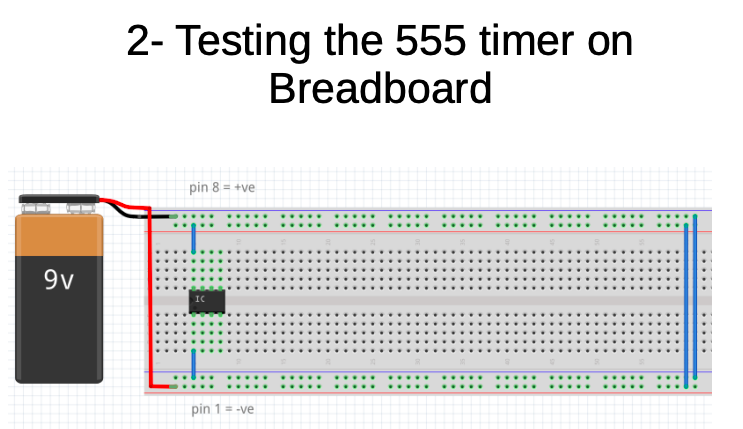
- insert the 555 into the breadboard, connect the power supply connections
- test for a voltage between the power pins, pin 1 = negative and pin 8 = positive
- when a voltage has been established, disconnect the 9V battery
- look at the Tinkercad circuit diagram, learn the component symbols and where the components are connected to
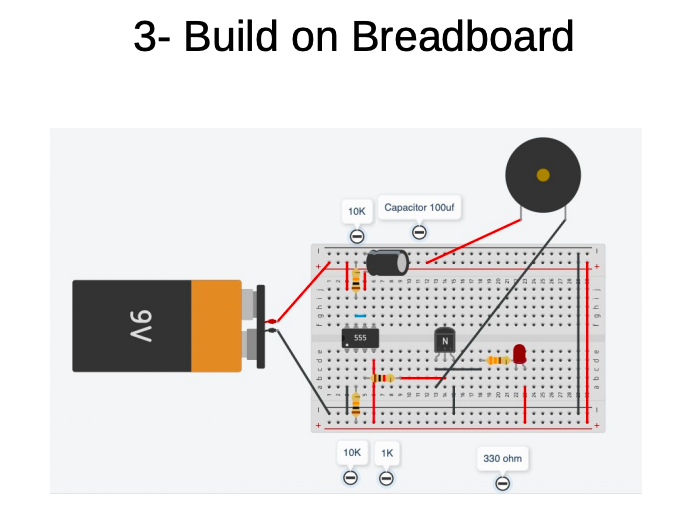
- insert the components as per the bread board diagram - connection wires must be straight and flat on the board - NO SPAGHETTI WIRES
- the switch will be made from two pieces of hook-up wire
- test it, LED should be on and then off for about 1 second
You may find this website useful: http://www.555-timer-circuits.com/
diagrams and pictures are loaded on your weekly course page

-
Kia ora...
This week we will continue learning about the 555 timer integrated circuits.
Learning Intentions:
use a 555 timer integrated circuit (IC) to operate an output for a specific amount of time
Success Criteria: I can/have...
construct a working prototype circuit using a 555 IC
Activities:
- insert the 555 into the breadboard, connect the power supply connections
- test for a voltage between the power pins, pin 1 = negative and pin 8 = positive
- when a voltage has been established, disconnect the 9V battery
- look at the Tinkercad circuit diagram, learn the component symbols and where the components are connected to
- insert the components as per the bread board diagram - connection wires must be straight and flat on the board - NO SPAGHETTI WIRES
- the switch will be made from two pieces of hook-up wire
- test it, LED should be on and then off for about 1 second
You may find this website useful: http://www.555-timer-circuits.com/
diagrams and pictures are loaded on your weekly course page
-
Kia ora...
This week we will continue learning about the 555 timer integrated circuits. We will use the variable resistor (potectiometer) to control the time
Big Idea:
Modelling a timer circuit using 555 timer
Learning Intentions:
use a 555 timer integrated circuit (IC) to operate an output for a specific amount of time
use mathematics to calculate a time constant
insert a transistor to operate an output
Success Criteria: I can/have...
- construct a working prototype circuit using a 555 IC
- I can vary the timing period by changing input components
- I can understand a time constant calculation
Activities:
start a doc to record your findings - title will be 555 timer calculations
- remove the resistor on pin 7
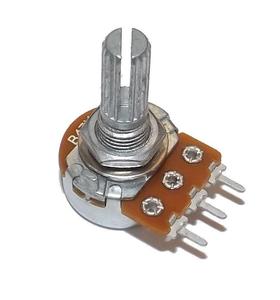
- insert a variable resistor on pin 7, (one wire to pin 7, one wire to +ve)
- remove the battery, resistance measurements can not be carried our while there is current flowing through the resistor as its resistance may be changing
- set a multimeter to measure resistance
- put the meter probes into the poles of the variable resistor
- turn the adjuster fully anti- clockwise - measure resistance
- turn the adjuster fully clockwise - measure resistance
what is the maximum resistance?
set the resistance to as near to 50K as possible, operate the timer, time the output period and note it
calculate the time constant using the formula of T = R x C
compare this calculated value of time with the actual time that the timer was operating (the actual time should be within 20% of the calculated time)
do the same with the VR set to 100K
-
Kia ora...
This week we will continue learning about the 555 timer integrated circuits. We will use the variable resistor (potectiometer) to control the time and we will start building our own timer
Big Idea:
Modelling a timer circuit using 555 timer
Learning Intentions:
use a 555 timer integrated circuit (IC) to operate an output for a specific amount of time
use mathematics to calculate a time constant
insert a transistor to operate an output
Success Criteria: I can/have...
- construct a working prototype circuit using a 555 IC
- I can vary the timing period by changing input components
- I can understand a time constant calculation
Activities:
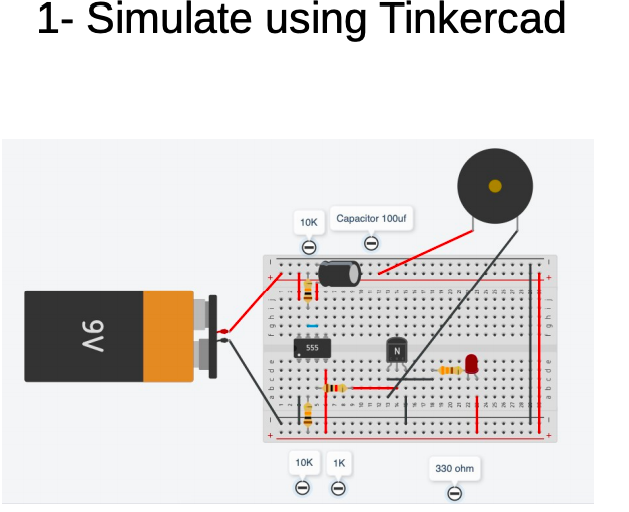
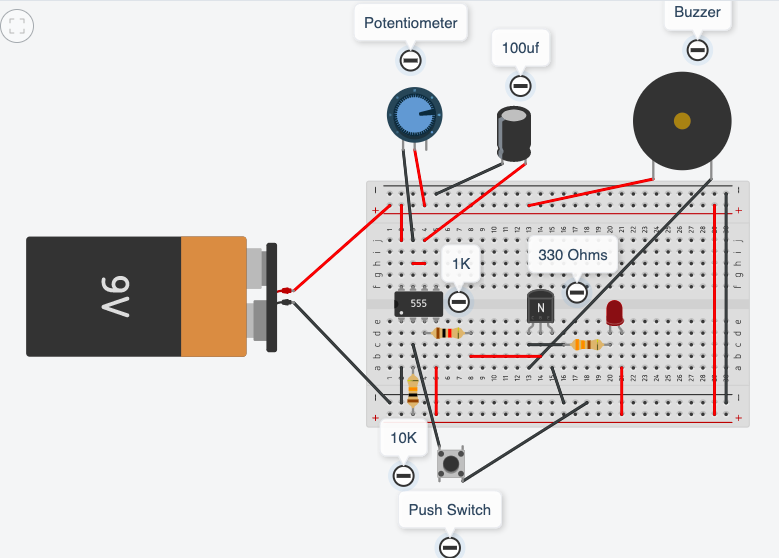
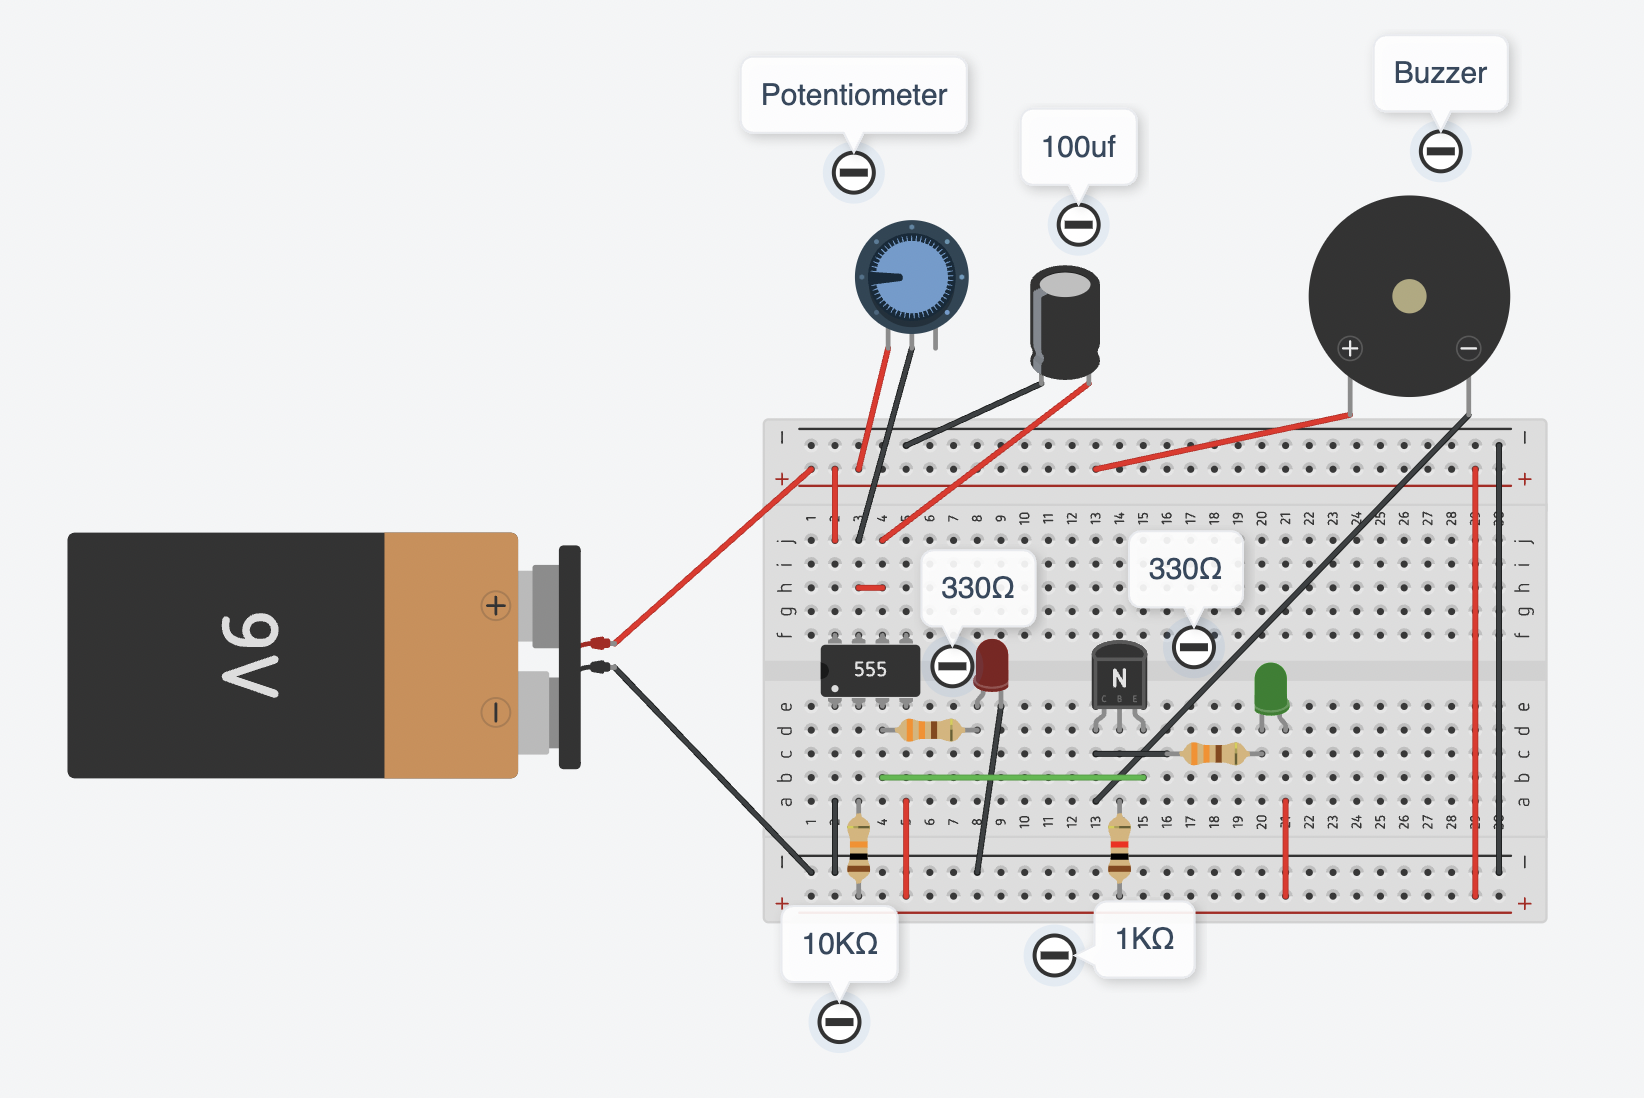
Build this circuit using Tinkercad Circuits:
-
Kia ora...
This week we will continue learning about the 555 timer integrated circuits. We will use the variable resistor (potectiometer) to control the time and we will start building our own timer
Big Idea:
Modelling a timer circuit using 555 timer
Learning Intentions:
use a 555 timer integrated circuit (IC) to operate an output for a specific amount of time
use mathematics to calculate a time constant
insert a transistor to operate an output
Success Criteria: I can/have...
- construct a working prototype circuit using a 555 IC
- I can vary the timing period by changing input components
- I can understand a time constant calculation
Activities:
Build this circuit using Tinkercad Circuits:


-
Kia ora...
This week we will continue learning about the 555 timer integrated circuits. We will use the variable resistor (potectiometer) to control the time and we will start building our own timer
Big Idea:
Modelling a timer circuit using 555 timer
Learning Intentions:
use a 555 timer integrated circuit (IC) to operate an output for a specific amount of time
use mathematics to calculate a time constant
Success Criteria: I can/have...
- construct a working prototype circuit using a 555 IC
- I can vary the timing period by changing input components
- I can understand a time constant calculation
Activities:
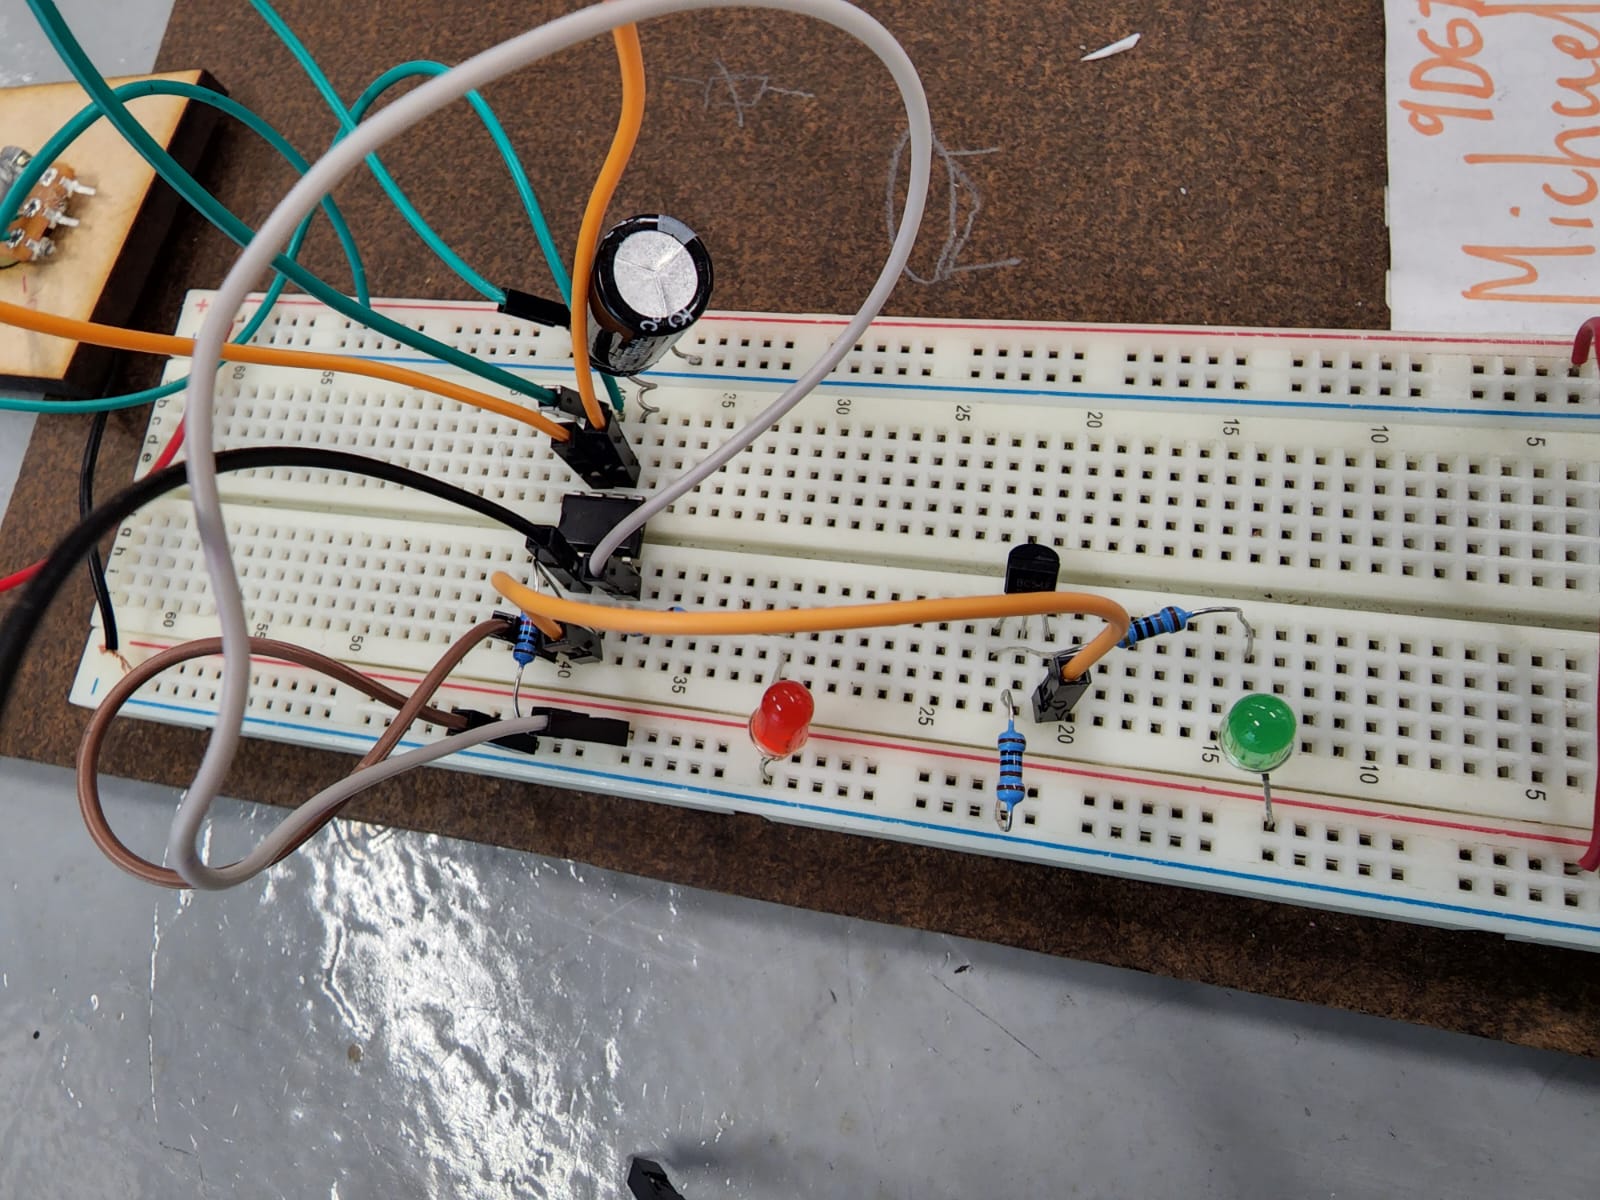
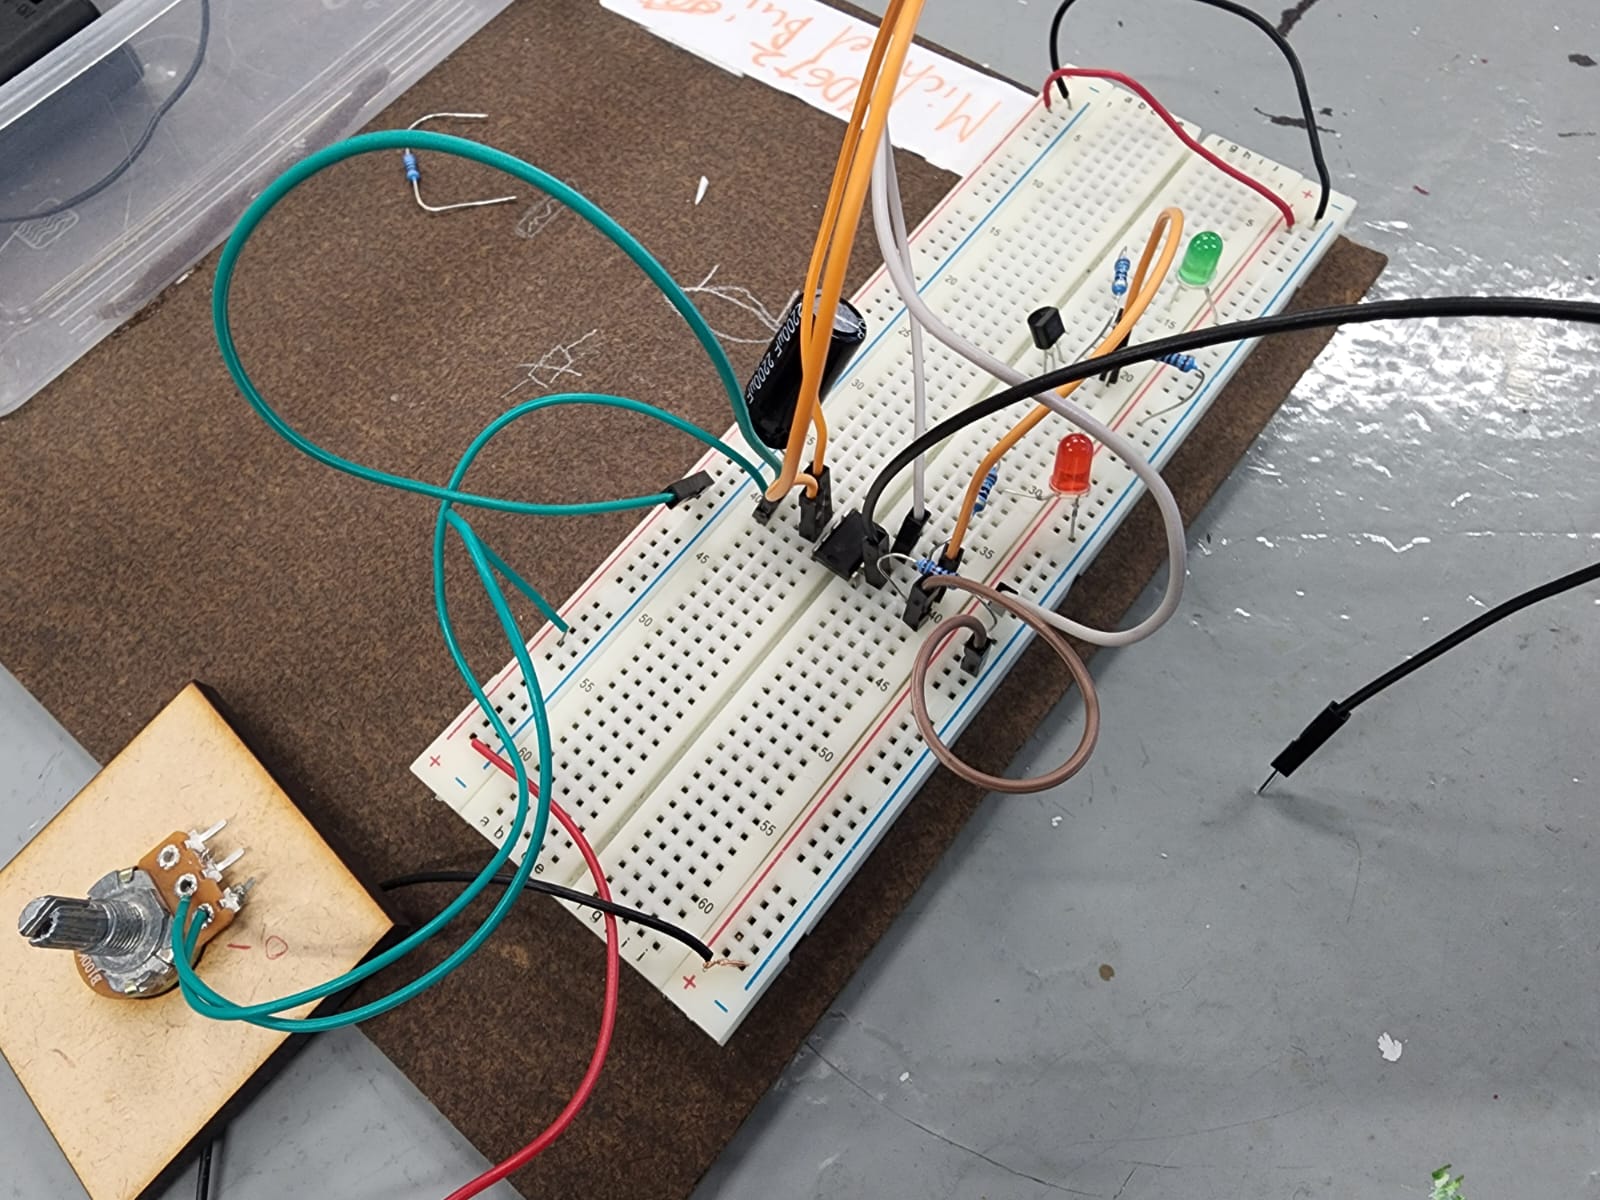
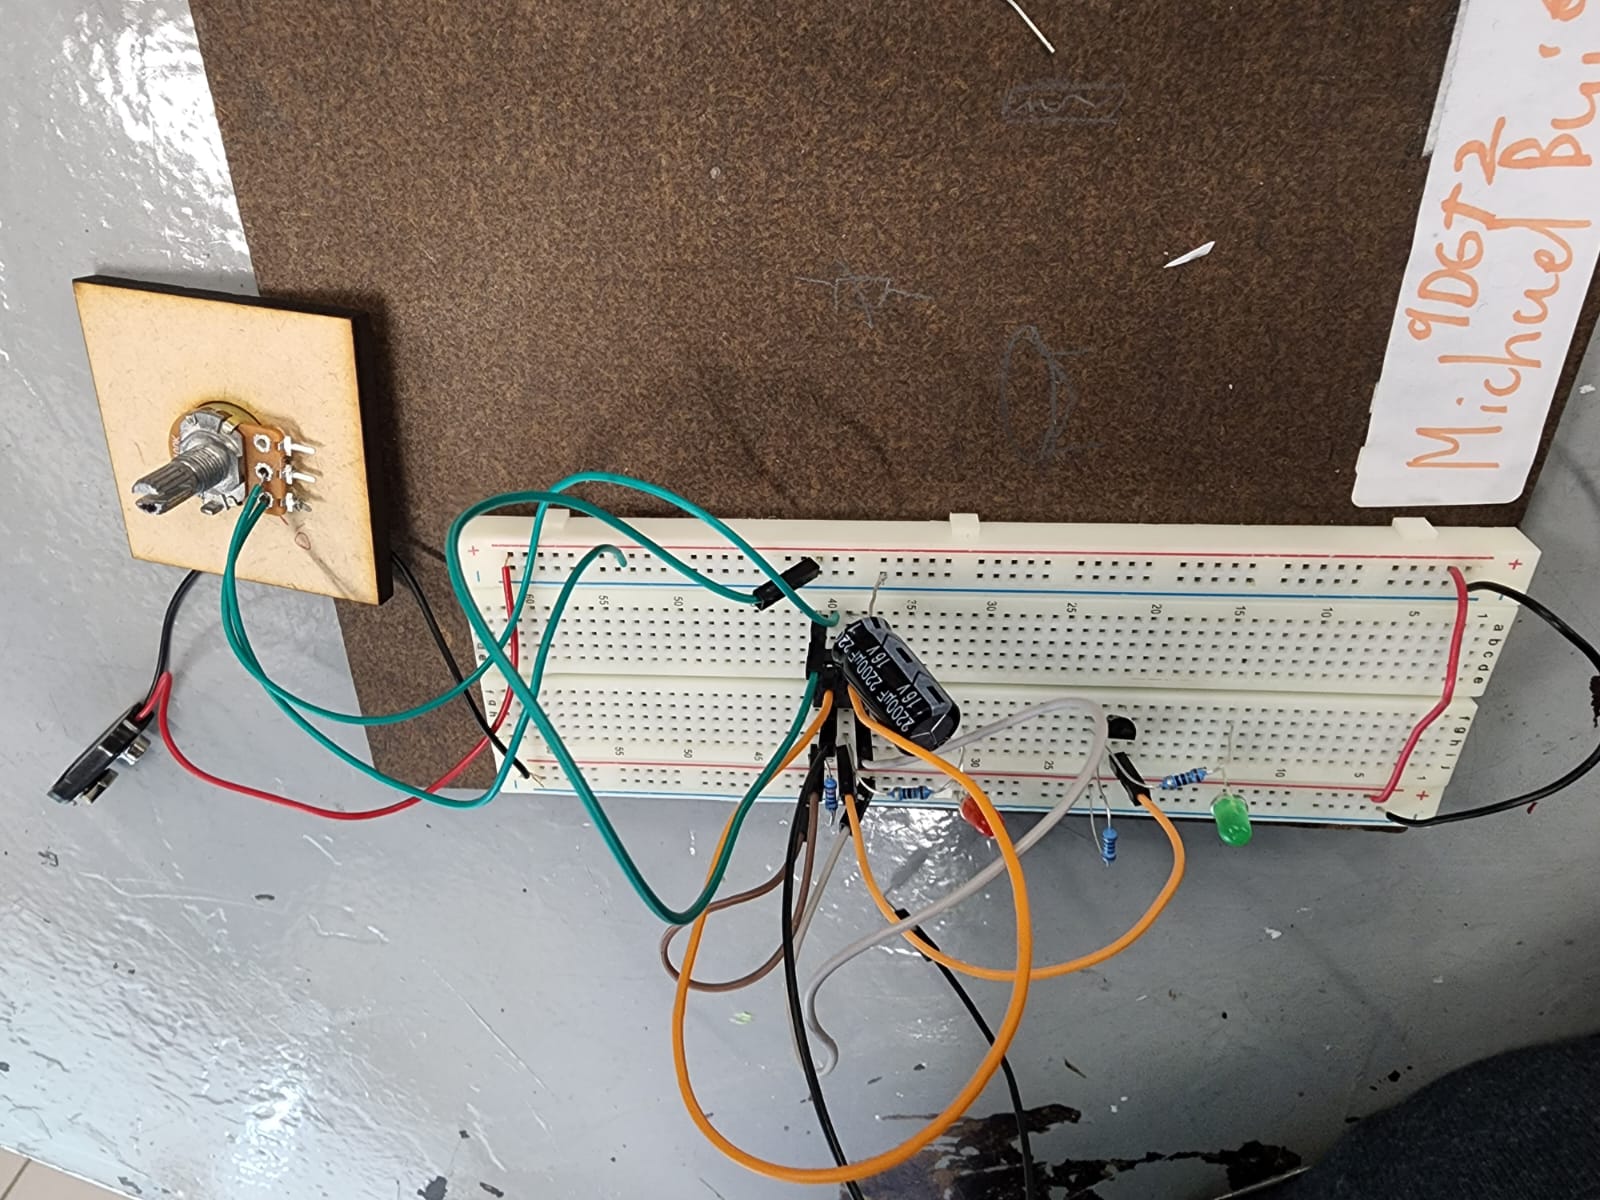
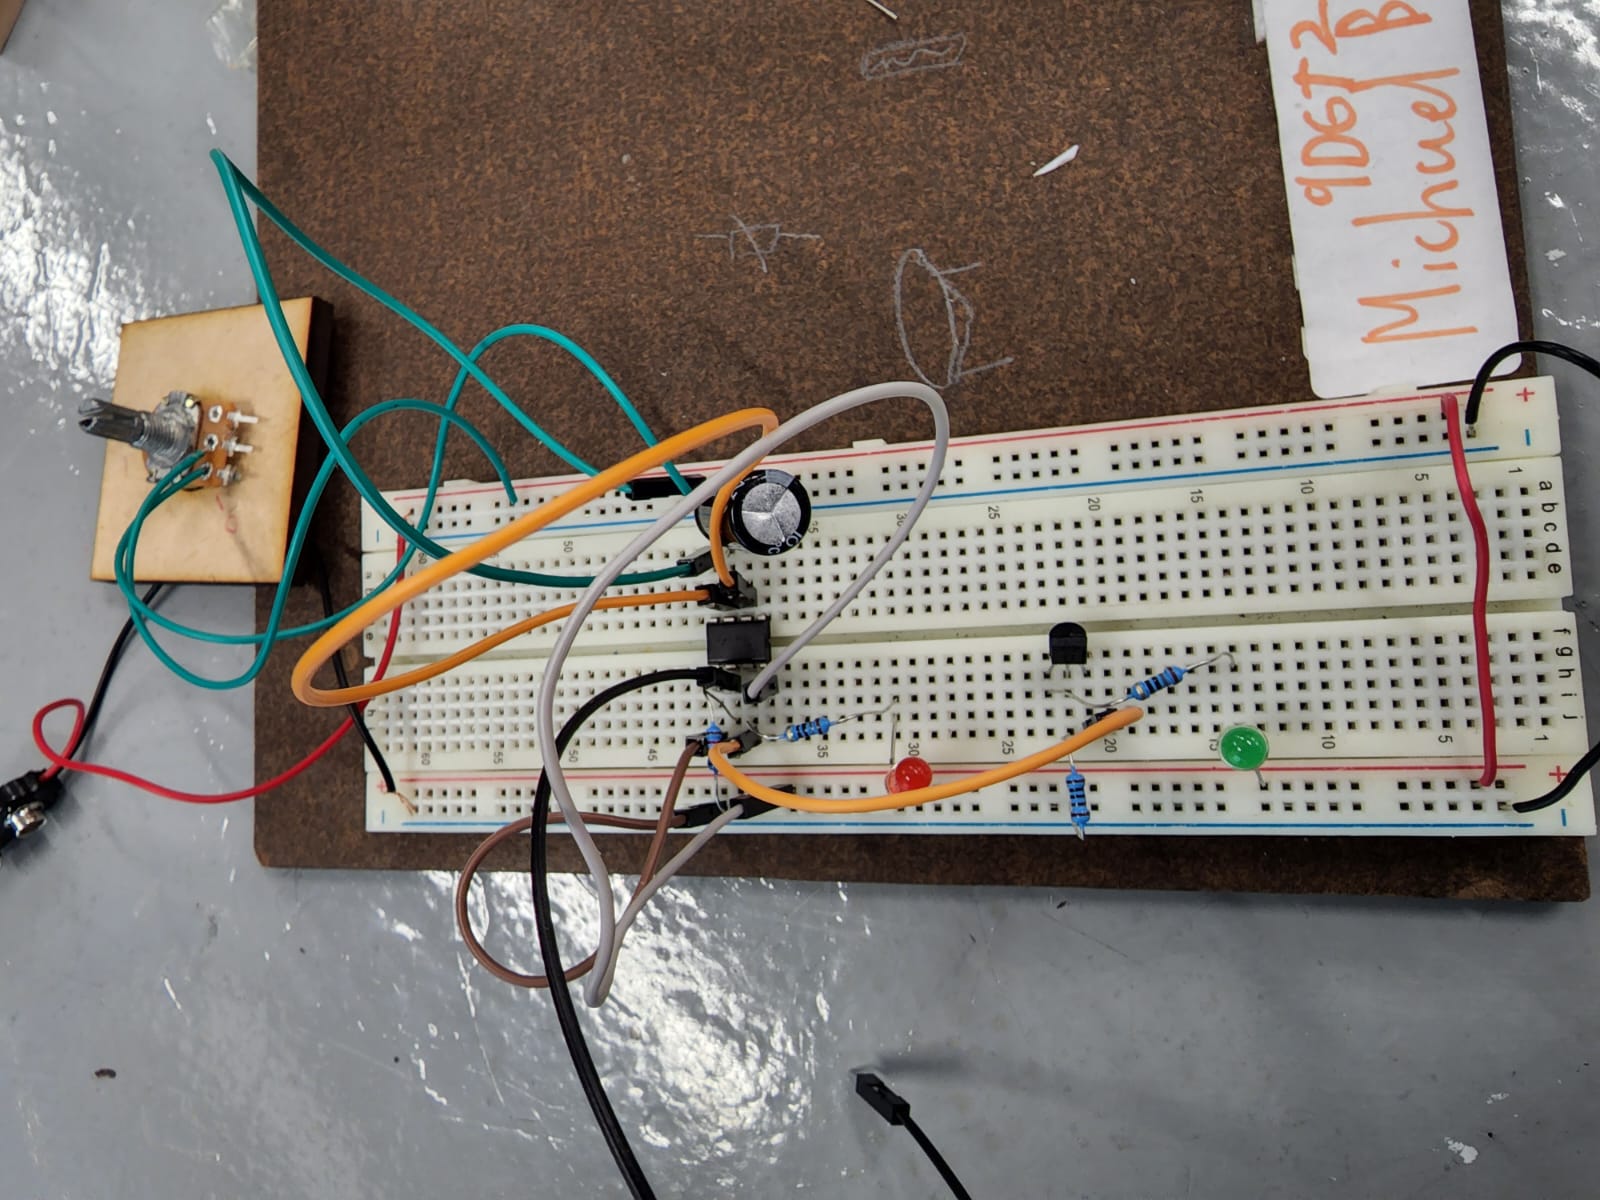
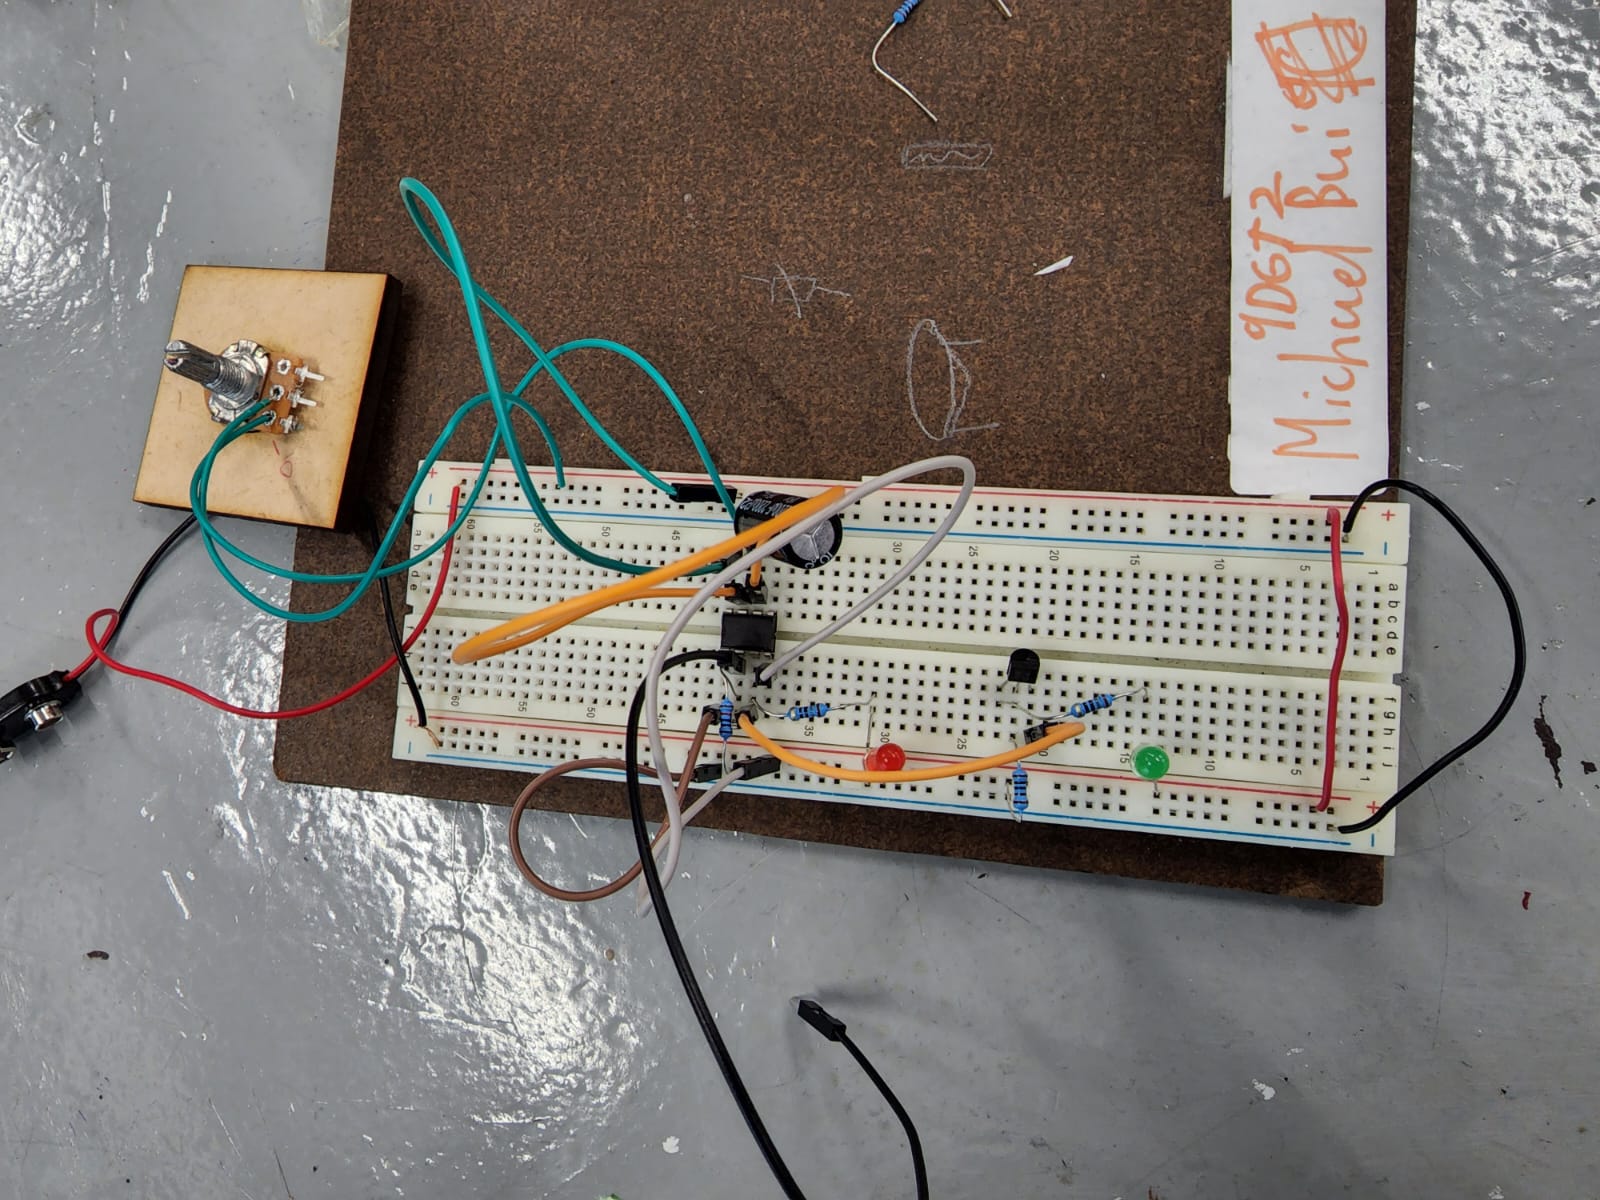
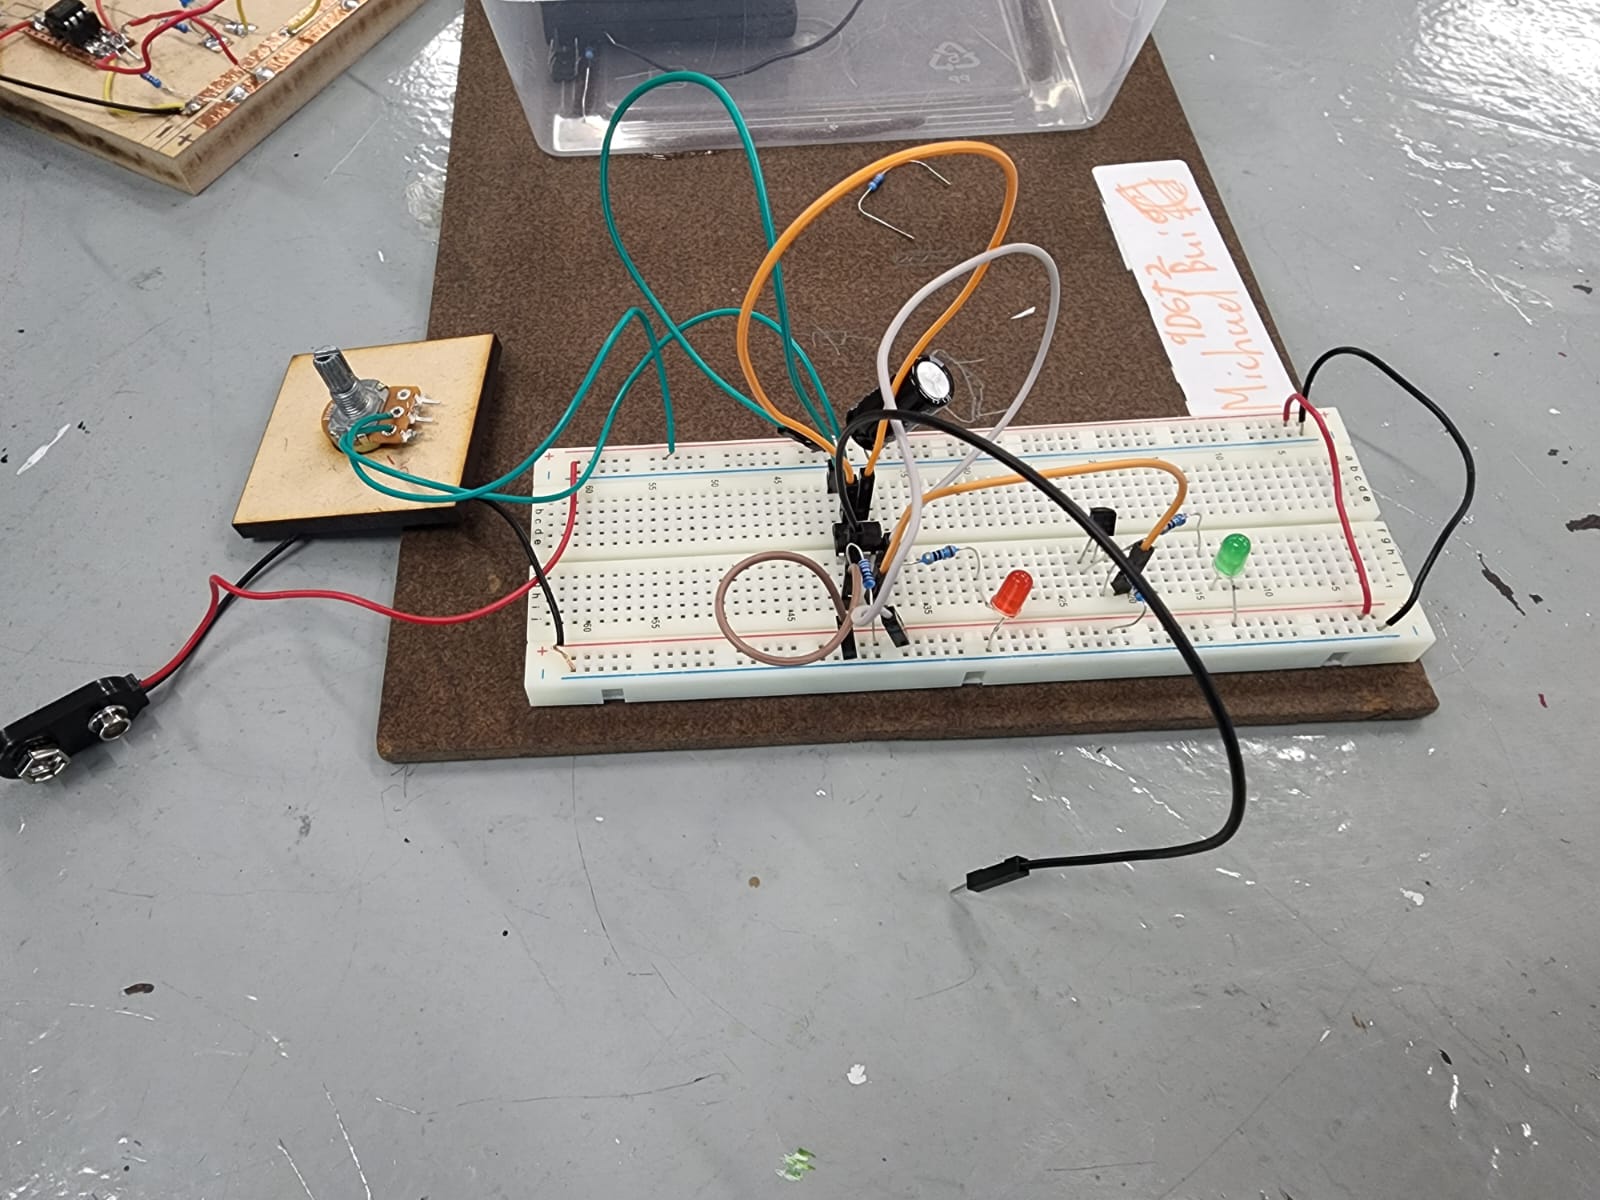
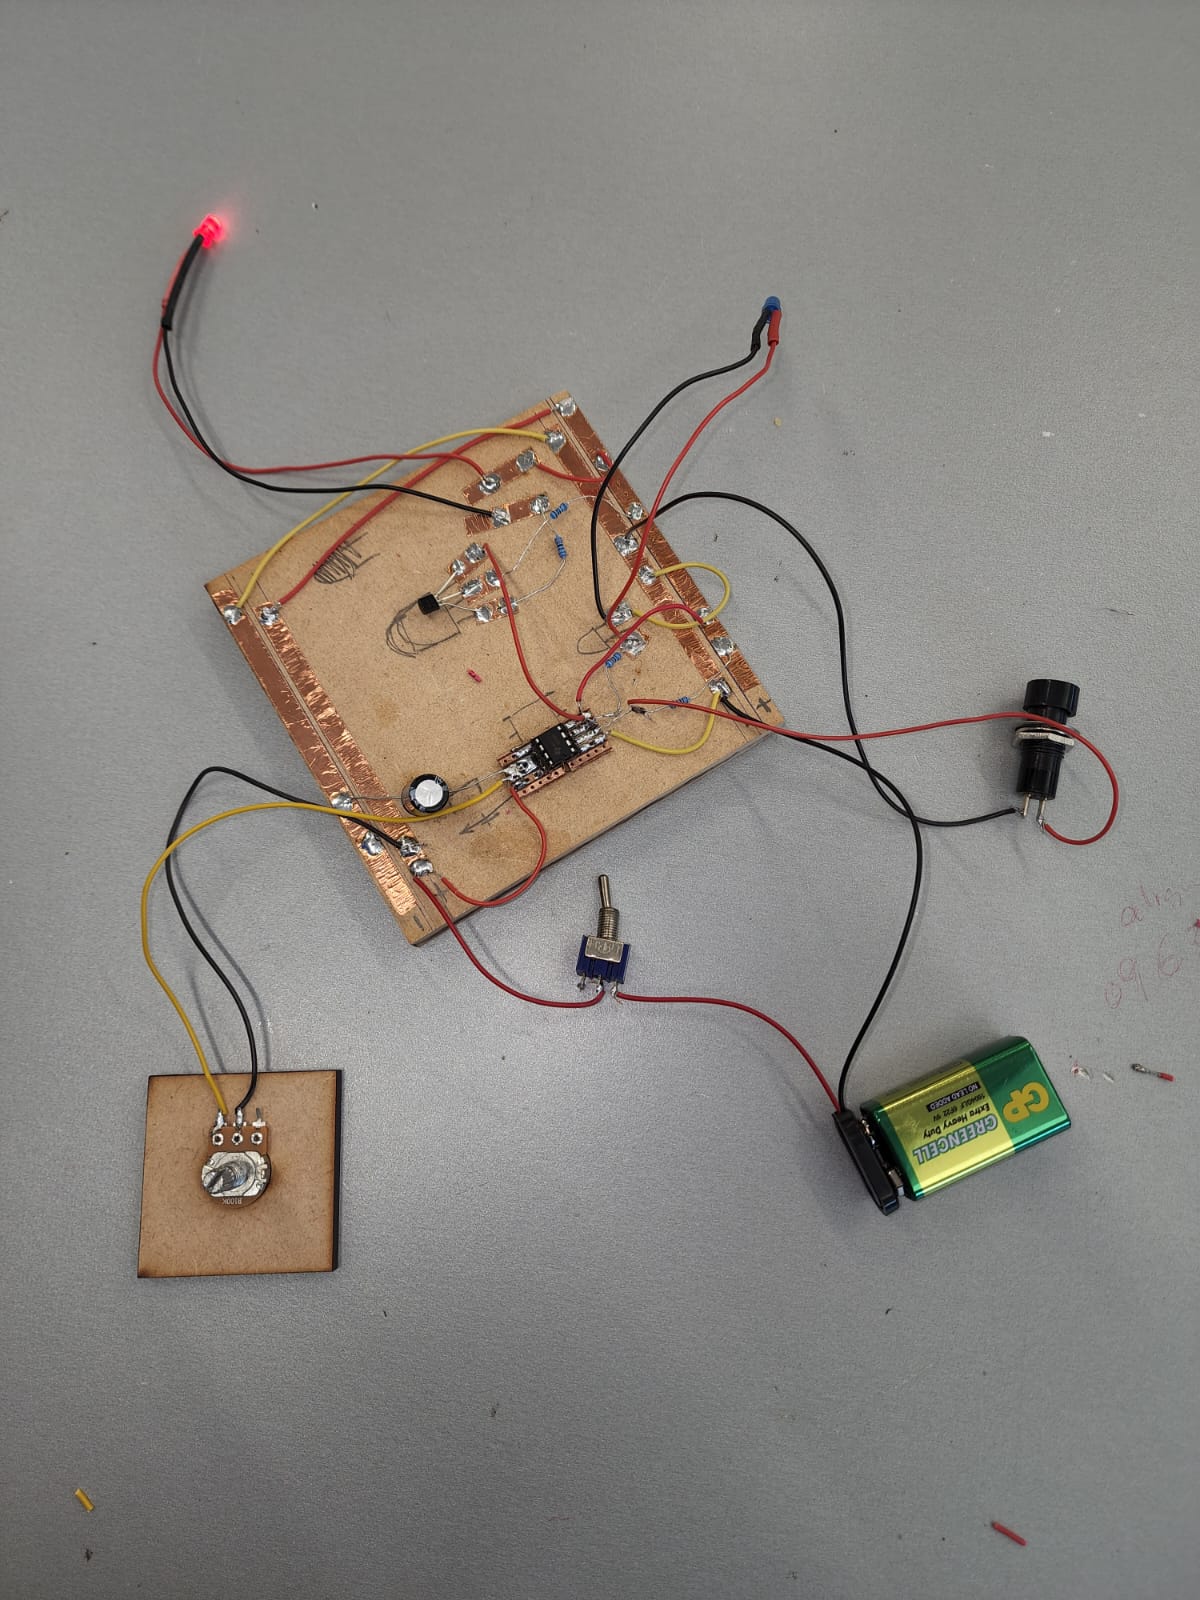
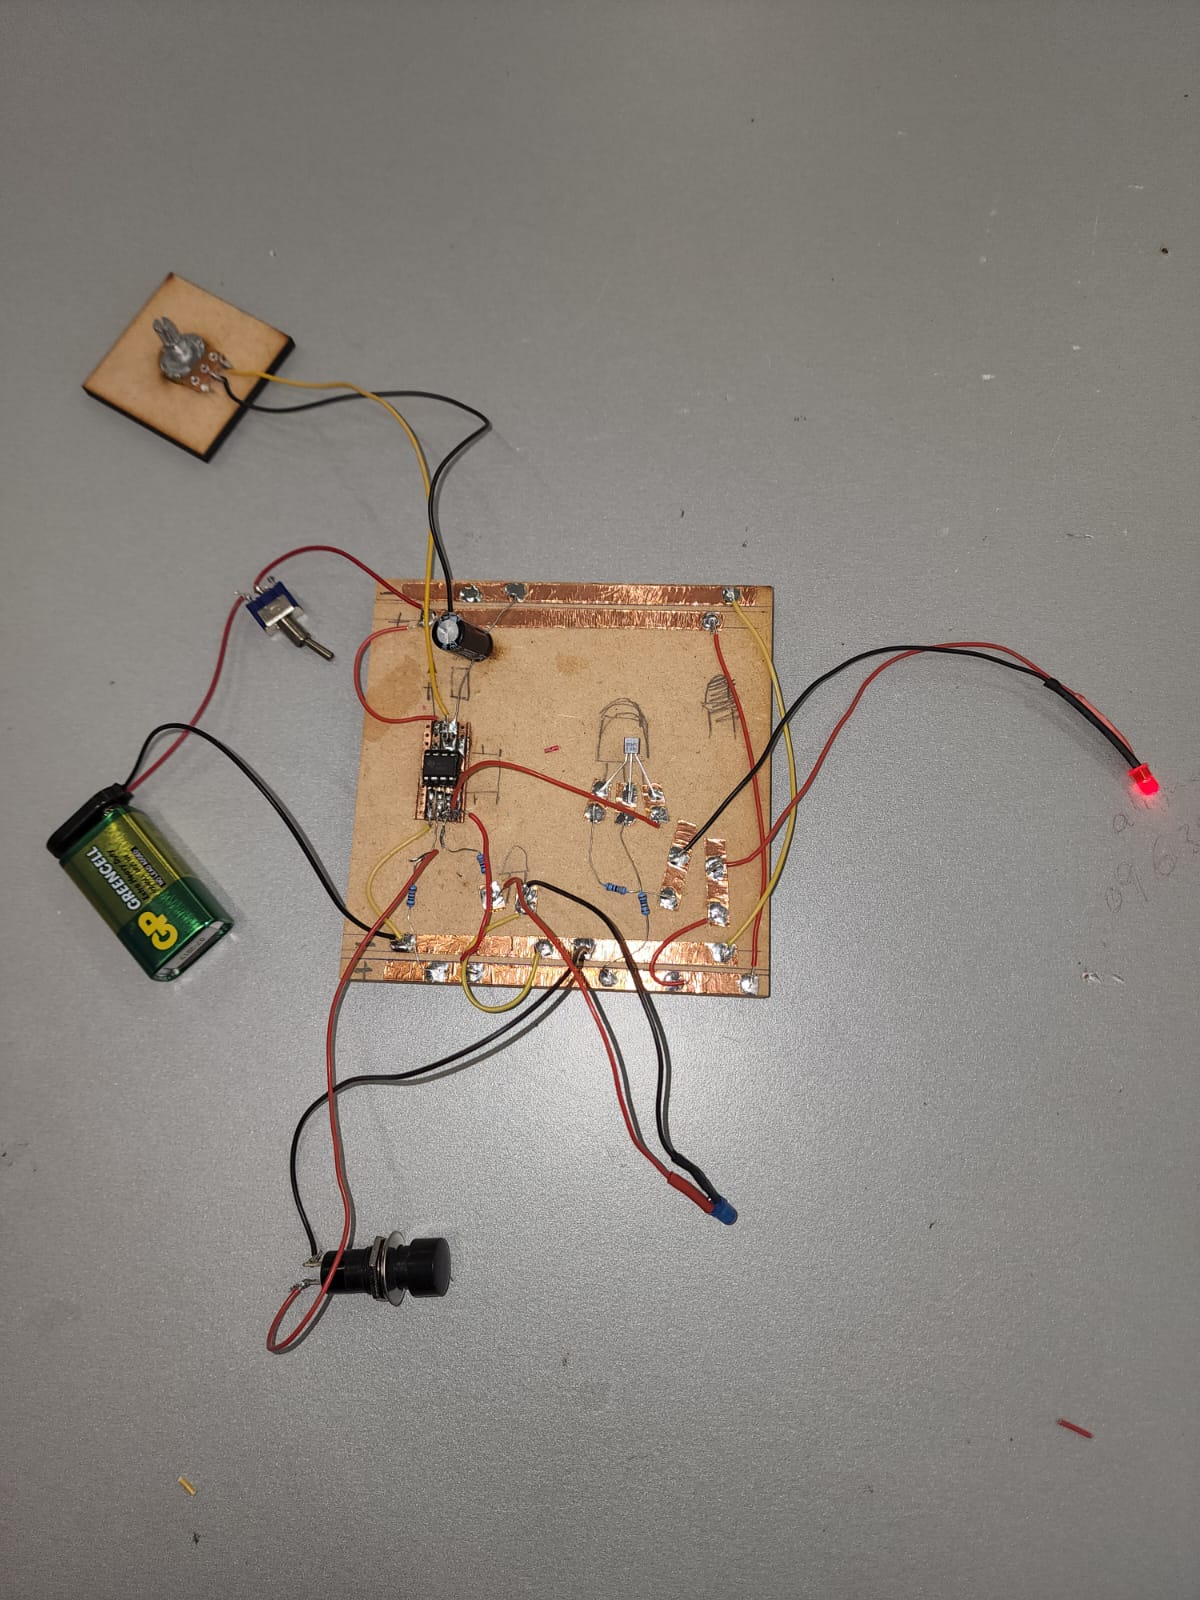
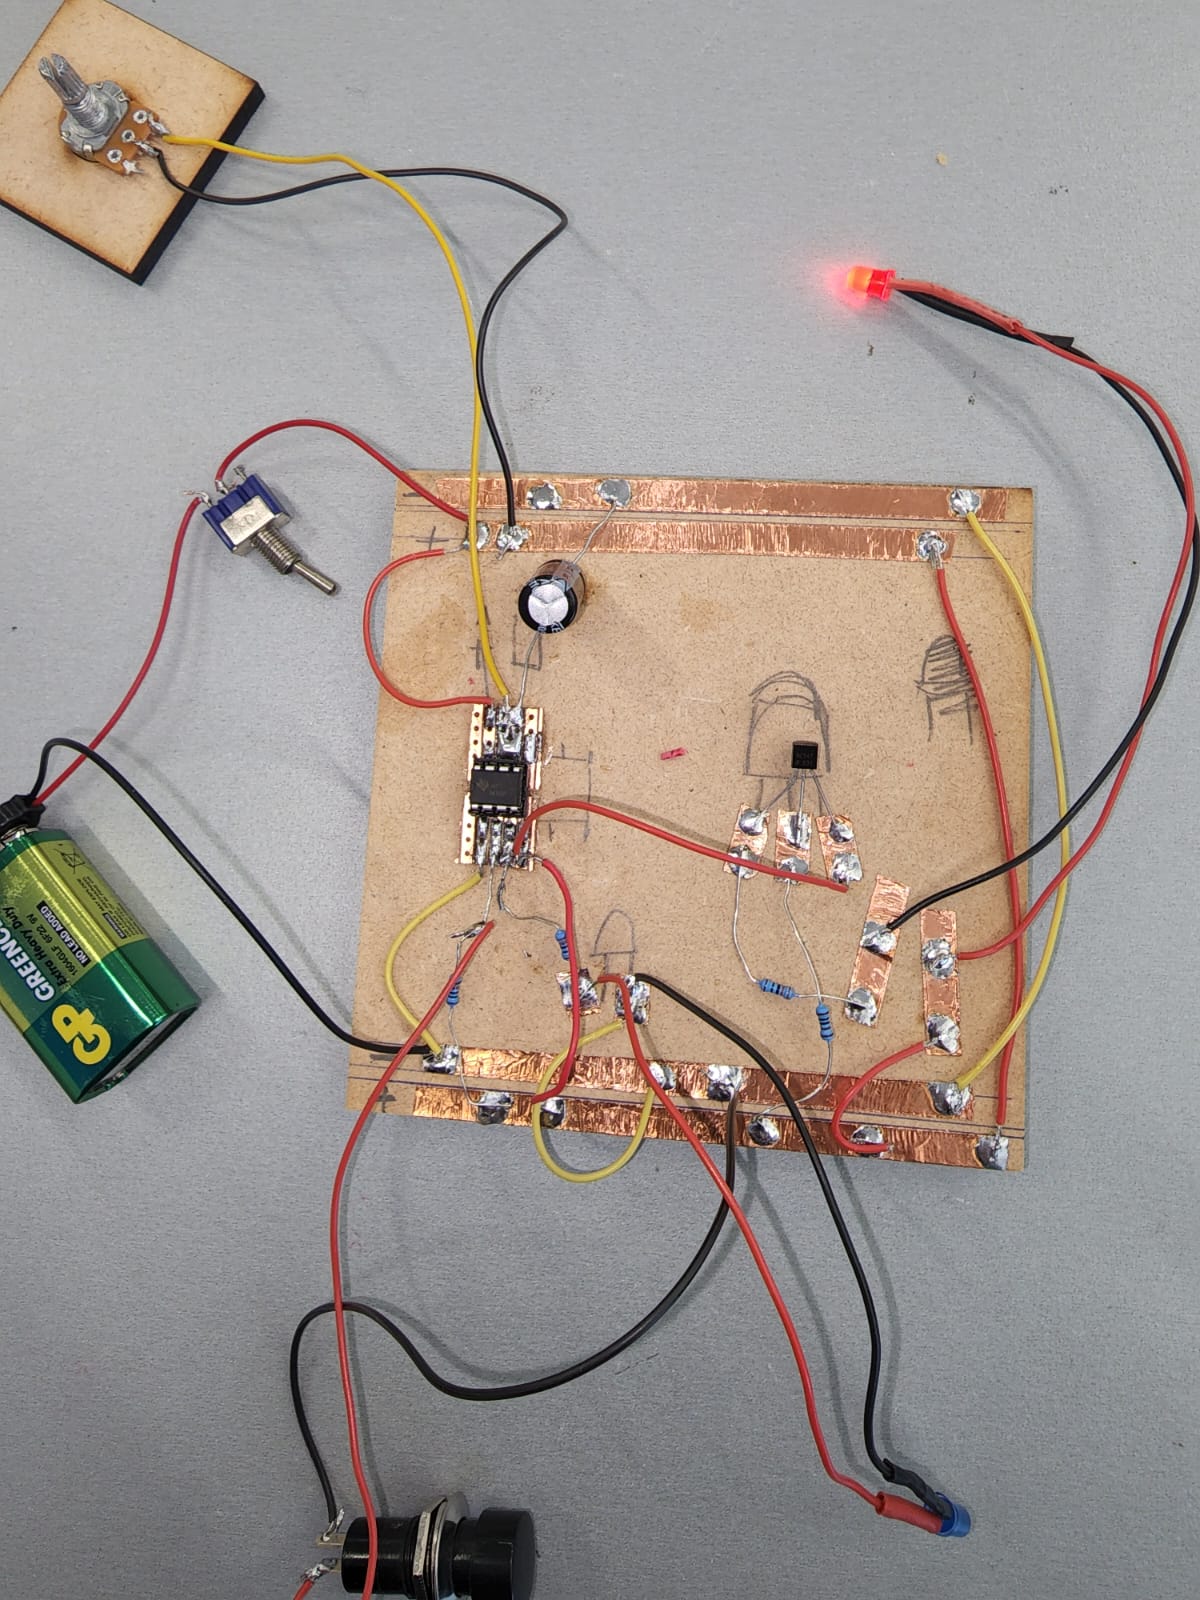
Build the actual timer using 555 timer component, transister, potentiometer and other eloctronic components.
-
Kia ora...
This week we will continue building our actual timer box using the 555 timer and other components
Big Idea:
Modelling a timer circuit using 555 timer
Learning Intentions:
use a 555 timer integrated circuit (IC) to operate an output for a specific amount of time
use mathematics to calculate a time constant
Success Criteria: I can/have...
- construct a working prototype circuit using a 555 IC
- I can vary the timing period by changing input components
- I can understand a time constant calculation
Activities:
Build the actual timer box using 555 timer component, transister, potentiometer and other eloctronic components.
-
Kia ora...
This week we will continue building our actual timer box using the 555 timer and other components
Big Idea:
Modelling a timer circuit using 555 timer
Learning Intentions:
use a 555 timer integrated circuit (IC) to operate an output for a specific amount of time
use mathematics to calculate a time constant
Success Criteria: I can/have...
- construct a working prototype circuit using a 555 IC
- I can vary the timing period by changing input components
- I can understand a time constant calculation
Activities:
Build the actual timer box using 555 timer component, transister, potentiometer and other eloctronic components.
-
Kia ora...
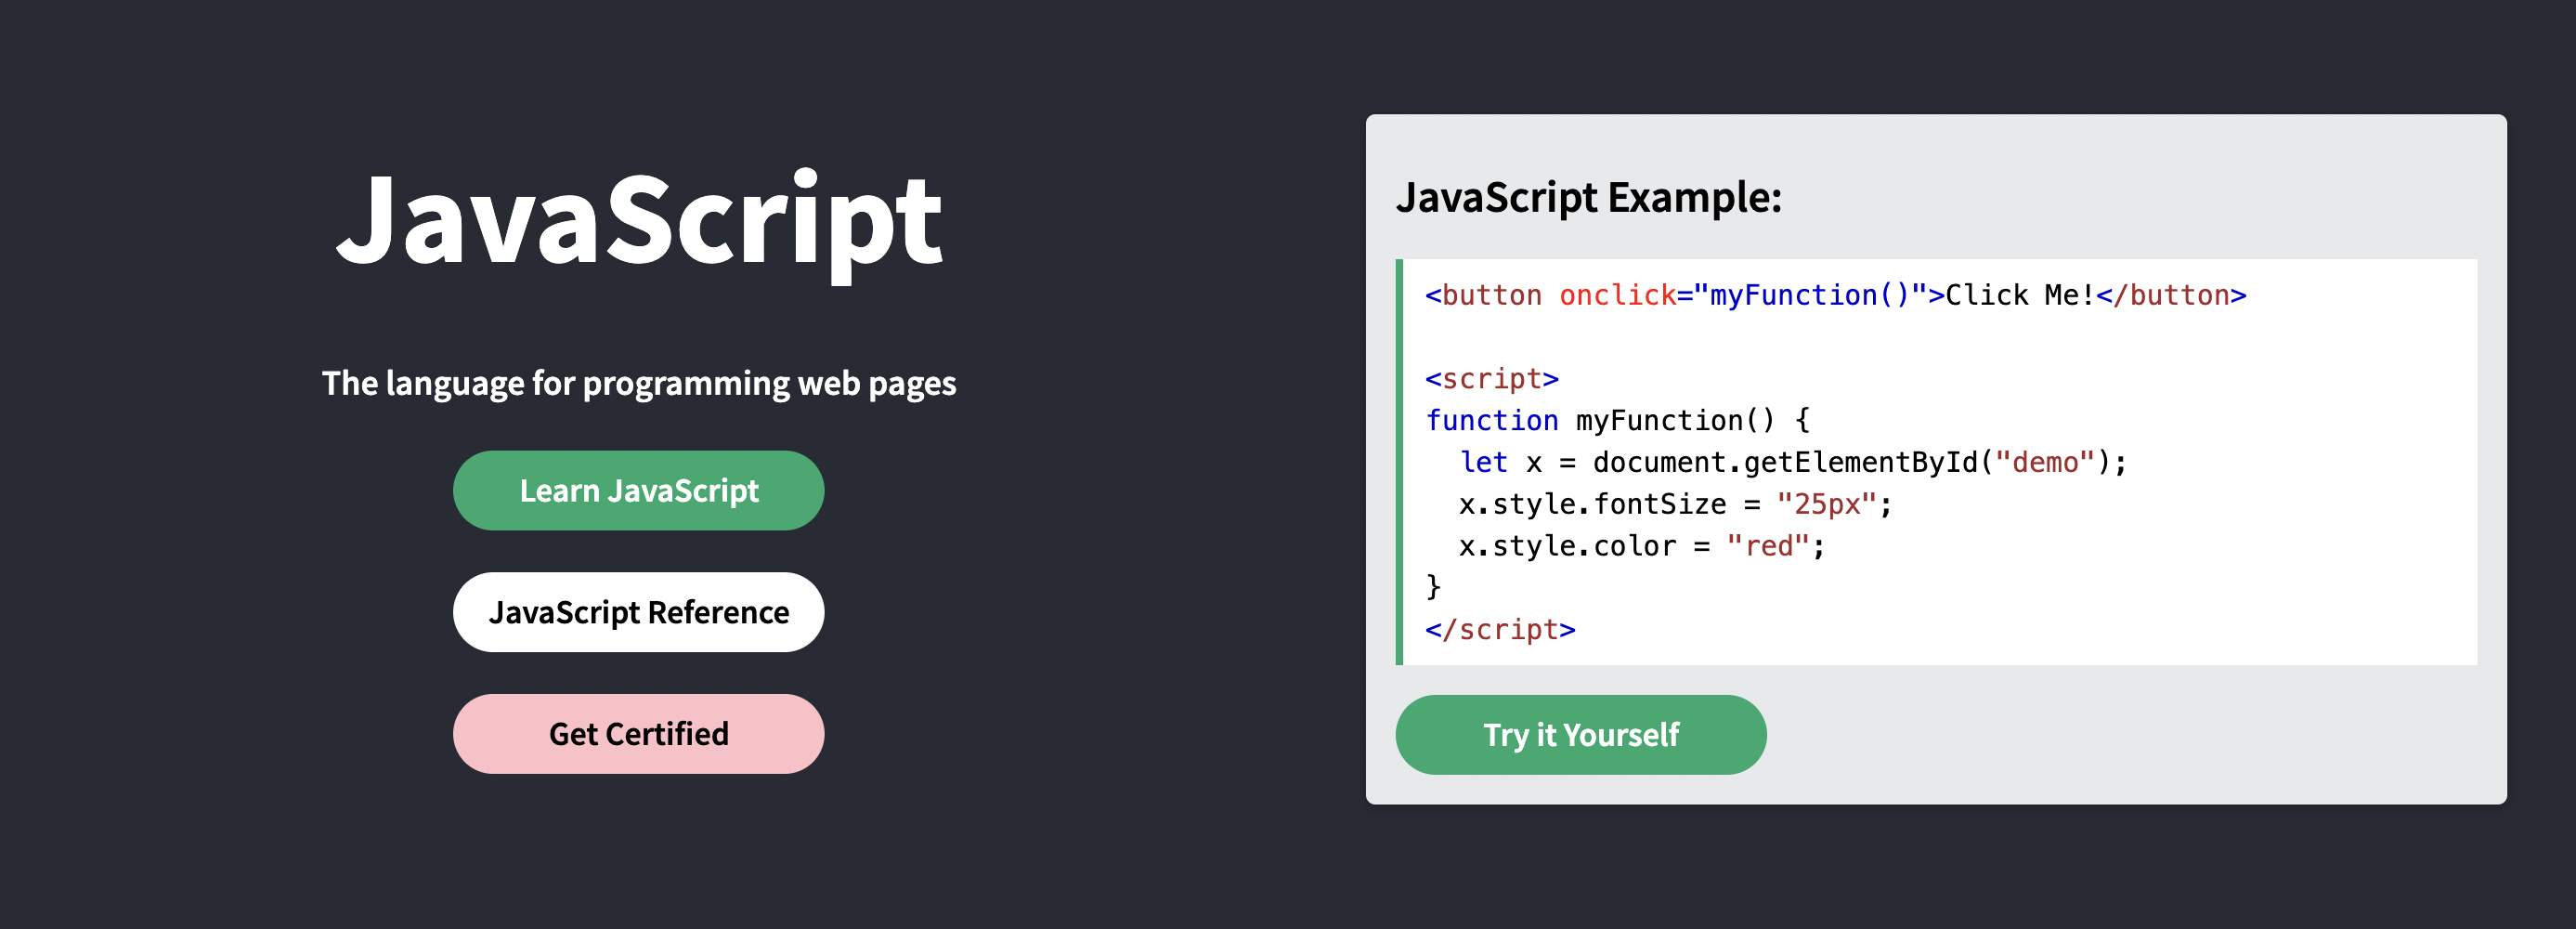
In term 4, we are going to learn and practice coding and how to write a digital code for different digital outcomes.
Big Idea:
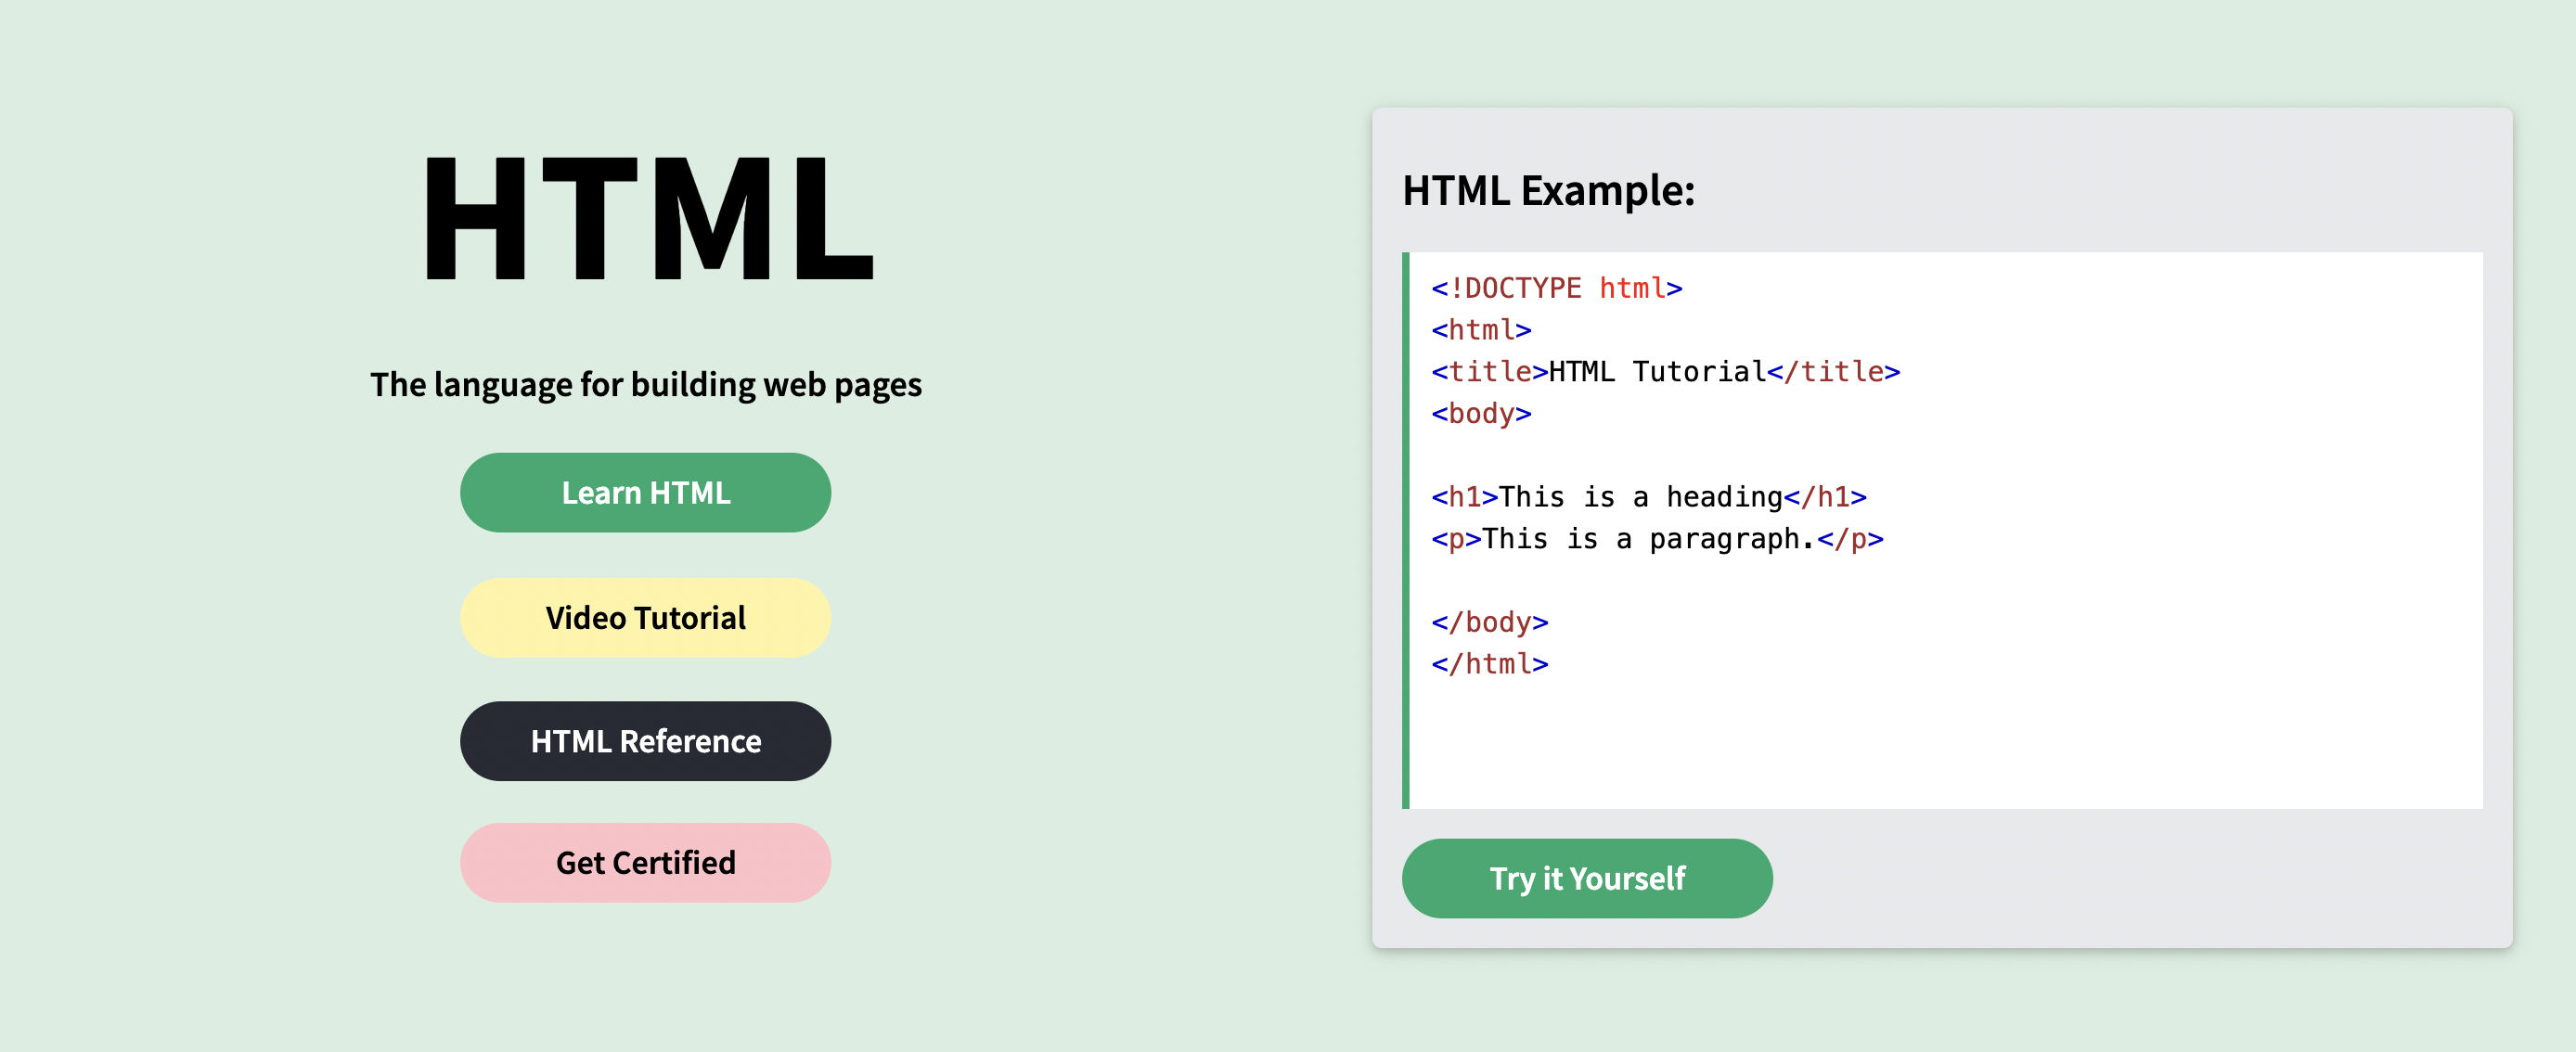
Learning to code with HTML and Python
Learning Intentions: WALT:
Write a code for different outcomes using HTML and Python
Activities:
Visit our 9DGT google classroom and click on the attched link for coding:
https://www.w3schools.com/python/python_intro.asp


-
Kia ora...
In term 4, we are going to learn and practice coding and how to write a digital code for different digital outcomes.
Big Idea:
Learning to code with HTML and Python
Learning Intentions: WALT:
Write a code for different outcomes using HTML and Python
Activities:
Visit our 9DGT google classroom and click on the attched link for coding:
https://www.w3schools.com/python/python_intro.asp